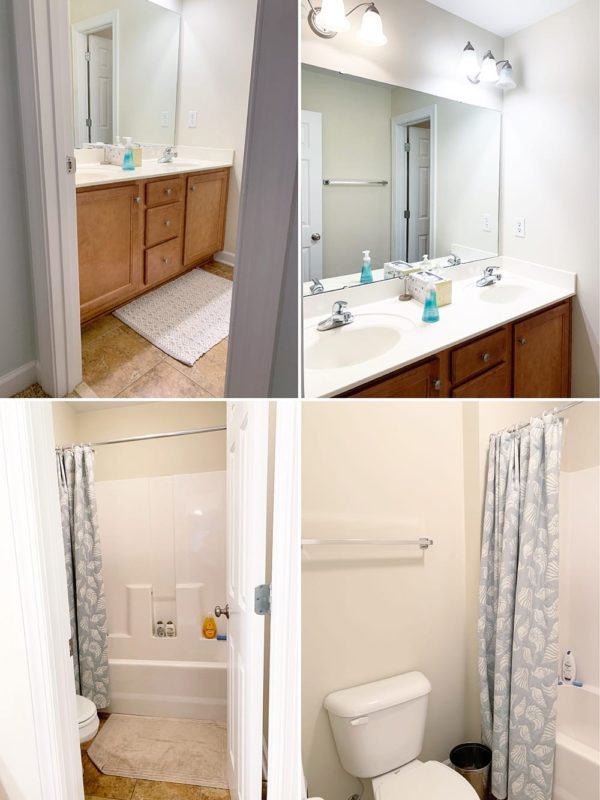
Welcome to our happy little bathroom, friends! This turned out to be such a fun space and I’m thrilled to share it with you today. Though the major elements stayed the same (layout, flooring, vanity and fixtures), this refresh included several mini projects, so I thought it might be helpful to walk you through them one at a time. But first, let’s look back at where we started!
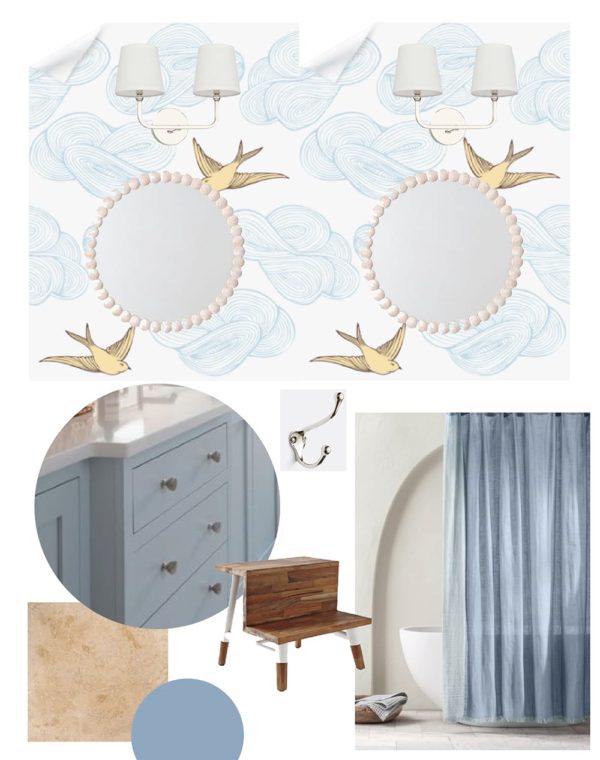
Since moving in, this upstairs bathroom was almost completely untouched, aside from hanging a shower curtain and occasionally changing lightbulbs :) This room doesn’t get heavy daily use, but eventually will be used mostly by our kids (as they get more independent), as well as guests. I wanted it to feel fun and youthful, but still polished! Here’s the design plan I eventually landed on:
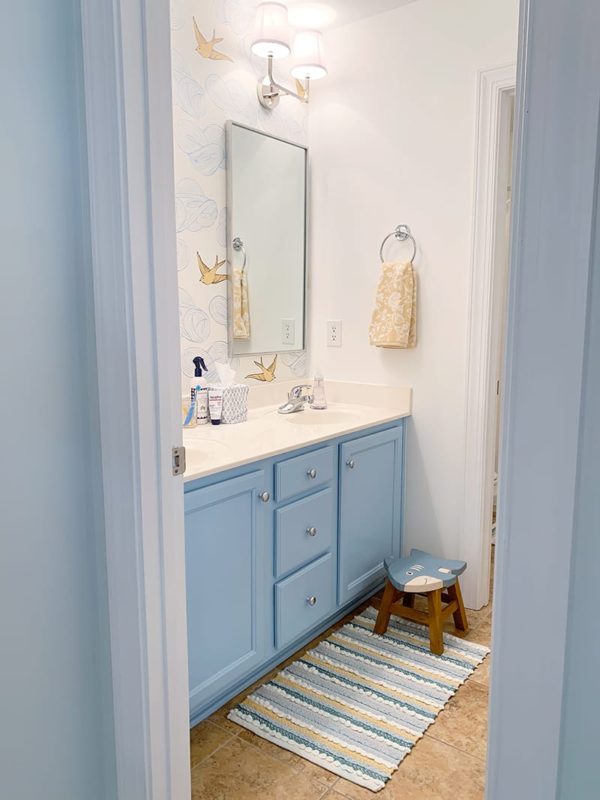
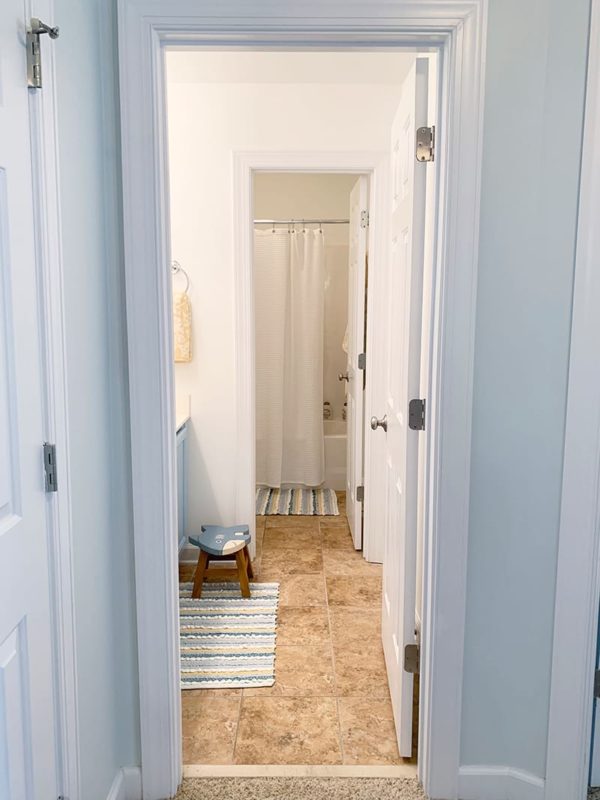
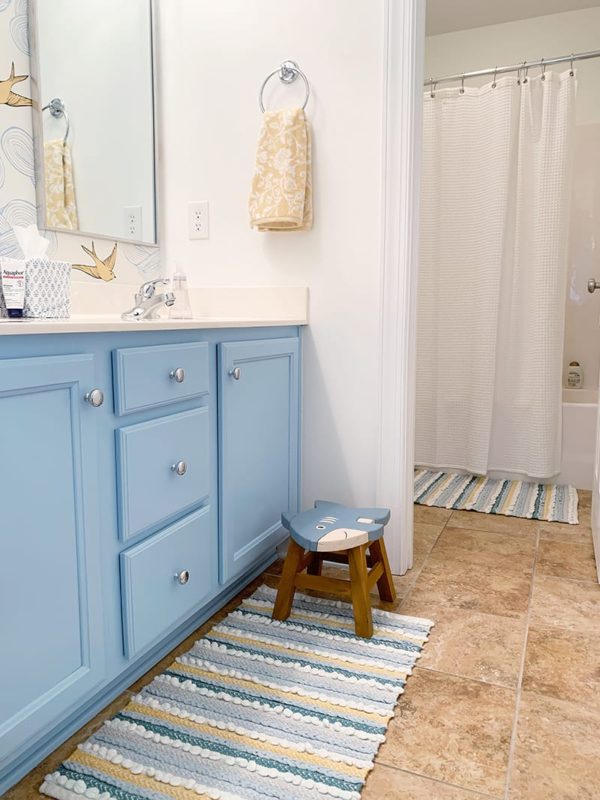
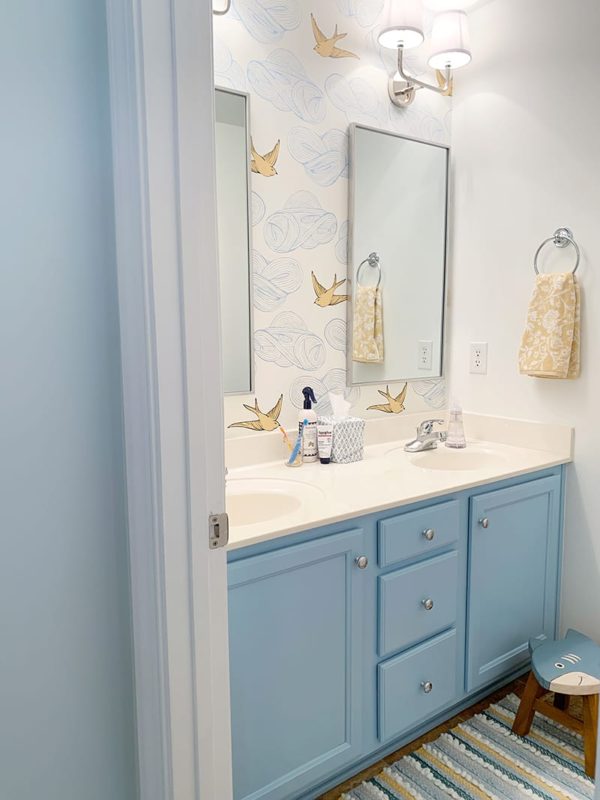
And here’s where we ended up!!
Here are a few more photos, along with brief rundowns of the mini projects, the grades I’d assign them, and any tips I collected along the way!
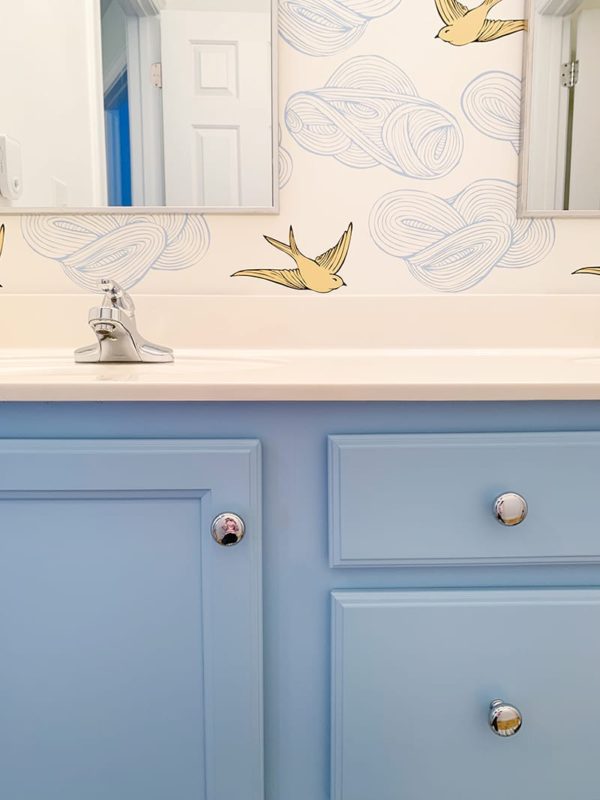
Paint the bathroom walls Who did it: Our handyman Rating: A Thoughts: In this season of life, I have accepted that painting is something I can do, but is well worth trading my money in exchange for my time. (Don was here for two hours to complete the job, whereas it would have taken us a full weekend!) We also asked him to remove the builder-grade mirror (we were able to give it to someone in our neighborhood!), remove the towel bars (donated those to Habitat!), repair the drywall, and fill in a few places of caulk. The color is Benjamin Moore “Chantilly Lace,” which I think is the perfect white-white without any undertones.
Paint the vanity and change out hardware Who did it: I did! Rating: A+ Thoughts: I loved this project and I’d do it again in a heart beat! I don’t think I’d tackle a project as extensive as kitchen cabinets, but a small vanity like this was totally doable and very satisfying.
I splurged on the Benjamin Moore cabinet paint and it went on like a dream! (I did two layers of primer and two layers of paint.) The color is “Palatial Skies.” The only change I would make next time is to paint the backs of the cabinet doors as well as the fronts. It would have taken a few days longer, but the end result would have been a little more professional, I think! As recommended, we left the doors off to “cure” for about a week before reattaching them and adding hardware – I chose these chrome knobs.
Wallpaper accent wall Who did it: John and I, much to his chagrin Rating: C+ Thoughts: While I still love the pattern (Julia Rothman’s “Daydream” in Sunshine) and am mostly happy with the end result, the application was fairly atrocious. This was our first time with a project like this, so I’m totally willing to take responsibility for my part, but I’m just not sure how we went wrong. Basically, to get the pattern to line up, we had to offset the panels themselves, so there is a half centimeter gap across the middle of the wall on the two outside panels??? We patched it with extra strips of wallpaper, ha! Thankfully, because of the positioning (mostly behind the mirrors) and the fact that the wall is also white, it’s not too noticeable, but still annoying. Even without this snafu, the whole process was just sweaty and fumbly, and some tense words may have been exchanged.
Note: it seems like Hygge & West no longer carries the removable wallpaper we used?Just wanted to note that we used the removable tiles, not the permanent rolls!
Change out light fixtures Who did it: John and I, again to his chagrin Rating: B- Thoughts: This was fine, it just took a couple tries to get the wiring right, which is always frustrating. We used two of these polished nickel fixtures!
Hang new mirrors Who did it: John and I, mostly willingly Rating: B+ Thoughts: Sadly, my beloved round mirrors were too wide for this space, so we went with these narrow silver mirrors instead. They are HEAVY suckers but went up without much trouble!
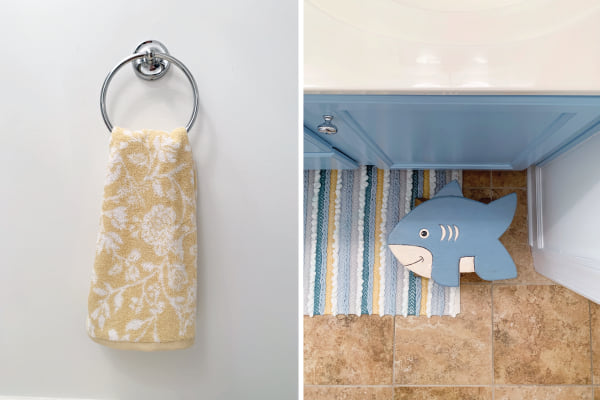
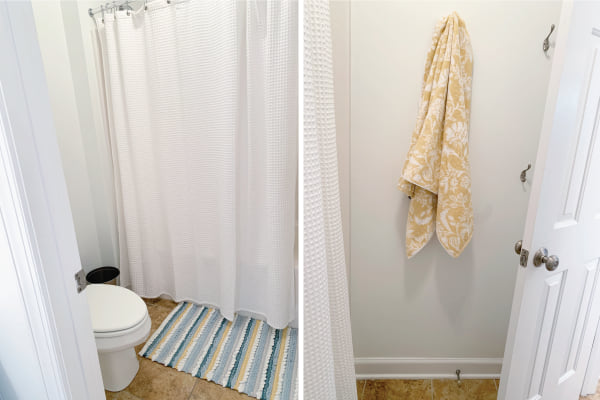
Add decorative accessories Who did it: I did! Rating: A Thoughts: The fun and easy part! These bathmats were a miraculous Target find (how perfect?!). I added this white waffle weave shower curtain (with these rings), these floral towels and hand towels (on this towel ring), four hooks in the shower room, and June helped me pick out the cutest shark step stool at HomeGoods. While I still love the Serena & Lily beaut, this one was a steal at $16 and can easily be switched out as the kids grow! The tissue box is from Amanda Lindroth.
The last thing I would like to add is framed photos of our kiddos’ sweet faces in the bath, likely in the shower room. Still on the hunt for the right square frames!
So there you have it – our fun little bath refresh! Well under $1000 and it makes me smile every time I walk by. Y’all know it takes me ages to finish a home project (6 months and counting for this one…), so I’m thrilled to finally be able to share with you!
I’d love to hear: are you working on a home project right now? Or do you have one in mind you’d love to tackle next?
Is renovation the right word to use here? It’s probably a bit too strong. But since we’ve done literally NOTHING to this bathroom since moving in besides hanging a shower curtain and changing lightbulbs occasionally, it feels appropriate! This project is already underway (exciting!!), so I thought I’d share a bit about our plans today!
Here’s the before. (Yikes, bathrooms are so hard to photograph!)
This bathroom it is the only one upstairs in our home. Though our children’s bedrooms are upstairs, it’s mostly used by guests right now (our current routines mean our kids bathe and brush their teeth in the downstairs master bath 99% of the time – more on that here). I’m assuming at some point in the future, though, our kids will use it more, so as I thought about design options, I wanted something that felt appealing for both kids and adults, and for both boys and girls.
Almost immediately, I zeroed in on Julia Rothman’s Daydream wallpaper from Hygge & West. I have loved it since at least 2014, when Jenny Komenda used it on the ceiling of her playroom! John, however, was NOT excited about the idea of wallpaper, so I compromised by agreeing to use the removable version. If the future wallpaper catastrophe he’s imagining ever materializes (?), we will have options.
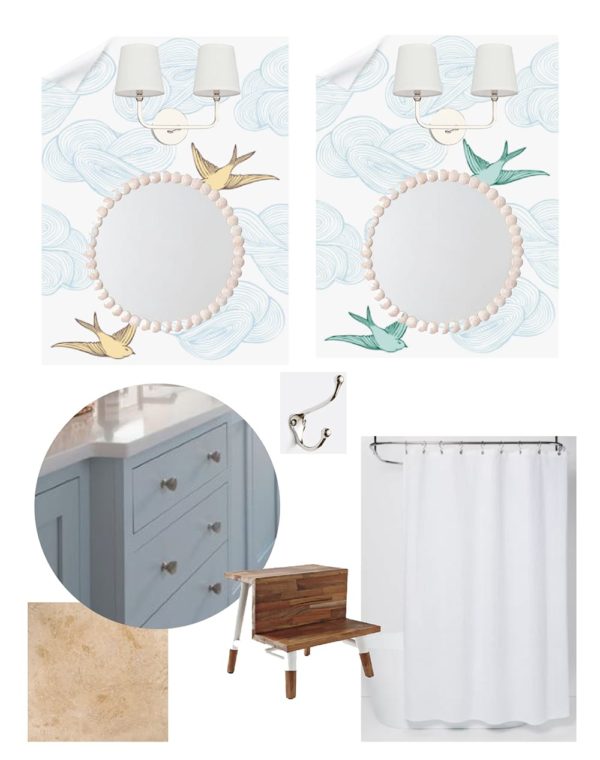
I ordered samples of the yellow and green colorways, and as I waited, I put together this little board:
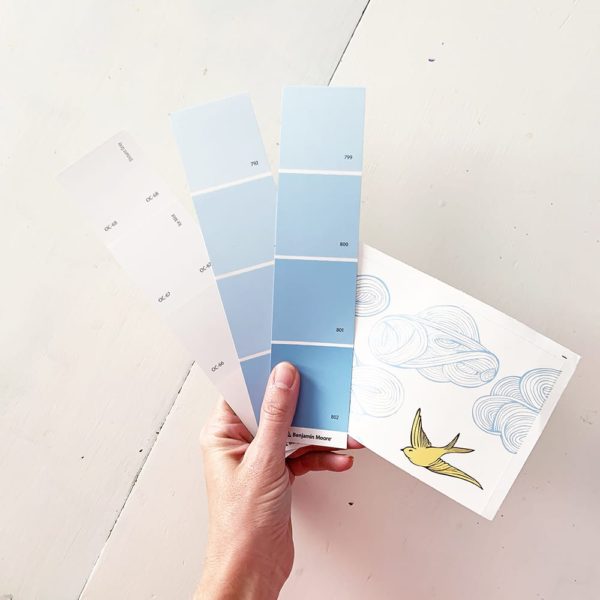
The samples arrived, and interestingly the clouds are different shades of blue, which is hard to tell online: the clouds in the yellow colorway are French blue, and the clouds in the green colorway are almost gray. In addition to preferring the French blue, I thought the yellow would pick up some of the creamier tones in the floor tile (which we aren’t planning to change) and the countertop (also not changing), so we went with the sunshine colorway!
That decision made, I revised my board to the current plan:
It makes me so happy! Here’s where I am in the project and what’s left to do:
Paint the vanity. We went with Benjamin Moore Palatial Skies and so far I’ve done two coats of primer and the first coat of color! I feel like I am worse than the average person at choosing paint colors, so I have my fingers crossed. Waiting to see whether we need new hardware (probably something simple like this) until the paint is finished. The blue vanity above is from a room by LEB Interiors, but I’m not sure what color she used!
Remove the builder-grade mirror, repair the drywall underneath, and paint the walls. I was originally planning to remove the mirror myself but Youtube videos intimidated me, so I think I will hire this out along with the wall painting to our favorite handyman. We’ll use Benjamin Moore Chantilly Lace for the walls.
Wallpaper the wall above the sink. It’s just a rectangle, so I’m going to tackle this myself! Probably with some begrudging help from John :)
Change out the light fixtures. Thinking these ones. (Is this the right order? Should I replace them before or after hanging the wallpaper?)
Switch out towel bars for hooks. I think hooks are better for guests and often easier for kids to use!
Hang a new shower curtain. I haven’t seen it in person yet, but to bring the blue color into the shower room, I’m hoping this one will be the right shade. The white waffle weave I considered earlier in the process is here.
Add rugs, art, step stools, and any other decorative accents. I’m so looking forward to adding a little personality to this space! The step stool in the board is so beautiful but also $$$, so I will probably hunt for one at Home Goods :)
So there you have it! While I’ve made good progress this week on the vanity, things will slow down a bit from here as we wait on our handyman – we are on his schedule for late September. I’ll be back to share the finished result once everything is in place!
Friends, I’d love to hear: have you ever used removable wallpaper? Will it get the best of me? Any tips to share?
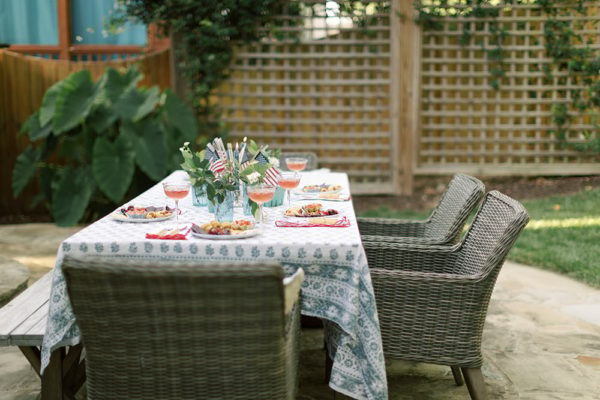
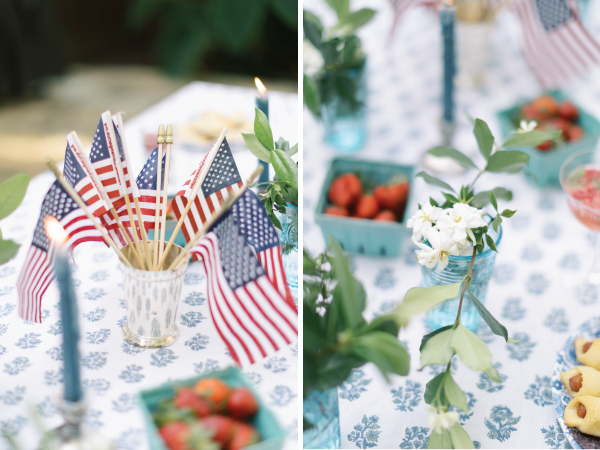
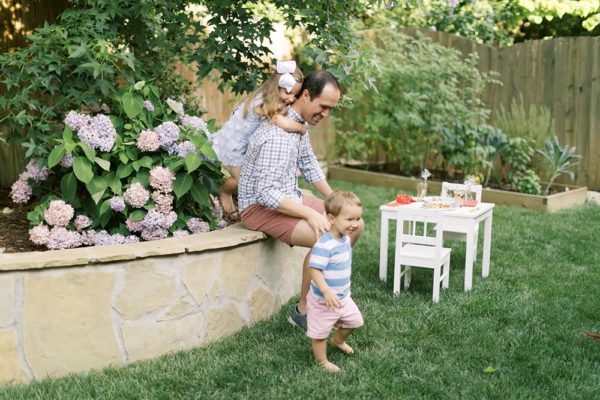
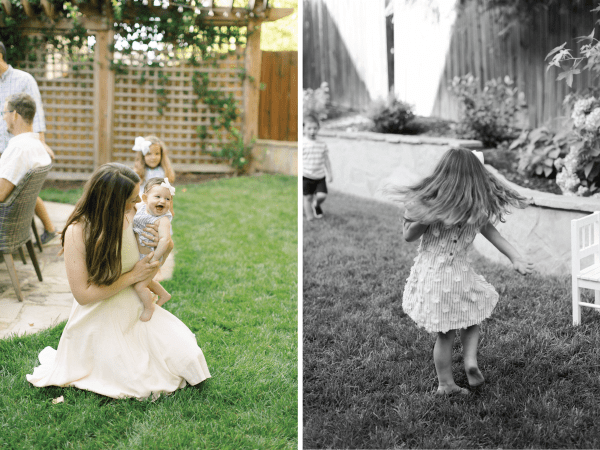
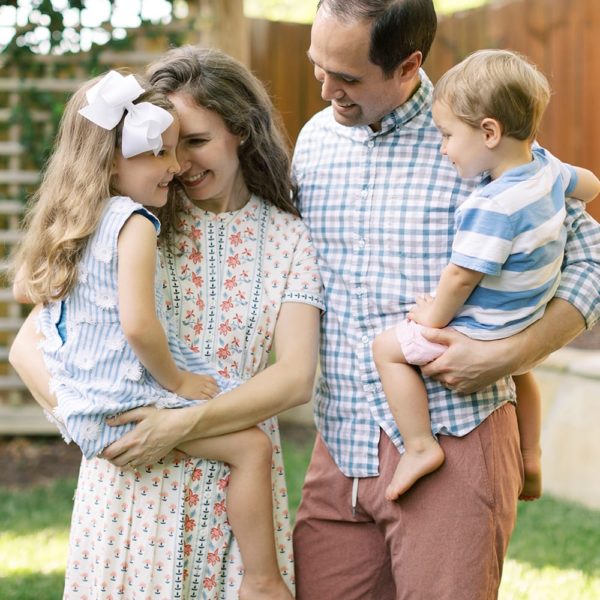
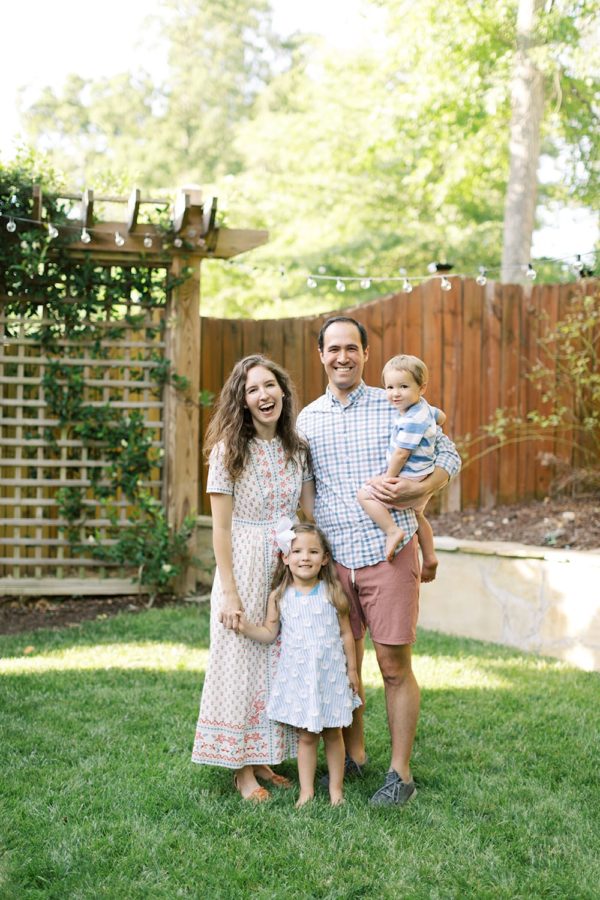
Over the last few years, the Kirk and Thomas families have developed a tradition of attending our town’s Fourth of July parade together. It’s pretty much guaranteed to be outrageously hot and charmingly old-fashioned :) This year, of course, the parade is cancelled, but Lisa came up with the idea to make a bit of our own Fourth fun – and I was immediately on board!
Whether you’ll be celebrating at home alone this weekend or socially-distanced with another family, we hope these ideas inspire you to have a little fun and get a little fancy! After months of leggings and jean shorts, it felt wonderful to wear a dress while toasting to silver linings, friendship, and our magnificent country.
A little background: you may recall that Lisa and I spent several years together criss-crossing the South creating editorial photo shoots for Southern Weddings. Though this most recent collaboration was hardly a professional production, we had fun brainstorming over Zoom and then bringing our ideas to life! And though our details were far more casual than our wedding days, we were very lucky to have professional photography on hand to capture them – thank you, Christen, for coming out to snap a few photos!! They turned out beautifully!
Even if it’s just your family around the table on Saturday, here is your permission to break out your favorite tablecloth, pour a cocktail, and try something new for dinner.
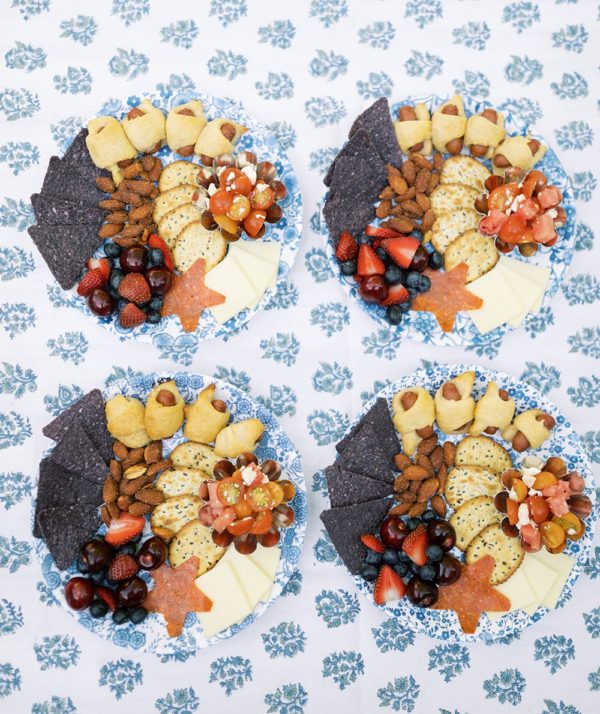
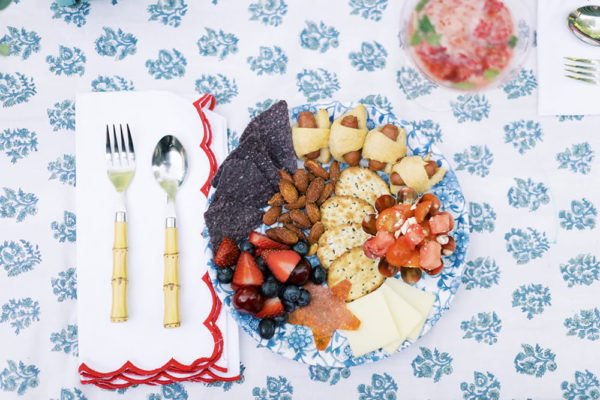
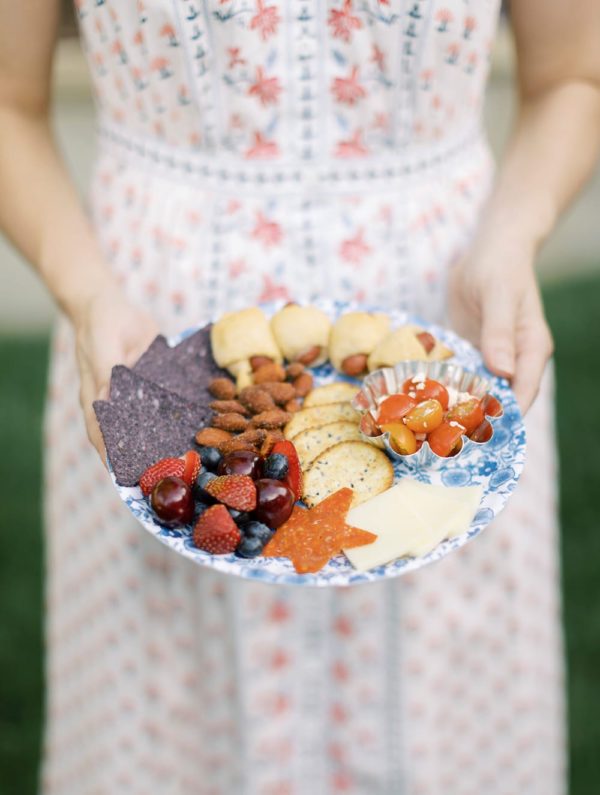
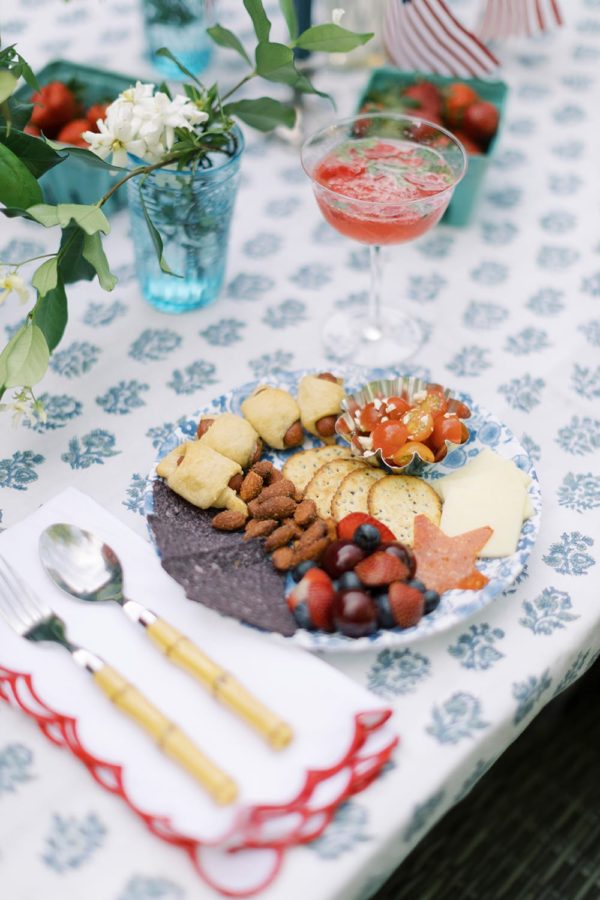
About the food: though I love a good modern spin on a charcuterie board (always and forever inspired by my friend Kayte!), we wanted to style an option that might feel more comfortable in the age of COVID. Instead of everyone sharing from a central platter, we made individual “boards,” complete with tomato, watermelon, and feta salad, cheese and crackers, summer fruit, spiced almonds, and pigs in a blanket (in honor of everyone’s cook-out favorite!).
Lisa mixed up a delicious drink with prosecco, simple syrup, raspberries, and mint to go alongside – you can find the recipe here!
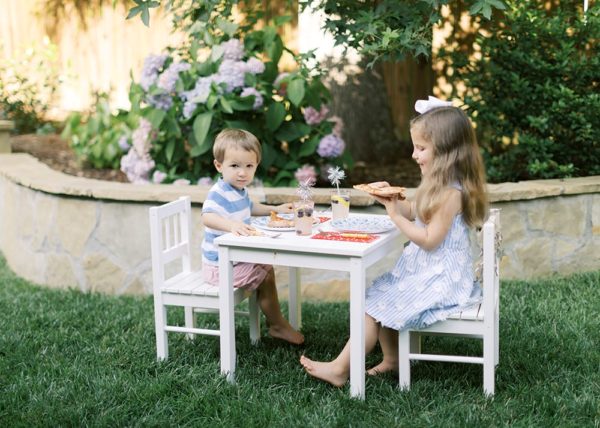
Though your kids would probably be totally into the charcuterie situation (ours were), we also thought it would be fun to give them their own little spot…
Yes, Shep had eyes on Christen at all times, ha!
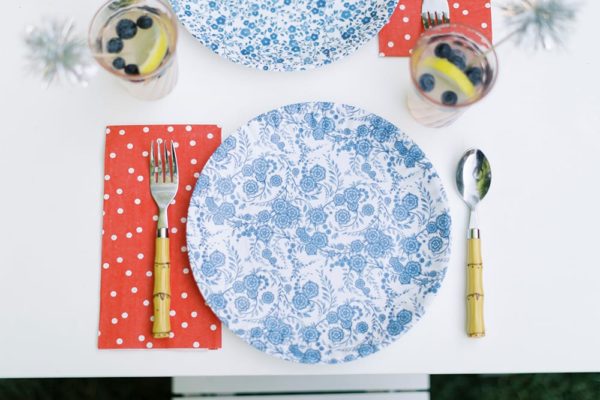
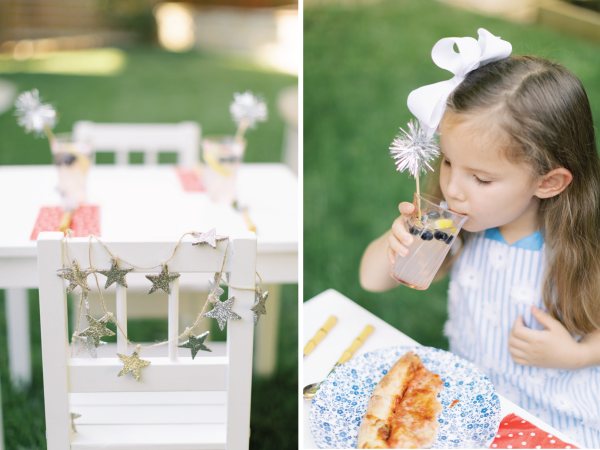
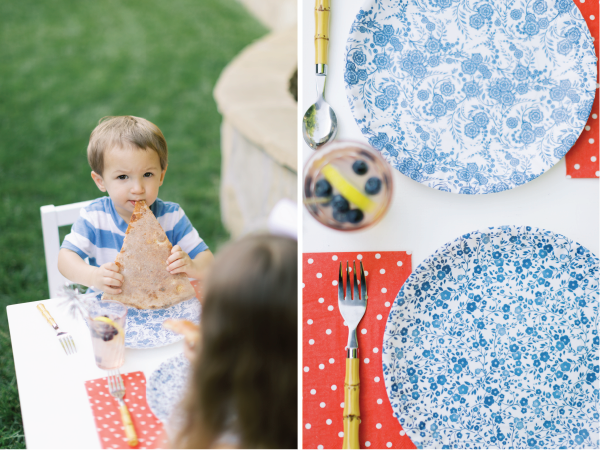
Super simple: I brought our kiddie-size table outside and added melamine plates, paper napkins, plastic silverware, and a fancy drink (lemonade with added blueberries!).
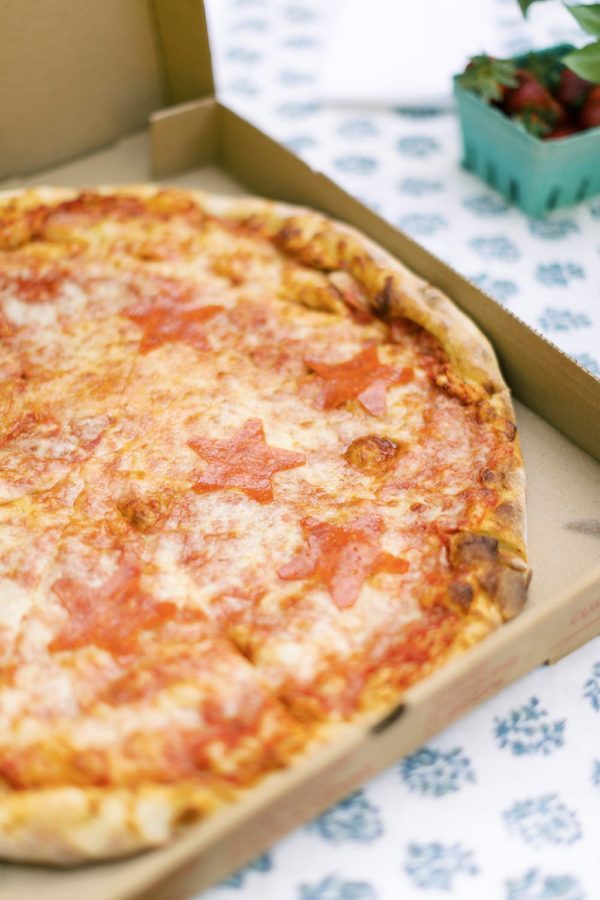
For dinner, we went with – wait for it – pizza with pepperoni stars :) It turned out so cute and was SO easy – just cut out the pepperoni with a cookie cutter and pop it on top of a cheese pizza!
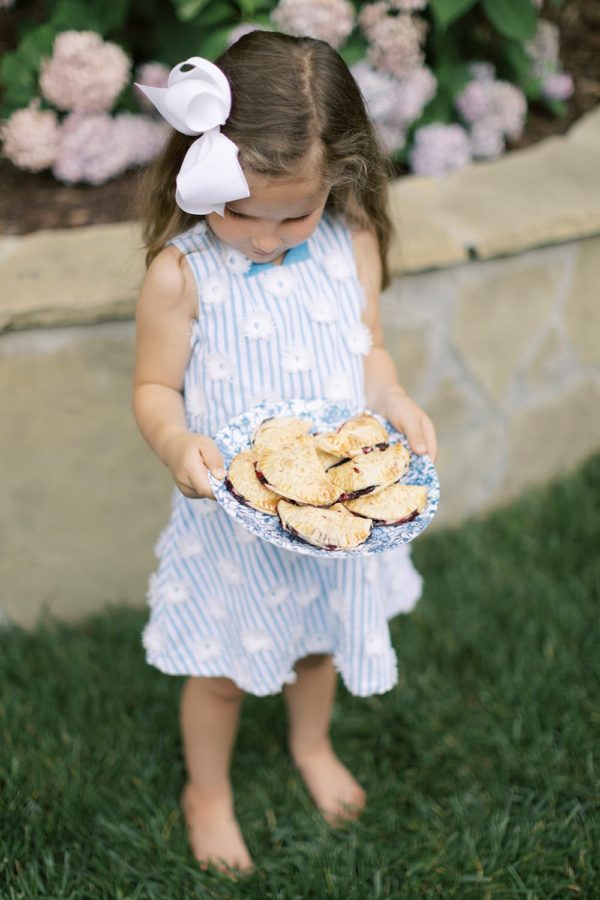
For dessert, Lisa made blueberry hand pies and individual berry trifles. June made the sweetest sweets model :)
Gosh, seeing these photos just makes me even more grateful for an outdoor space to call our own, for beloved friends, for reasons to celebrate, for my sweet family, and for the freedom to enjoy it all. In the midst of our communal work to make this country truly a land of equal opportunity, I hope you take a few minutes this weekend to be thankful for all that we already have. I know I will.
Thank you again to Christen Smith for these beautiful photos and to Lisa for asking me to collaborate – be sure to check out her post today, too!
Friends, though I’m curious to hear how you’re spending the Fourth (and please feel free to let me know!), today I’d really love to hear something you love about America in the comments. It can be anything! After all, if we are to work to make this country better, we have to believe that there’s something good at root to build from. I’m eager to hear your thoughts, as always. xo
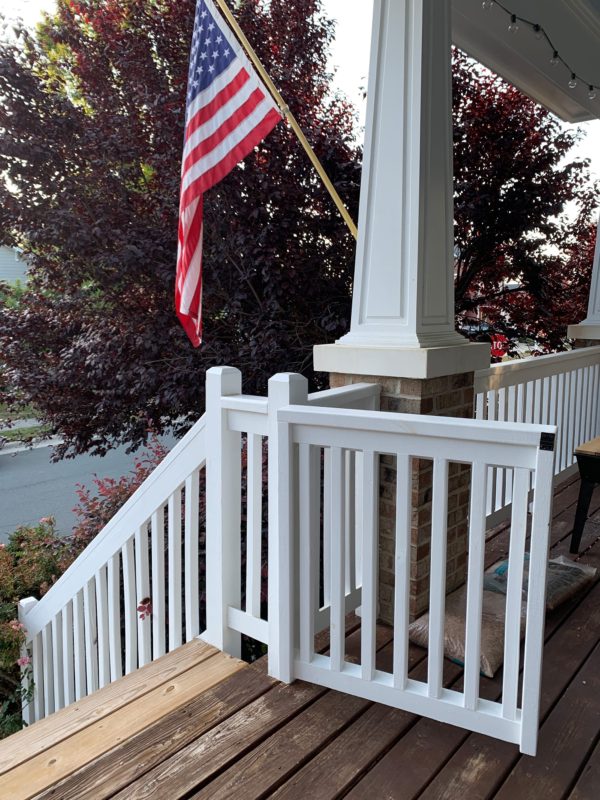
Another mini goal update for you! This time for our 2020 goal of living a wild life outdoors. Though living into this goal most often looks like venturing out into the woods or playing in a creek, sometimes progress is closer to home — as in the case of our new front porch gate! This is a small update that has just delighted us, so I thought I’d share it with you today.
Those who have been around awhile may remember that when we finally made an offer on our current house, after a long search and several failed contracts, the biggest thing we ended up compromising on was actually one of our top criteria: a large yard. After 7 years, I am (mostly) at peace about this, but it is still sometimes hard for me to reconcile what living a “wild life” with small children looks like when we don’t have the same acres of woods, expansive lawns, big trees, rocks, and streams that surrounded both John’s and my childhood homes.
However, just because we don’t have the yard of my dreams doesn’t mean we have nothing; we certainly have much to be grateful for in our home and in our front and back yards! Aside from those green spaces, there was another space I was determined to maximize this year: our front porch. It’s decently sized and nicely shaded by a plum tree most of the day, so it had great potential as a play space for the kids. However, there was a major issue: our front steps are many and steep, so there was no way Shep could be out there without an adult in arm’s reach, let alone by himself.
Especially after a day at school, I love being able to have them outside, but at their ages, I can’t just turn them loose. So, how to balance independent play while also completing dinner prep? Our kitchen is at the front of our house, meaning it was totally possible to have them out there, playing happily while I watched them through the window — as long as we solved the issue of the steps.
Enter: our favorite handyman! Inspired by many of our neighbors who have similar gates for their own steep steps, we asked Don to build and install a gate for our porch. He did a magnificent job — considering the utility it’s already given us, it was well worth the few hundred dollars he charged us. I’ve always loved the idea of a white picket fence, and swinging our new gate open and closed gives me all those vibes even without the fence :)
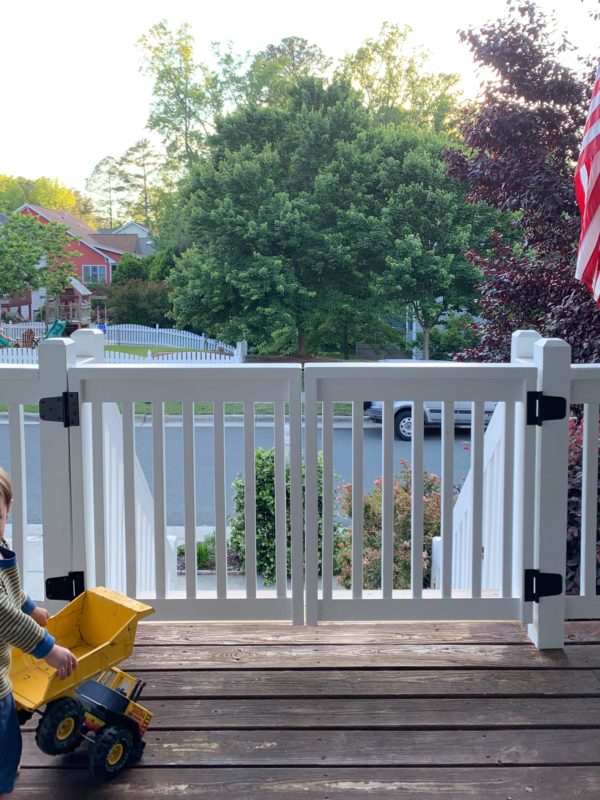
The kids love being out there at all hours of the day now: it’s the perfect spot for eating snacks, digging in the sand/rock table, any kind of water play, muffin tray “cooking,” rock painting, and much more.
Later this summer, I hope to add a few big potted plants as a bit of a privacy screen, to add some softness and another play element. Our kids are currently very eager to spot our neighbors’ Frenchie through the railing, though, so they’re not concerned :)
I have another post idea brewing with pros and cons for two more major updates we’re considering for our downstairs, but in the meantime, I’d love to hear: what’s a small (or big) update you’ve made to your home that’s made you so happy?