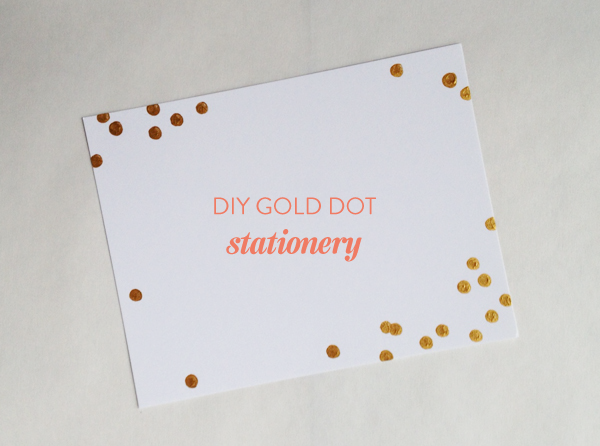
DIY gold dot stationery
Hi friends! Thank you so much for your thoughtful comments on my last post! I loved reading them!
Going back a few more posts, I had mentioned that I was considering DIY-ing this Sugar Paper note card set. And I did! It ended up turning out very well (if I do say so myself!), so I thought I’d share it here.
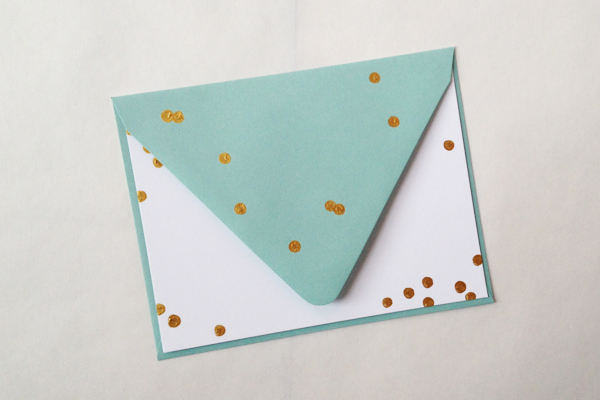
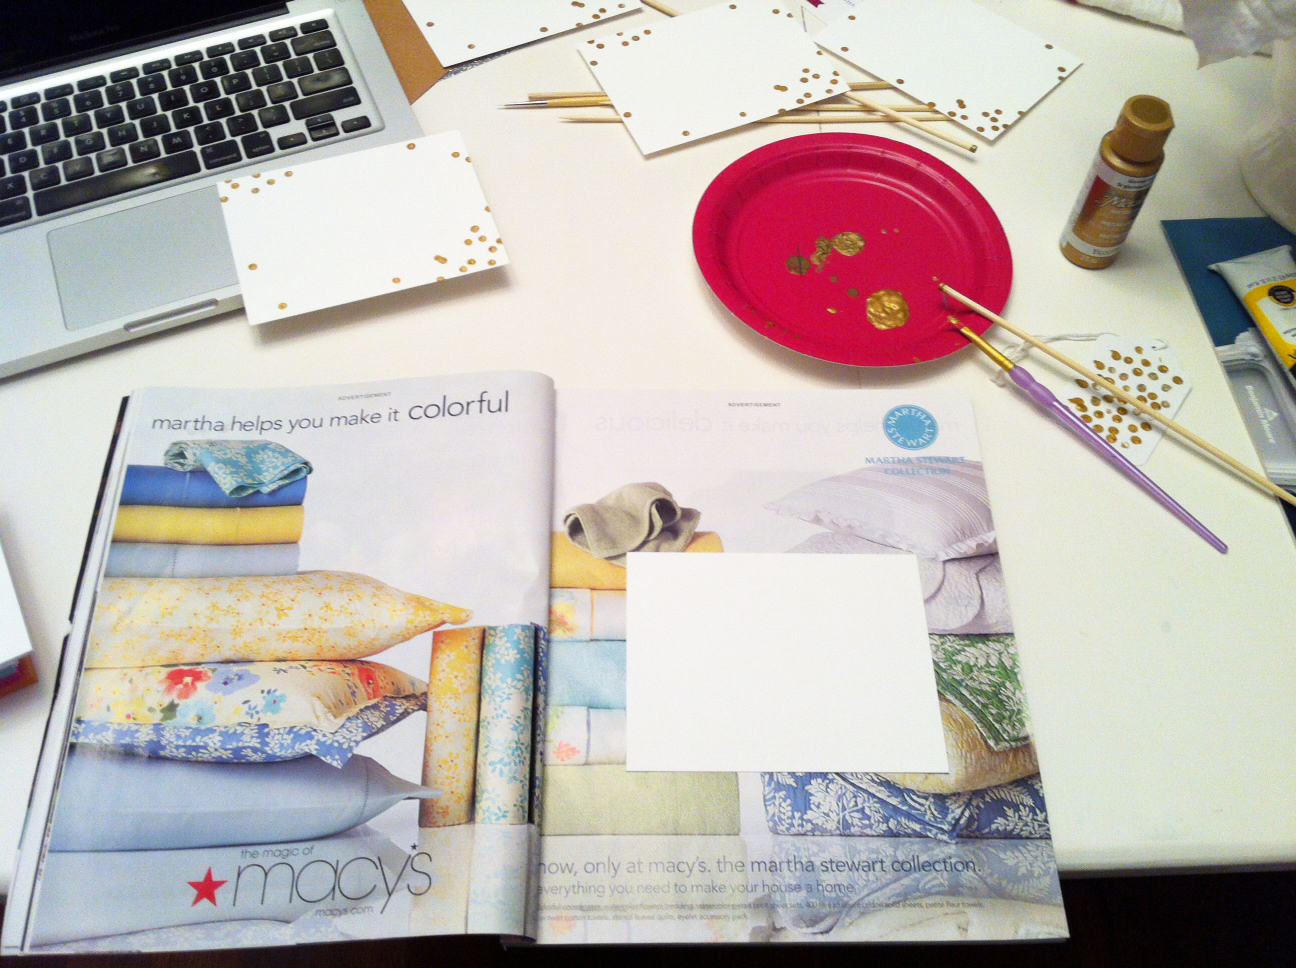
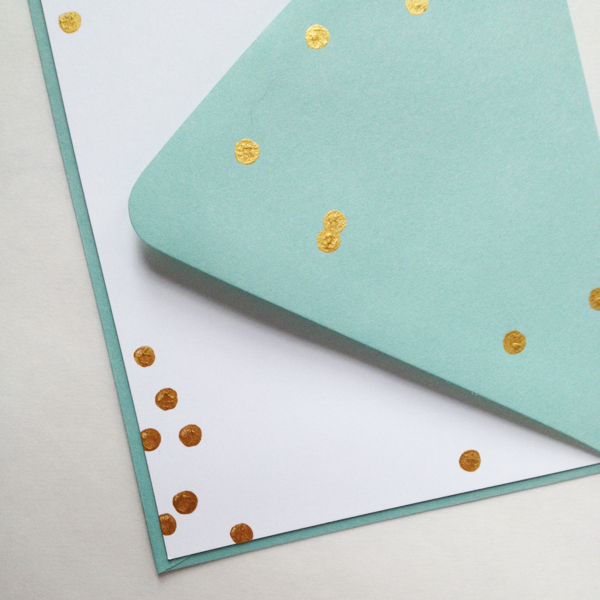
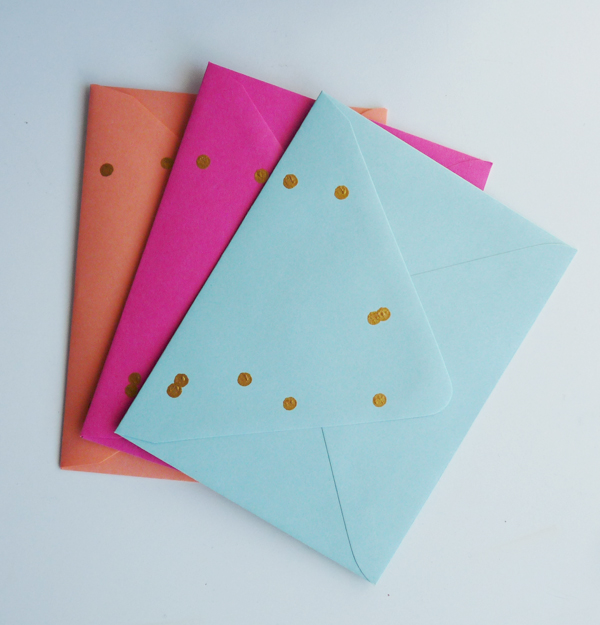
Supplies needed: white cards (I used A2), colored envelopes (my favorites are from Paper Presentation), metallic gold craft paint, a 12″ bamboo skewer, a small paint brush, something to hold your paint, and an old magazine
There are really no instructions for this project — you’re just making dots, however you think looks best! But I do have two very helpful hints. The first: I like the look of dots going off the card, but if you do so, you’re depositing paint on your work surface with every card, which can make finding a clean place for your next card difficult. My solution: use an old magazine you’re ready to recycle! You can turn the page after every card so you have a clean surface for each one without using an excessive amount of paper.
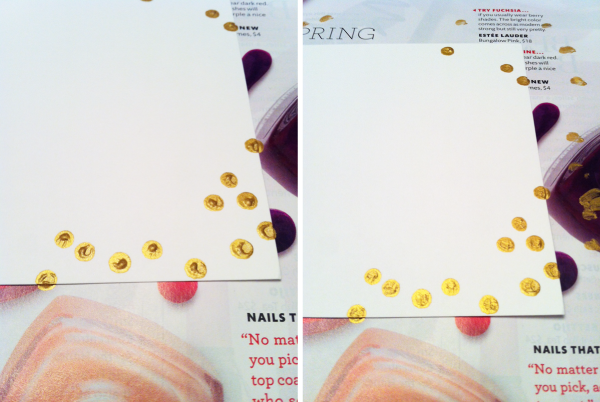
Second tip: When you use the base of the skewer to deposit the dots, it leaves a tiny peak. I wanted a cleaner look, so I went back over each dot with a small paintbrush to pick up some of the extra paint and smooth things out. It sounds fastidious, but only took a few seconds for each card! Before and after below.
And that’s it! I tied sets of six with satin ribbon for gifting after letting them dry overnight. They may not be letterpress like Sugar Paper’s, but I think they’re pretty fun!
DIY projects don’t always turn out that professional-looking, which can make them hard to give as gifts, but I think this stationery is the perfect candidate. Tuck this one away until next December, or make a set for yourself! :)


I happen to agree that these make a perfect gift! :) I’ve already used two of mine!
Love the look of these! And I’m super excited that I have all the supplies on hand, might just have to try them this weekend.
So adorable and (seemingly) so easy! I’m not really a crafty person, but I definitely plan on trying this.
Those are darling. I’m obsessed with Sugar Paper!
YAY!!! I’m so glad you posted this project! They look great! And, it’s the gift that keeps on giving– when you give a set, the recipient gets to give the gift of a handmade card to whoever they send it to, and no one can deny the joy in that! I also like the texture of the painted dots because it gives it a handmade feel which always communicates something special. :)
Absolutely love this idea! (Valentines is coming up, so yay for DIY!)
So cute! I also love that stationery set, but not so much the price tag. Thanks for an awesome DIY option!
So cute! Packaged up with thick, gorgeous gold ribbon, these would make beautiful gifts!!!
This are just darling Emily! I have a goal of sending more happy mail to loved ones this year, so this project is perfect for me. Thank you for sharing this how-to!