Welcome back to our home! Today I thought we could take a tour of our main room. As you may have seen in this video, our downstairs is pretty much one big room (aside from our master bedroom, which is also on the first floor). In the ten years we’ve lived in this house we’ve never fully settled on a name for this space – it alternatively goes by family room, living room, main room, and sometimes just “out there” if we’re in the bedroom – but main room will do for today’s purposes :)
The last time I shared a full look at this space was in 2015, two years after moving into our home and before we had any kids. Since then, I’ve shared details here and there, like our upgraded toy storage, my desk/family command center, and our dining room chairs. My style has evolved over the years, too, shifting from more colorful and cute to warm and classic. With craftsmen in our home for our kitchen refresh, we took the opportunity to make a few final updates (for now! ;)) to this space, too. I love how it’s looking these days, so come on in!
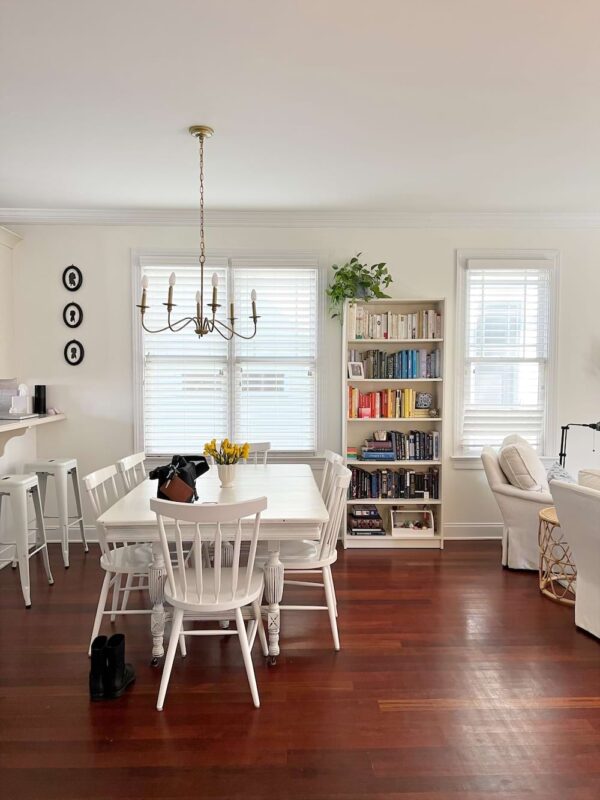
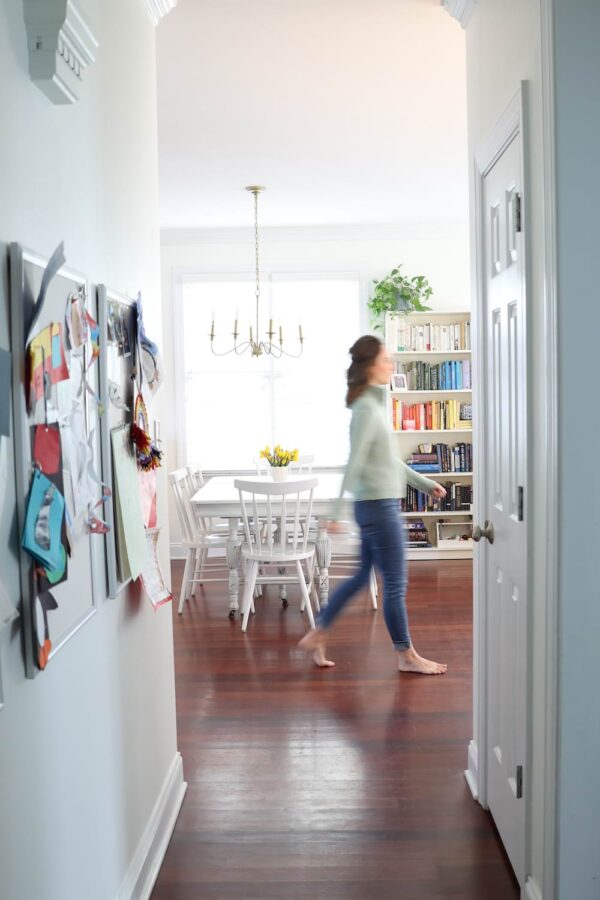
The centerpiece of our dining area is our table. I found it in an antiques shop in Connecticut many years ago; my parents generously gave it to me as a college graduation gift (it was about $300). It is a heavy sucker, and has beautifully carried us through life from a party of two in an apartment to a family of five who regularly hosts Articles Club. (At its smallest, it is a four-top, and with several leaves, easily expands to seat 12!)
We replaced the chandelier last year with our kitchen refresh and… it is not my favorite. We went with the inexpensive choice (it was $120), and I think it shows – the finish looks cheap next to the rest of the kitchen hardware, and it hangs a little wonky. I’m considering eventually replacing it with this or this – feel free to let me know which one you prefer, or if you have another suggestion for me! – but am okay with it as-is for now.
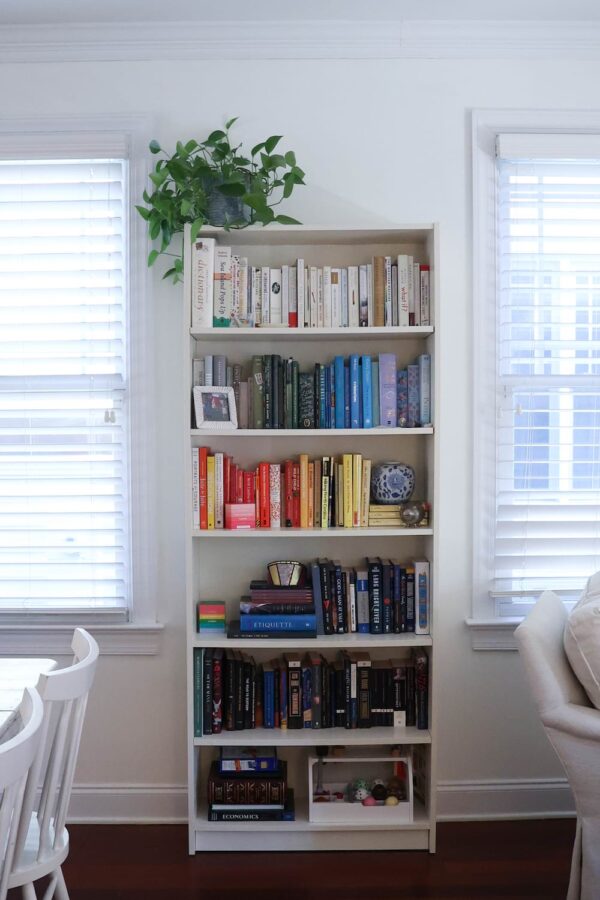
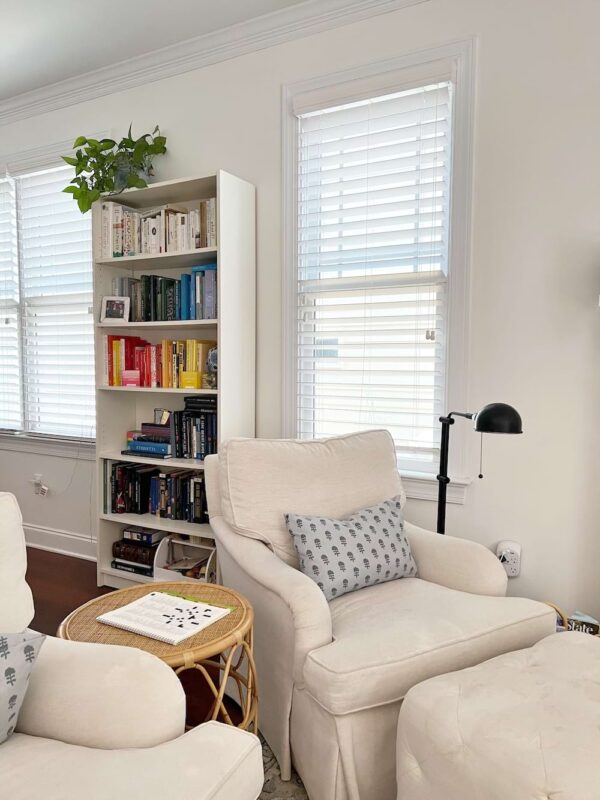
Our colorful bookshelf is still going strong! I re-sorted it a few years ago so that it no longer goes in rainbow order from top to bottom, but instead has the lightest books on the top and then descends in a sort of colorful gradient (and, of course, our beloved ice cream station reigns on the bottom shelf). My Irish dancing crown, CWM conversation cards, and my childhood piggy bank are dotted in there, too. Sometimes I get the urge to shuffle all the colors together, but that feels like a lot of work :)
Seating Area
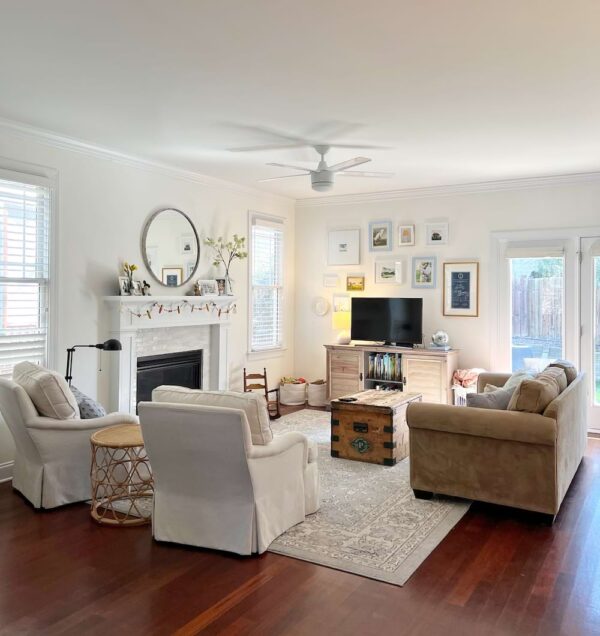
And here’s the rest of the space! It’s come a long way from the early days, and I’m pleased with it – it works hard for our family and feels like a cozy hug.
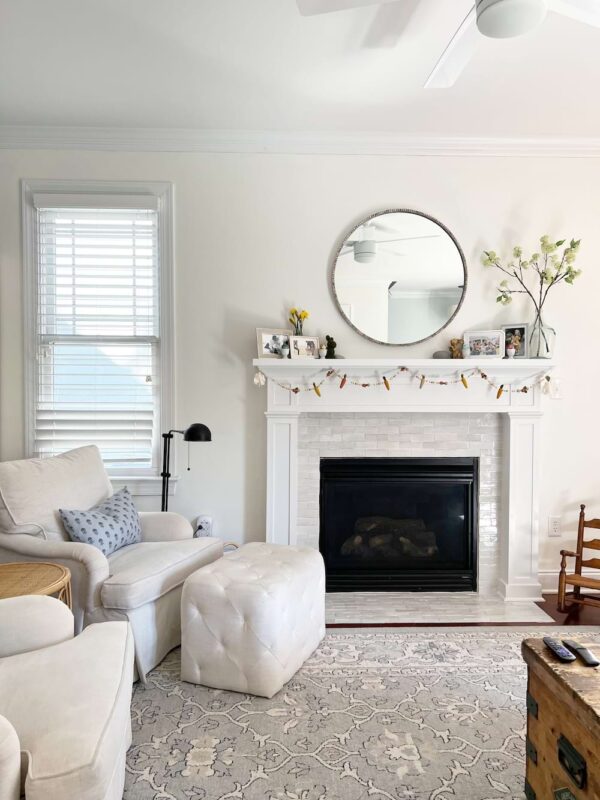
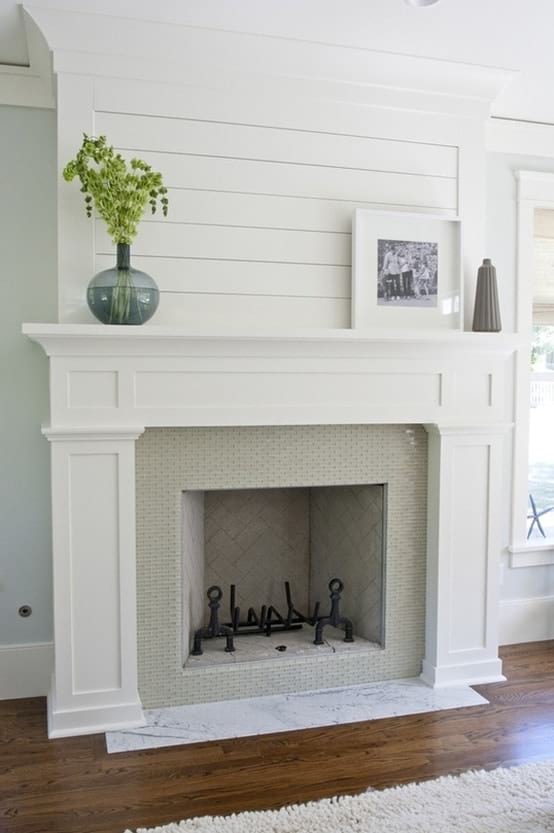
The most recent upgrade to this space was the fireplace surround. Before, it had a thin, dated mantel and tile that matched our old kitchen backsplash. I gave our handyman an inspiration photo and asked him to build a classic and more substantial mantel, and he did a fantastic job. He also replaced the tile with the same kind we used in the kitchen backsplash. So, so pleased with this update!
These chairs were a splurge several years ago. They’re comfy, such a classic style, and I love that they’re made in North Carolina. I did waffle over whether cream was the right choice with little kids, but I made a decision and have made it the right one :) I do keep my favorite spray close at hand and assume we’ll need to reupholster them at some point down the line (a soft green or maybe navy could be lovely!) and so try not to be too precious about them in the moment.
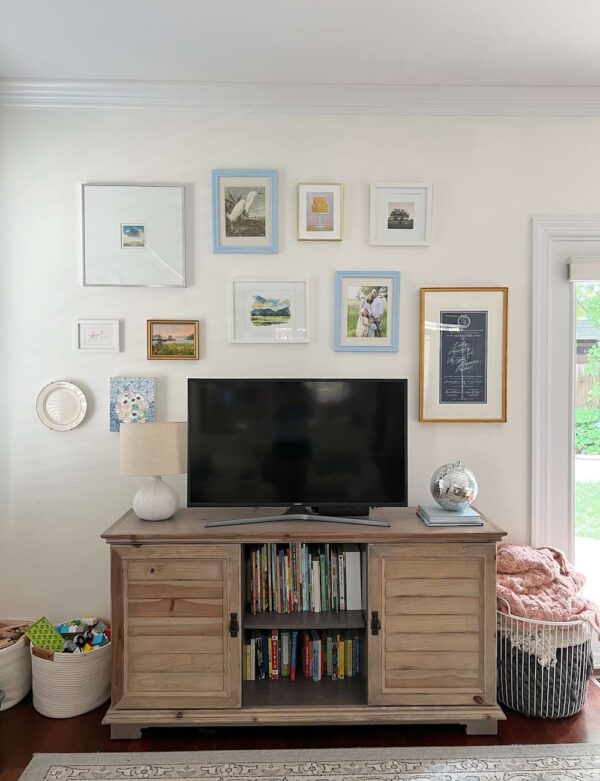
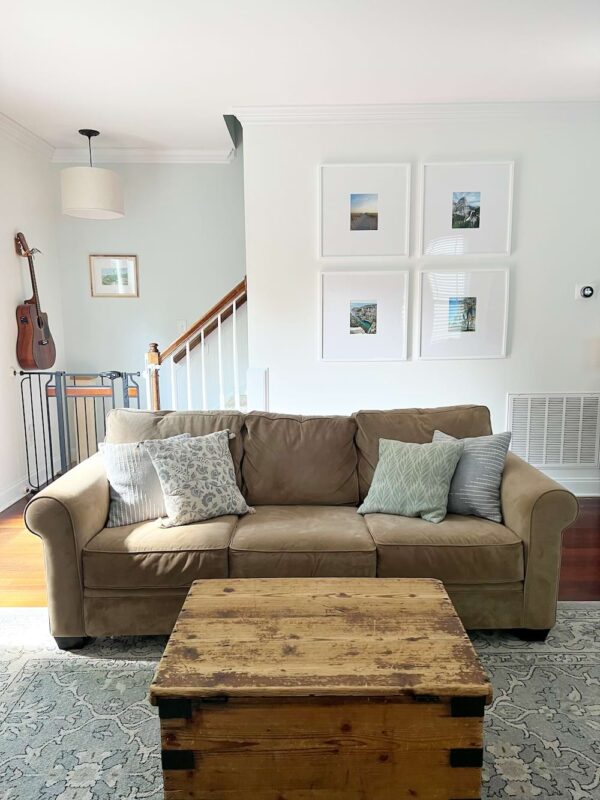
Our TV is somewhat laughably small, mostly because we bought it a long ago, but it kind of tracks for our family :) I like that it’s visually almost tucked into the gallery wall.
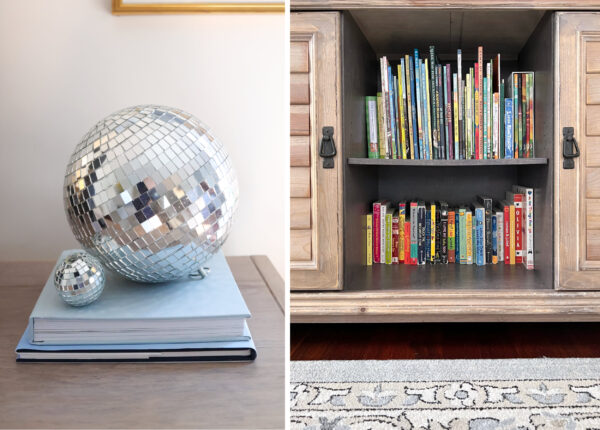
The sideboard was a very lucky find at HomeGoods a few years ago, and does a bang-up job at storing board games (there are more in the chest), puzzles, drawing paper, a bin full of cars, and our collection of Magna Tiles. Train tracks and LEGOs are in the two rope bins.
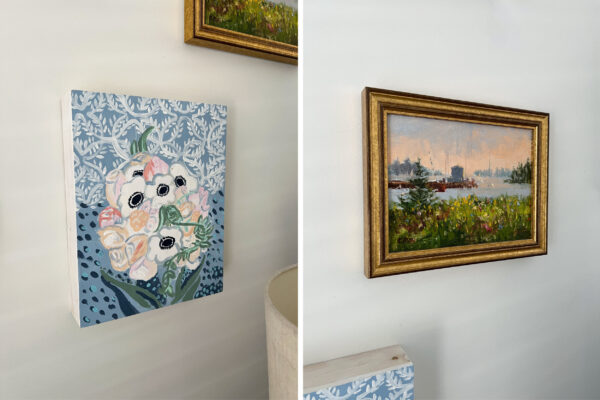
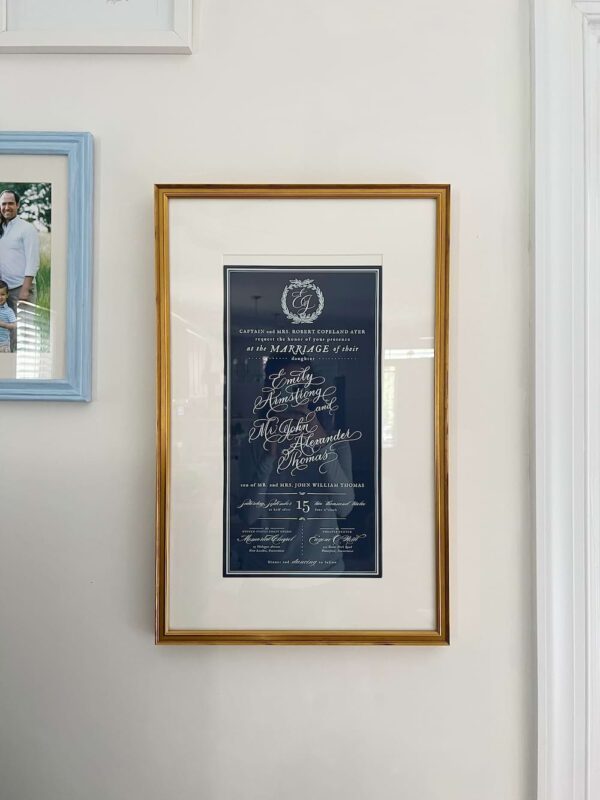
Our gallery wall is due for a little updating, but it makes me happy: it includes everything from a painting I inherited from my grandmother, of the view out her window, to an old dinner plate from our Maine cottage. The painting of my bouquet by my sister-in-law and our framed wedding invitation (still obsessed ten years later) are two of my other favorites. The disco ball came home with me on our last day in the NC Cultivate offices – a reminder of the good times we had together in our lovely space :)
Say hello again to none other than the tan sofa I waxed poetic about in this post. She’s an old gal (we’ve had 12 years together!), but still going strong. This purchase represented one of my and John’s first big leaps into adulthood; we saved for months to afford the $700 price tag. It is incredibly comfortable, the velvet fabric is impervious to stains, and the practical color hides the dust of daily life effectively. It’s wonderful to have a piece of furniture the kids can go nuts on, especially when I’m a little more precious about our cream armchairs.
The big frames are a fun conversation piece: they hold four photos we took on our travels, including snaps from Michigan, Yosemite, Nevis, and France.
Hallway
Finally, we purchased three of these bulletin boards a year ago to hold artwork for our three kids. They’re a cheerful addition to the back hallway and the kids love curating their personal galleries.
If I’ve missed something you’re curious about, happy to share – just drop a note in the comments. And thank you again to Honeysuckle Collective for a few of these photos!
Friends, it’s one thing to invite you into my thoughts, and another into our home – even if virtually! I hope you enjoyed this peek at our space. It’s always fun to be able to picture the backdrop to a story, isn’t it? :)
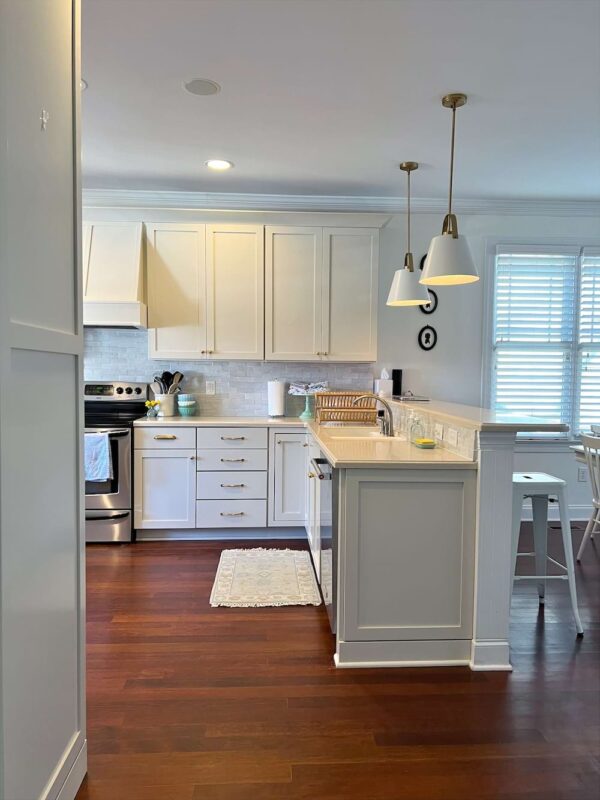
Friends, I am so very excited to share a few photos of our kitchen refresh with you today! If you’re new here, be sure to click over to this post first to get the back story, including before photos, inspiration clippings, and a breakdown of the work we had done. Then continue reading for many after photos, sources, and some thoughts on the process and our contractors.
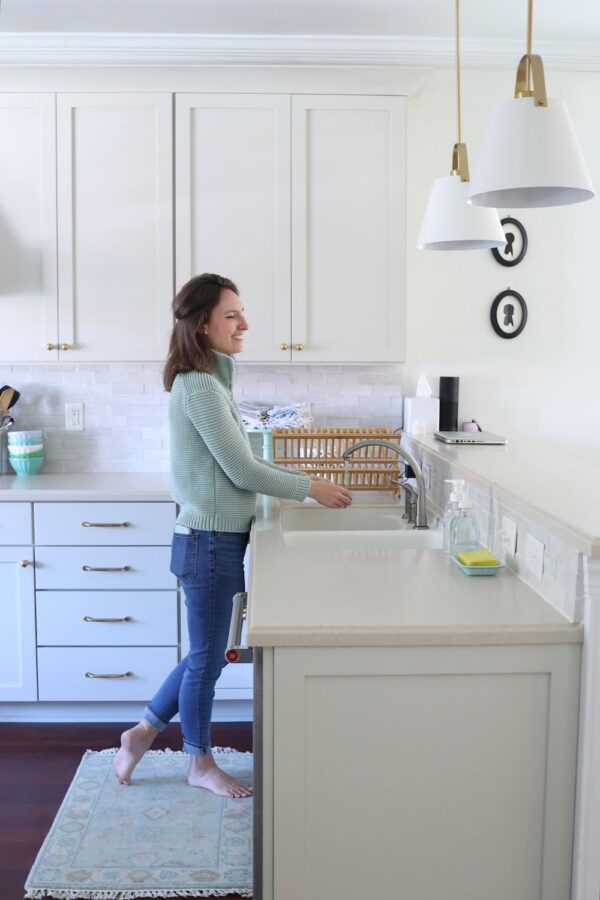
So welcome into our kitchen, friends! I always laugh like this while doing the dishes ;)
Ahhhhhhhh. Doesn’t this view just make you let out a long exhale? It certainly does for me. It’s been five-ish months since work wrapped up on this project, and I still sometimes turn the corner only to be surprised by what I see. It just looks so fresh and lovely, and I pinch myself that this project finally happened, ten years in the making.
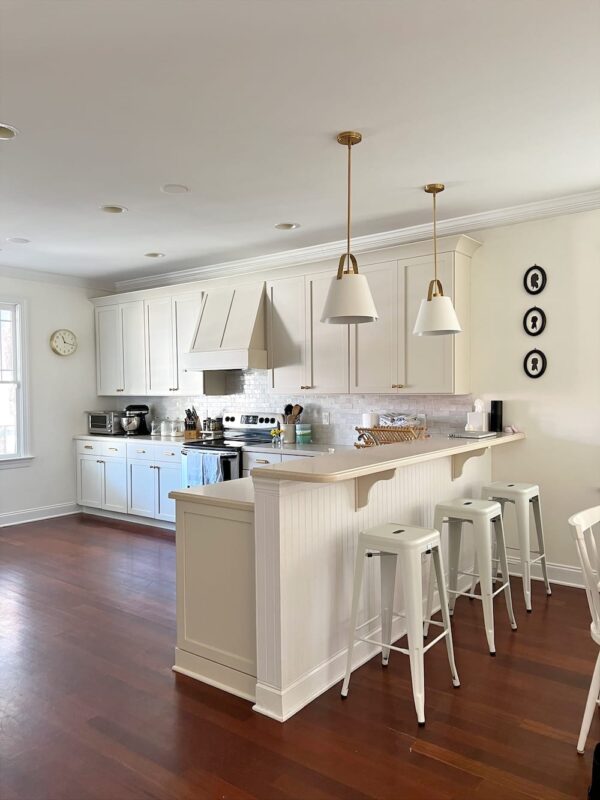
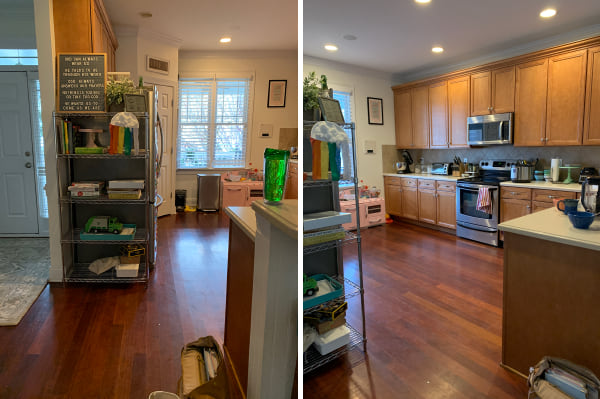
This photo sums up most of the major changes we made to our kitchen:
— We replaced the cabinet doors and hardware and replaced the crown molding with a simpler design. — The cabinets were painted Natural Cream by Benjamin Moore. — We added Shaker trim to the side of the dishwasher (what you can see right at the front of the photo above). — We replaced the backsplash with Zellige tile. — We moved the microwave from over the stove and replaced it with a range fan that vents to the exterior and a custom-built wooden hood over the top. — We switched out the light fixtures and stools and added decorative touches like the silhouettes and clock.
And then a reminder of a few things we didn’t change: the layout, the floors, the cabinet boxes, the sink, the faucet, the stove and other appliances, and the counters. Again, more on all that in this post.
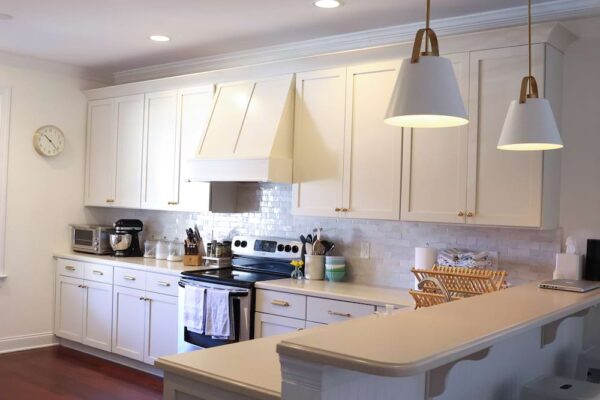
By far the most common thing that pops out of people’s mouths when they see our new kitchen is, wow, it looks so much bigger! And I can’t disagree! It’s pretty amazing what some neutral paint and more harmonious fixtures can do for the felt-size of a space. We did also remove the wire rack at the entrance to the kitchen, which made a difference. But by and large, it was removing the visual clutter that has now makes it appear larger than it did before.
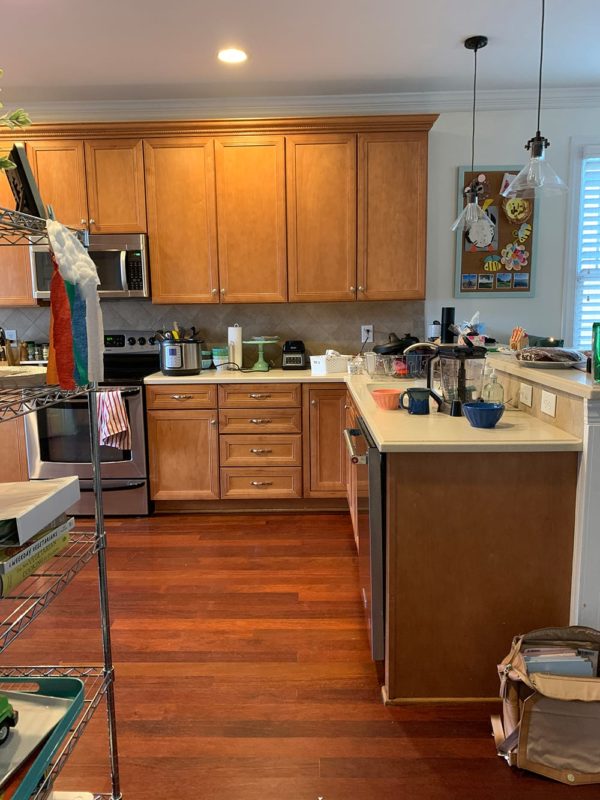
On the topic of the paint color: it was stressful to choose something other than white for our cabinets, even up until the first coat of color was sprayed on, but I adore how it turned out – to me, it’s the perfect not-too-yellow, not-too-cool greige. (Our painters even liked it so much they had a cabinet door sample done up to show other clients!) I credit Alaina’s impeccable taste and keeping the paint sample hung up for eight months with my success :)
Also, don’t you think it tones down the redness of our floors (which I don’t love)? I was hoping that would be a happy by-product and I think it is.
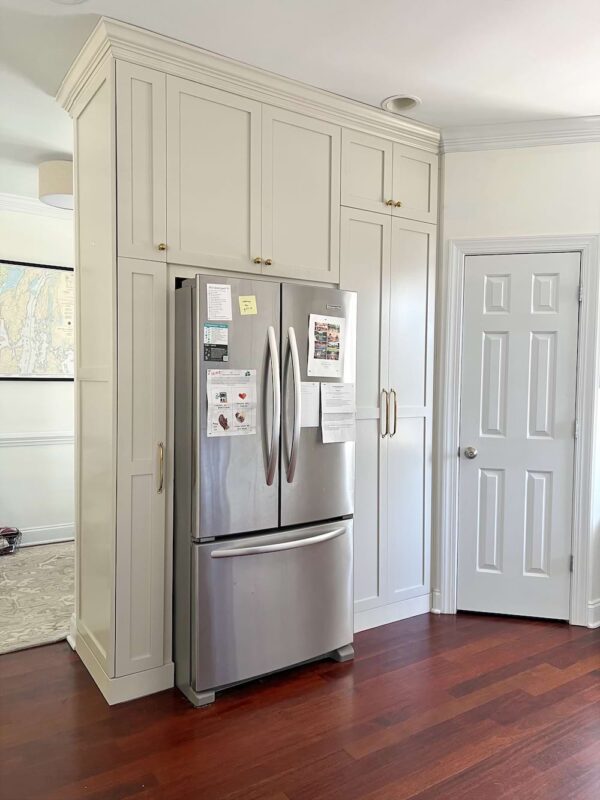
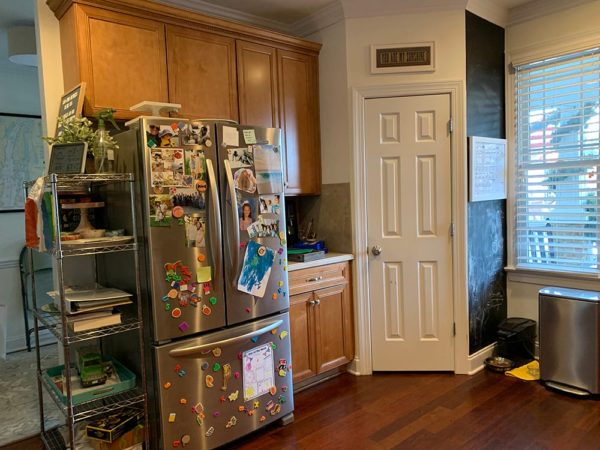
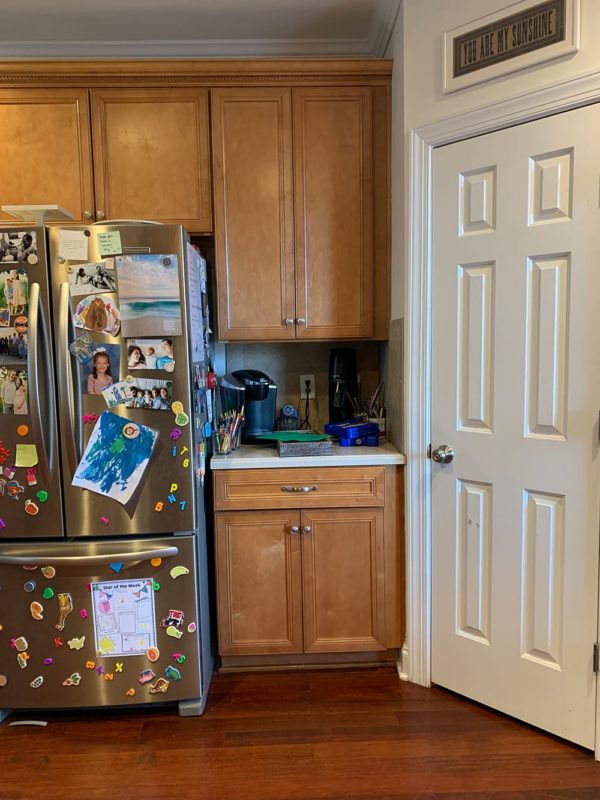
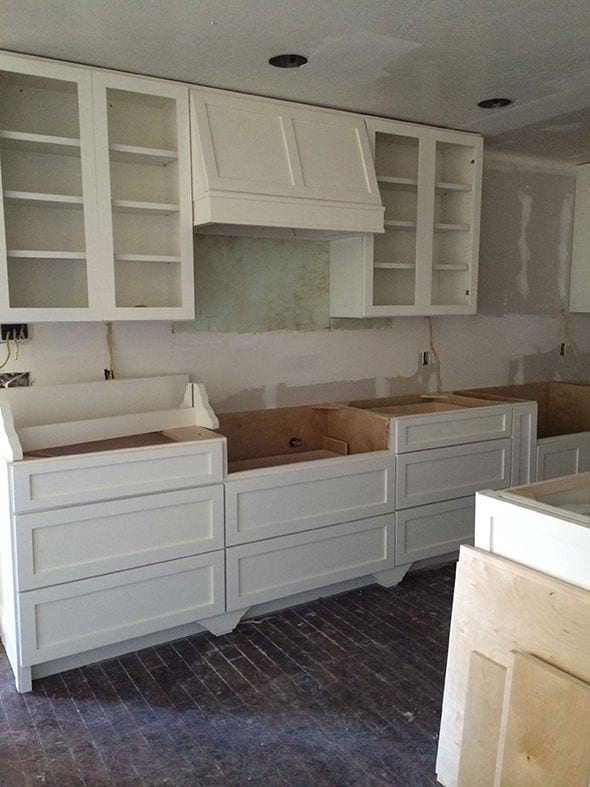
Since we’ve turned to face the other direction, let’s talk a little bit about this wall. Big changes over here! Bull Restoration (more on them below) demo’d the existing cabinetry and counter above and to the right of our fridge and built these new cabinets up to the ceiling. I love how it turned out.
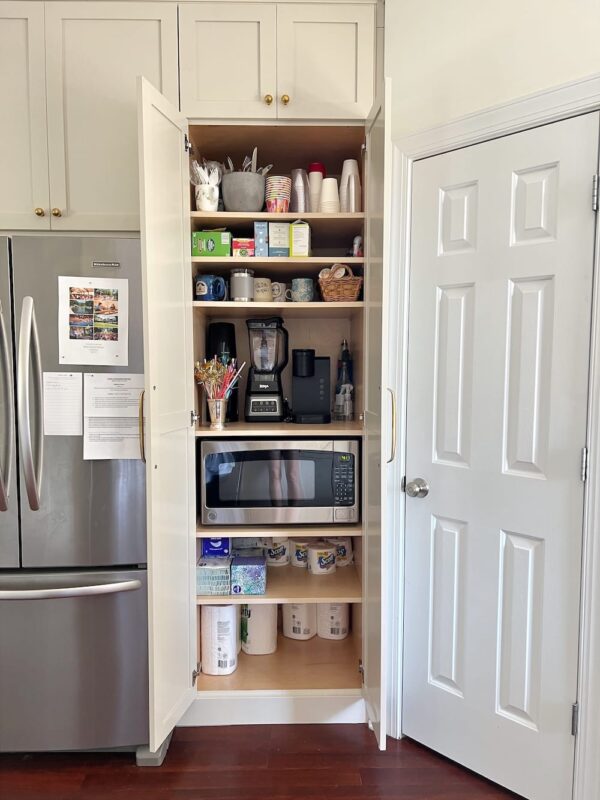
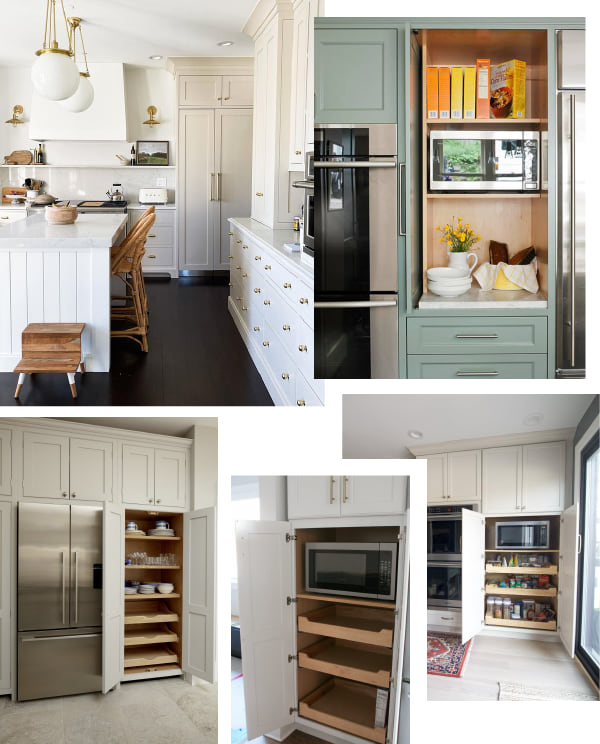
Here’s the microwave’s new home! Though we did have to find new homes for a few items in this refresh, most of the items in this space were stored here before – it’s just now closed storage instead of open. I was worried (and John was very worried) it might be annoying to open the doors every time we wanted to use the microwave, but it has been just fine. From top to bottom we’ve stored paper cups and party supplies; teas and Keurig pods; mugs; our Soda Stream, blender, and Keurig; the microwave; toilet paper and tissue boxes; and paper towels.
One of my favorite features is that the height of each shelf is completely customizable, so we were able to size each shelf for its exact contents (and can adjust the height whenever we want!).
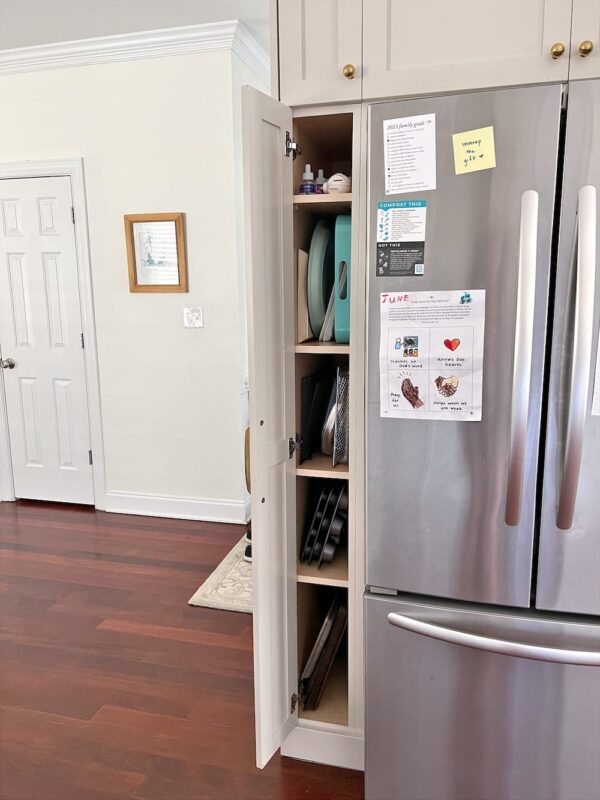
Popping over to the other side of the fridge, we have one of my favorite new additions to the kitchen. Our project manager at Bull was NOT convinced that this skinny little cabinet would be usable space, but I knew exactly what I wanted to use it for and it has been SO functional. Before, we stacked our baking sheets/muffin tins/cooling racks in a pile in a cabinet, and it was quite annoying to extricate any one of them. Now, I just slide out the sheet I need and it is glorious. This cabinet also became the new home for serving trays (relocated from the wire rack). Pitchers are stored in the shorter skinny cabinet above.
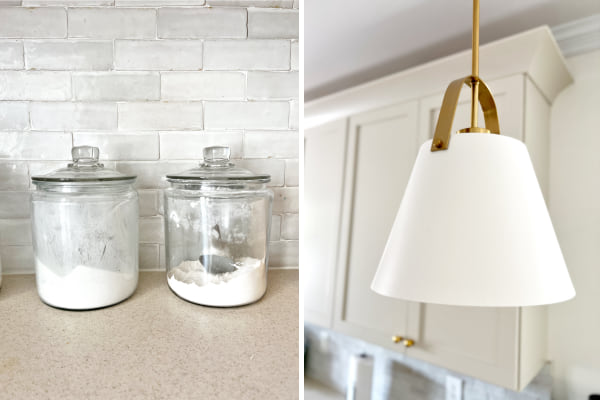
The backsplash! We chose the Bejmat Zellige tile in Weathered White from Clé Tile. It was a larger expense than simple subway tile, but I decided that it, along with the cabinet hardware, was a splurge that would go a long way toward giving a more custom look overall. I would recommend reading up on Zellige before choosing it for your own space, because it’s an artisan product with plenty of imperfections. But we really love the pearly, handmade finished look.
Okay and the light fixtures. I’m obsessed. These Ferguson light fixtures were one of the last items to be installed, and once they were in (a few weeks after the major work was finished), it was like we placed the final piece of the puzzle. I love how the more modern style of the pendants plays against the more traditional cream, Shaker-style cabinets, and how the gold details complement the gold of the hardware. Obsessed.
Full credit for finding these beauties goes to Kristin Winchester – I saw them in her kitchen and knew my search was over. We have the 13″ size in matte white/heritage brass.
Speaking of cabinet hardware: we chose unlacquered brass pieces from Rejuvenation after literally every single inspiration photo I collected used it. (I am not exaggerating.) Along with the tile, it was one of the other larger splurges, but I’m happy we did it – I think it’s a noticeable upgrade. We went with a combination of 6″ Vernon brass bin pulls, 1 1/4″ Ball cabinet knobs, and Massey 6″, 8″, and 10″ drawer pulls – all in unlacquered brass.
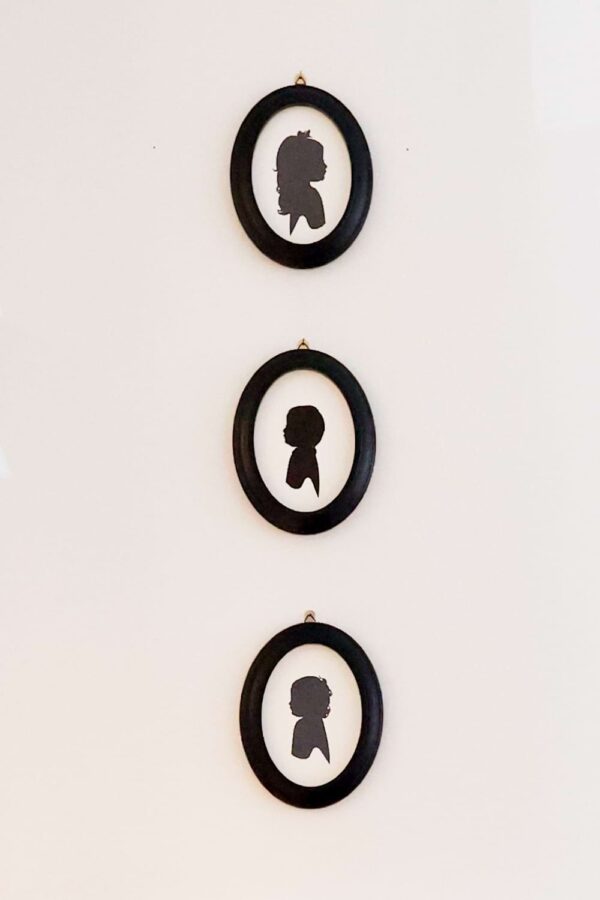
They’re a minor detail, but let’s talk about those silhouettes for a minute. We’ve had several done over the years for the kids, and I love that they’ve found a home here. June’s is from when she was about four, and Shep and Annie’s, about age one. Shep needs an updated one :) We have them done at the NC State Fair by Erik Johnson in the Village of Yesteryear – he’s there every year. He travels around the country the rest of the year, so if you’re interested, you may find him near you! He’s amazing – it takes him less than five minutes to cut each silhouette by hand.
A few thoughts on working with Bull Restoration:
I’ve had several local readers ask who we used to paint our cabinets, so I wanted to share a few thoughts. Bull Restoration replaced our cabinet faces, painted our cabinets and crown molding, and built the cabinets around the fridge.
After striking out with several other options, we got in touch with Bull after a personal referral in our neighborhood. Sean, the owner, came out promptly and gave me a quote standing in my kitchen. He came out several more times over the course of our project to finalize details, which I appreciated, and was our main contact throughout.
Bull does what they do and they do it well. In kitchens, they primarily build and paint cabinets and islands. They are a well-oiled machine, which is great, but it also meant that I had to be VERY clear and VERY on top of the details for anything that went outside of their usual scope. I came armed with pictures and rudimentary sketches, but because they don’t use CAD or other professional drawings, I was a bit stressed over how it would turn out in the end. Had I been clear enough? Had he interpreted everything correctly from our conversations? Communication was largely in person or via text which was also not my preference (I would have preferred email – easier to track conversations and details).
In the end, the result was great. The quality seems to be really good, and the paint finish is impeccable. The experience of having the guys in our house was good, too. They were only on site from Monday-Thursday of one week: about three days of building and taping, and one day of actual spraying and assembling. On Saturday, the punch list guy came and was impressively meticulous with making sure every tiny detail was perfect.
All Kitchen Sources:
Design consultation: Callie of Haven & Hinge (more on how Callie and I worked together in this post. She was so helpful!)
Tile install, hood construction, light fixture install, and other general handyman things:Versatile Edge (we have used Don for many projects over the years and adore him!)
Electrical work: Watford Electrical Contracting (we had to have a microwave circuit installed)
If I’ve missed something you’re curious about, happy to share – just drop a note in the comments!
As we wrap up, I owe a big thank you to Honeysuckle Collective for a few of these photos. You’ll see more of her work in upcoming posts on our bedroom and the rest of our downstairs!
And friends, of course a big thank you to YOU! I hope you enjoyed this peek at a project many, many years in the making. So grateful we were able to complete it and share it here!
September is a big month around here! Not only have we been anticipating our anniversary trip, but also the official start of our kitchen refresh! This project has been months in the making. Many of you expressed interest in hearing more about it in my mid-year goals update, so I thought we could chat about it today!
The background:
From the day we stepped foot in this house ten years ago, I knew I’d someday want to paint the cabinets. The kitchen was actually one of our favorite parts of the house – the layout was good, there was ton of storage space, the countertops were unoffensive, and overall it was in great shape – but the reddish wood of the cabinets combined with the reddish tone of our floors was just not my style.
That being said, we emphatically did not have the budget to hire a cabinet painter for the first many years of homeownership, and it was not a project I was interested in taking on myself. We also were unsure how long we planned to stay in this house, and therefore unsure whether the expense of a kitchen refresh made sense. We did make a few tiny upgrades along the way – a sliver of a chalkboard wall in 2013 and new pendant lights in 2014 – but the kitchen largely still looks the way it did the day we got the keys. Here’s a home tour from 2015 for a little background; I’ve sprinkled a few “before” photos throughout this post, too, very much unstyled :)
We’ve decided that this will, likely, be our home for at least the next few years, and that, combined with a more recent ability to pay for these upgrades, made us comfortable slating a kitchen refresh for 2022. For all the excitement I’ve had for this project, though, I’ve also been in my head a bit.
First, this project represents a large outlay of money for us. I feel pressure to craft an outcome I’ll LOVE and be happy with for a long while (probably the rest of our time in this house), especially because I am the one driving this refresh. (John would be happy to leave things as-is.) I’ve waited ten years to spend this money, and I want to spend it well and not have regrets. That’s a lot of pressure!
Second, while I am proud that we’ve lived with a kitchen that didn’t feel like us for a decade in an age when it’s easy to find instant, extravagant, ripped-to-the-studs renovations everywhere you look online, there’s still something in me that feels conflicted about replacing things for (almost) purely aesthetic reasons. I’ve wrestled with whether I’m being a good steward of the earth and of our finances in doing so.
Those are not rabbit holes for which there are easy answers, but I’ve come to a place I can live with and am truly excited for what’s ahead.
The process:
In planning for 2022, I dubbed the kitchen refresh a Q1 goal. LOL.
In reality, in what felt like a part-time job at times, I spent all of Q1 and into Q2 chasing down contractors to bid on our project. We did, by the end of May, choose two and pay deposits, and were able to get on their calendars for three months later.
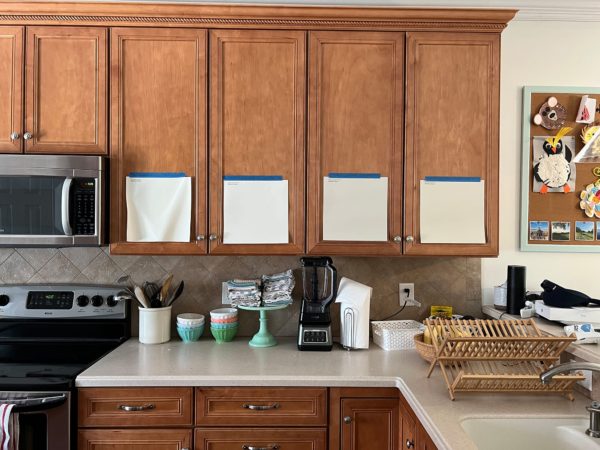
A bright spot was meeting with my friend Callie of Haven & Hinge in January. For an hourly fee, we met in my kitchen, talked through options, and weeded through my Pinterest board together. She recommended contractors to reach out to and sent me a simple design plan based on what we chatted about. Based on our meeting, I ordered and then hung up four paint sample swatches. Friends, they have been taped to our cabinets since January. EIGHT MONTHS! Even though we chose our cabinet color in the spring, I refused to take them down. Through all the waiting, frustration, and delays, they were my sign – my beacon of hope! – that something was eventually going to happen in this kitchen, ha!
In August, I had a final meeting with Callie. To maximize our time, I combed through the whole project and bulleted out in granular detail my exact questions before she came over: where should we put knobs and where should we put pulls? Which style of hood? 8″ or 13″ pendant lights over the bar? Etc. etc. etc. These are the types of questions I could spend hours debating; instead, it was so nice to spend ONE hour making all the decisions.
Once I had answers, I had final meetings to relay them to Don (who is doing most of the work aside from the cabinets) and Sean (who is doing the cabinets – not confusing at all to have a Don and a Sean working on our project). I also entered the official “spending money” stage and purchased the light fixtures, cabinet hardware, tile, and hood vent. And that pretty much brings us to where we are today!
The plan:
So what actually are we doing in this refresh? Here’s the punch list:
STOVE WALL | We’re replacing the cabinet doors with Shaker-style fronts, replacing the hardware, and painting the cabinets.
HOOD | Removing the microwave, installing a hood that vents to the outside, and building and installing a wooden hood cover
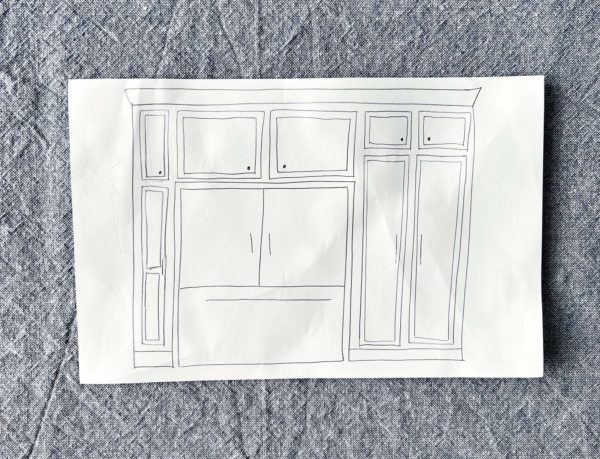
REFRIGERATOR WALL | Removing the counter and cabinets to the right of the fridge, building a tall double-doored cabinet to the right of the fridge (the microwave will go inside), and building cabinets out around the rest of the fridge, to the ceiling. The wire shelf currently next to the fridge will be rehomed.
LIGHTS | Replacing the pendant lights over the bar and the dining room table fixture
OTHER | Adding or replacing a few other decorative pieces: adding a rug, painting over the chalkboard wall, removing an old intercom, simplifying the molding, removing blinds, hanging curtains, etc.
Here’s a sketch I made of the refrigerator wall, since it’s a little harder to picture:
We are not replacing our countertops, sink, or any appliances. However, we are doing a few smaller projects in or adjacent to the main room, but outside of the kitchen, at the same time:
POWDER ROOM | Painting the walls and replacing the light fixture, towel ring, artwork, and hand towels
FIREPLACE | Building and installing a custom wood mantel and replacing the tile with the same tile as the backsplash
STAIRS | Removing some fussy scrollwork detail for a more classic, simplified look
SIDE HALLWAY | Installing three large fabric bulletin boards to display kid artwork and photos
The inspiration:
Let’s look at a few lovely photos to wrap things up for today!
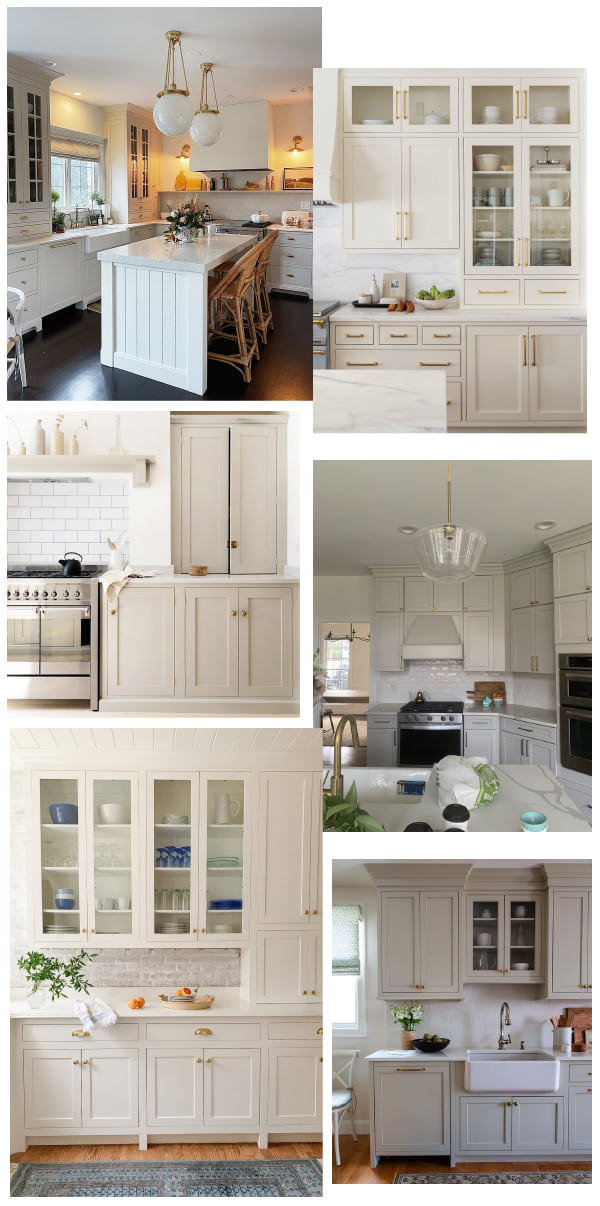
Though I love a white kitchen, I wanted something a little warmer for our space. We’re going with Benjamin Moore’s Natural Cream, which is the same color used in Alaina’s kitchen (top left – so beautiful!). We’ll also be using gold hardware. (Other sources clockwise from top right: unknown, a friend’s kitchen, LEB Interiors, Friday & Co Design, unknown)
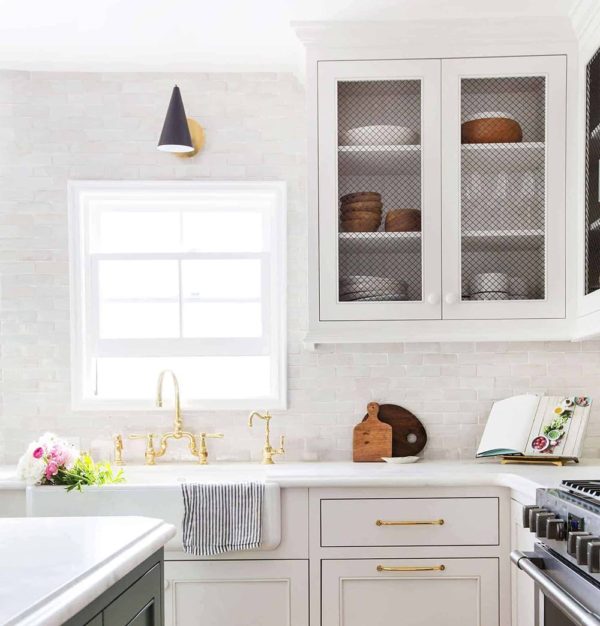
This kitchen by Emily Henderson has the same beautiful Zellige tiles that we’re using for our backsplash and fireplace surround.
Don is using this photo (from a Caitlin Creer home) for reference as he builds our mantel. (We aren’t doing the horizontal planking above.)
And he’s using this photo as a reference for our hood (I don’t have a credit for this one!).
And there you have it! Friends, the paint samples are still on my cabinets as I type because this all still doesn’t seem real – but maybe by next week it will? Because there will be new tile in my kitchen?! Thank you, as always, for being excited about the journey – even the very long ones :)
Back in the fall of 2020, when our preschool opened back up, we met two of our dear family friends.
The preschool opened up with more limited hours, and so the three of us all suddenly picked up at the same time. After a distanced summer, we were hungry for even casual interactions with strangers – which is what this started out as, as our children ran and played outside the school for a few minutes before loading into cars.
Day after day, strangers grew into acquaintances who grew into friends. By piggybacking off our kiddos, we were able to “hack” one of the oldest tricks in the book: making new friends at school – except this time, it was our kids’ school, not our own. This allowed us to quickly up the time quotient of the friendship equation, which can be hard to do post-graduation. Casual interactions, swapped stories, and frequent check-ins piled on top of another until one day, I realized these new friends were as close as many old ones.
We swapped phone numbers. We met up at a park. And then, after many months, we took a big step forward: one of the families hosted a weekend dinner. There’s just something about being in someone’s home that’s a huge leap forward for relationships, don’t you think? We had a lovely evening, and then several months later, the other family hosted us all at their home.
As we pulled out of the driveway, John and I chatted about how it was our turn to host, but that we wished our home was more conducive to having multiple families with kids over. (Our house is wonderful for our own family with young kids – the open plan makes it easy to interact while I’m cooking and they’re playing, for example – but it can get loud and chaotic and hard for both the kids and grown-ups to enjoy themselves when it feels like we’re all on top of each other and the floor is somehow suddenly strewn with every toy we own.)
Then, June piped up from the back in a sad little voice: “I wish we could have the friends over to our house.” Not realizing she had been listening, we fell over each other to assure her that we could have friends over to our house and that our house was wonderful, because the last thing I want her to think is that there’s such a thing as a house that’s not good enough to host friends, or that I was anything but grateful for our perfectly wonderful home. She was reassured, and we talked about how it might be nice to have a spring party so that we could enjoy our backyard. And then I forgot about it.
But she did not :) And so, a few weeks ago – apropos nothing – June asked when we were going to have our spring party. And so, a spring party it was. We set a date, and the planning commenced.
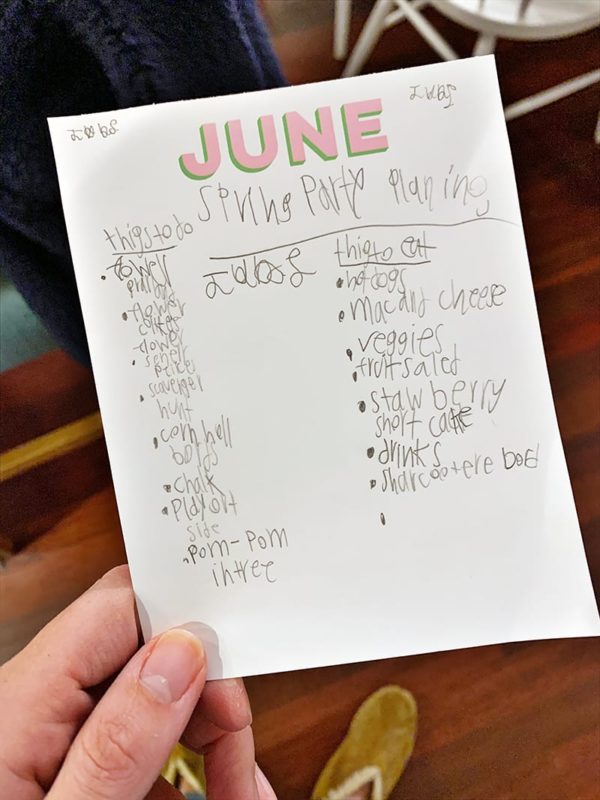
Friends, my big girl is her mother’s daughter, and she launched into party planning with great zeal. Here’s a sheet with some of her notes:
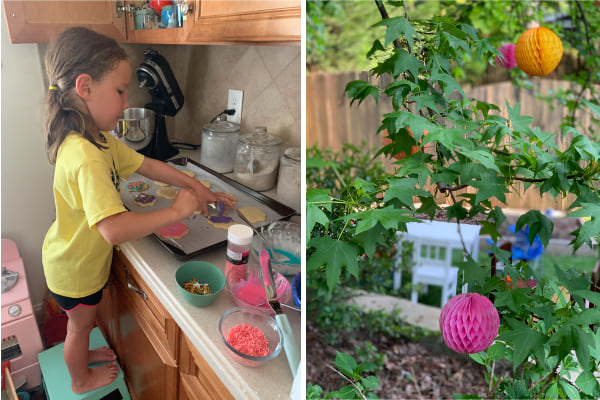
Over several weeks, we brainstormed food, we made decorations, we planned activities, we baked and frosted sugar cookie party favors, and on the day of, we did all the final preparations together. She was in heaven. In celebration of imperfect hosting, I thought I’d share a few photos…
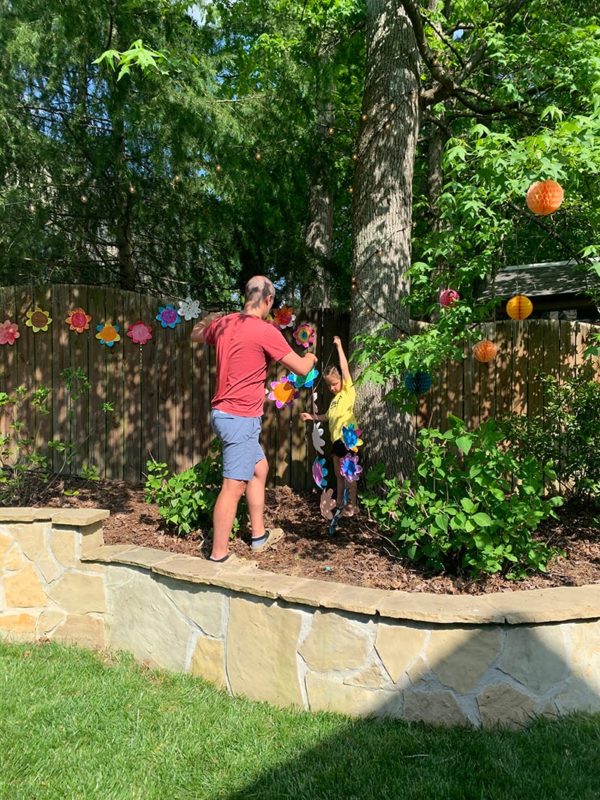
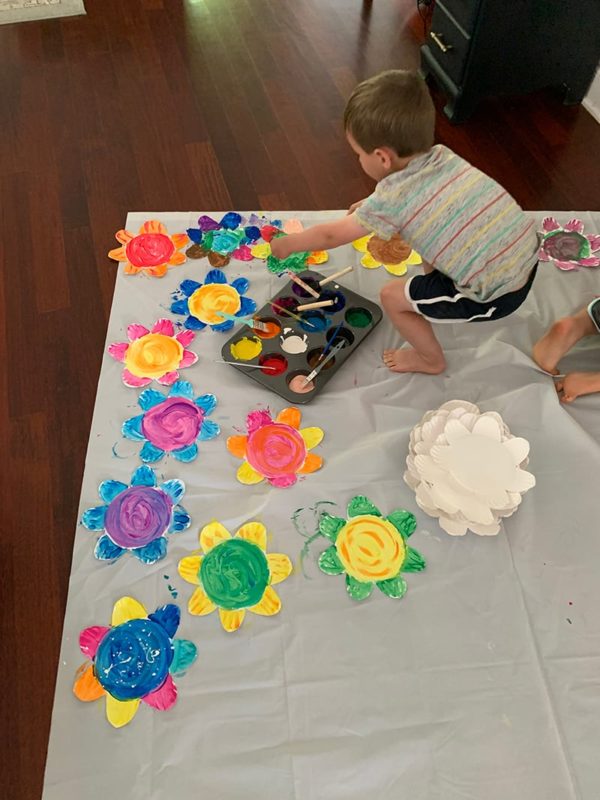
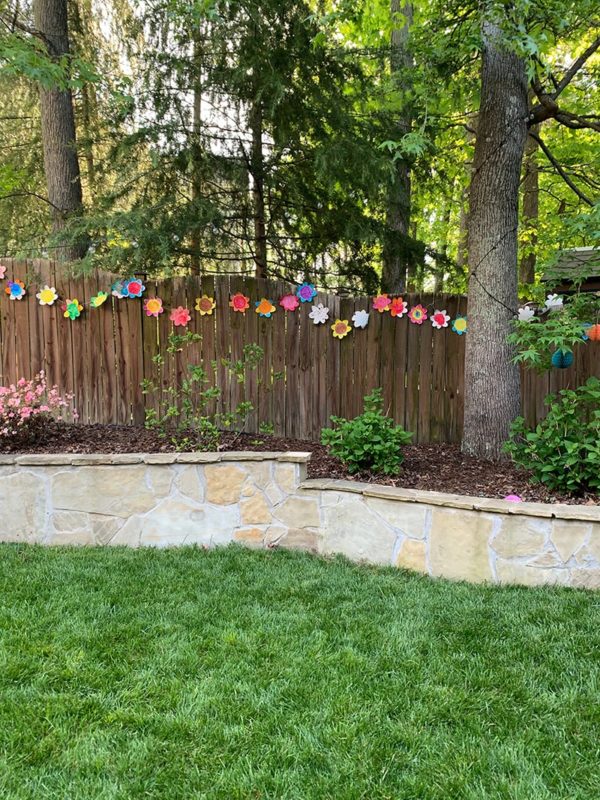
The flowers for the back fence were the biggest project – they probably took 3-4 or so hours over several days. Does that seem like a lot for something we tossed in the recycling post party? Maybe, but it was a delight. June and I listened to the Yoto radio while we cut the petals out of paper plates (I still have a gigantic stack from pandemic preschool-at-home) and then Shep joined in to paint 60 flowers. I hot glued them onto twine and John helped us hang them right before the party. It was SO fun, and they looked so sunny and cheerful!
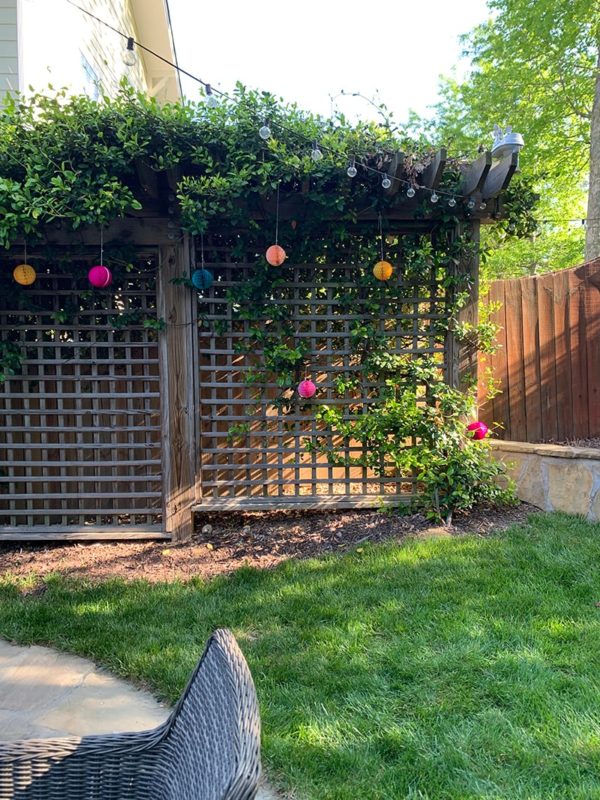
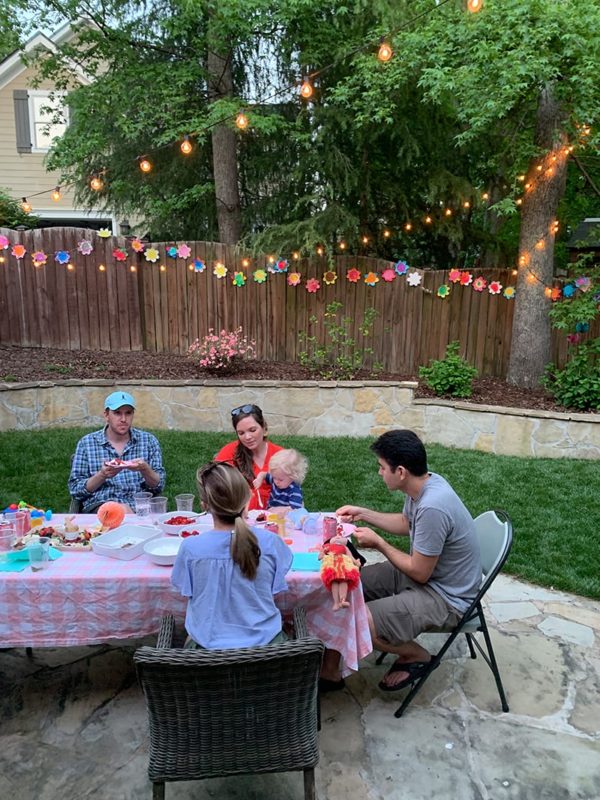
We also hung some honeycomb poms from my party-planning stash from our trellis and the branches of the trees.
For food, we started with a charcuterie spread from Raleigh Cheesy that one of the other families brought (SO GOOD!) and lemonade/lemonade cocktails for the grown-ups. We kept things easy for dinner with hot dogs and brats on the grill, plus fruit salad, cut veggies, and a tray of Chick-fil-a mac and cheese. Dessert was warm box brownies (Betty Crocker always) with freshly-picked strawberries and whipped cream spooned over the top. June’s sugar cookies (from our favorite baking book) were the take-home favors.
Whether you’re nervous to host or it feels like your circumstances are less than ideal, I hope this post encourages you to go for it if it’s something that matters to you! This night is such a sweet memory – and we’re all eager for the next one :)
And never forget – string lights make everything 100x more magical.