Em’s guide to photo organization, part one
Friends! You’ve accompanied me on my two-year journey of photo organization with such patience and good cheer. Your encouragement along the way, especially in the trenches of iPhone photo organization, kept me going. With thanks, I’ve finally put together the steps I took over the last few years to get my photo house in order – and today I’m sharing the first installment!
Sometimes I’ve felt a little awkward talking about this project so much – after all, it’s not like I’m solving nuclear physics over here. But the overwhelm created by having an amazing camera ever-present with no physical storage constraints, a houseful of cute kiddos, and the desire for simplicity is real.
Before I began this project, I also had no back-up solution (meaning I lived with a constant low-grade fear of losing all of my precious photos) and no good way to enjoy our favorite images. What I did have was the nagging feeling that for every photo gem captured on my camera roll, there was a surrounding sea of 18 almost-identical-but-not-quite-as-sparkling versions.
And so, slowly but surely, I waded into the mess step-by-step. Starting with this post, I’m so happy to lay out those steps for you. They’re not rocket science, but I hope they’ll make the path a little clearer and easier for you if you’re hoping to follow along behind.
Two shout-outs before we begin:
— I purchased Nancy’s photo organization digital guide a few years ago, and it was just the kick in the pants I needed to get this project underway! I diverged from her process at different points and made it my own, but I’d definitely recommend her course if you’re looking for an even more comprehensive guide than I’ll be sharing here. Note: I purchased the $29 option, which is no longer available, but you can see current options here!
— This was a long and tedious project, and without the process of breaking it down and the accountability of mini goals to check off month after month, I’m not sure I ever would have gotten to where I am now. Couldn’t have done it without you, PowerSheets! :) All of the steps below are perfect to add to your Tending List!
Let’s start with physical photo organization!
Step 1 | Gather all printed photos.
First, I gathered every loose printed photo in our home and brought them together in one spot. I gathered the printed photos that were still at my parents’ home and brought them to NC. I also had several old photo albums, and except in one instance, I disassembled them and added the loose photos to the growing pile.
Step 2 | Sort printed photos into loose categories.
My categories were childhood, middle school, high school, college, newlyweds, and family life. In process, this looked like big piles of photos arranged in a circle around me on the floor of our loft, ha! Nothing fancy. Though much of our history is already combined, I did not separate out my childhood photos from John’s – they’re all in one pile!
Step 3 | Cull printed photos.
With the photos in loose categories, it was easier to sort through each one. I touched every photo and discarded duplicates, photos with bad lighting, and photos with events or people I no longer really cared about (harsh but true, ha!). I know this can be hard for some, and I have a few more tips for sorting through childhood items here. My best tip is to take the long view – will you really care about that photo in 20 years? – and to challenge yourself to keep the photos that truly bring joy and tell your story, not the ones you “think you should keep.”
Step 4 | Sort printed photos into a box or boxes.
I only have a few hundred printed photos, and they all fit in one photo box at this point. They’re divided into categories by little homemade dividers – again, nothing fancy :) If you have lots of printed photos, multiple boxes might be helpful!
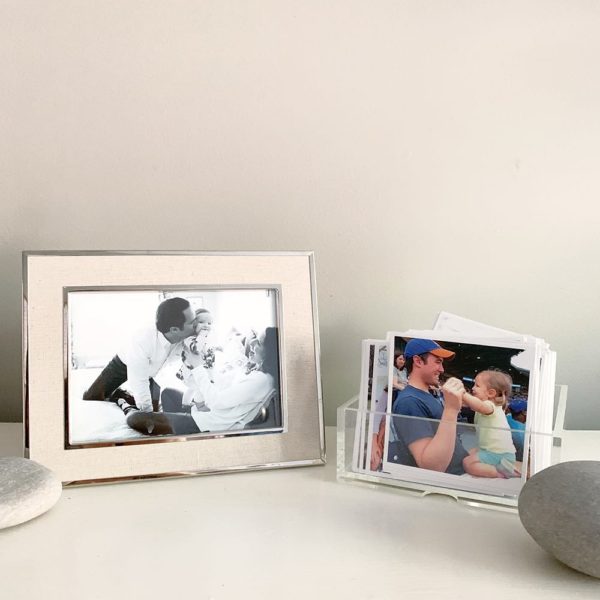
Step 5 | Refresh photos around home.
Flipping through all of our printed photos helped me rediscover a few gems. I purchased a few new frames and added photos to our bedrooms, mantel, refrigerator, and living room gallery wall, among other spots. In some cases, these were heavy-hitters – wedding and newborn photos – but in others, they were teeny little moments, like June on the boat with her aunt or John and June laughing at our favorite pizza place.
That’s it! We’ll talk about printed photo albums in part three of this series, but in the meantime, you might find this post that touches on printed Instagram photos interesting.
I’d love to hear: do you have printed photos in your home? Are they organized? If so, how? Back with more soon! :)
Part two: digital photo organization
Part three: printed photo albums
Affiliate links are used in this post!


Do you happen to have a link for that little acrylic box you have a stack of photos in? I love that for storing some loose photos and being able to flip through them to pick a new one to have in the front on display!
Yes! It’s great! Here’s the link: https://emilymccarthy.com/collections/personalized-trays-and-tabletop/products/lucite-catch-all-trays?variant=28319084576855
Remember when you commented on one of my goal posts about my mention of baby book updates and how that made you antsy because you knew you’d need to tackle that yourself? That’s how these photos posts of yours make me feel HA! I think this is going to be a BIG 2021 goal over here in the Bosse home. Bookmarking this specific post to kick my butt in gear! GREAT WORK, Em!
Yesssss you know I will be cheering you on!
Omg this touches my soul! Haha. I’ve been on a digital organization quest (that mostly involves photos) for about the same length of time! Geez, it is SO time-consuming!! I feel so encouraged that you actually finished!! Can’t wait to read your process for digital pics :)
It is – but my encouragement is it’s not endless!! Well, it kind of is, in the sense that you’ll always be taking new photos, but you WILL get to the end of the backlog some day! :)
Have LOVED following along on this journey with you, Em! You inspired me to work on my own photo organization, too and it is one of my only goals flourishing in the time of COVID, ha! I’ve almost organized all my digital photos and have ordered two annual photo albums and they make me so happy to look at.
That’s so wonderful, Abigail! I’ll bet your albums are beautiful!