21 April 2010
Gather in close, y’all, because I’ve got a secret to share today. Well, it won’t be a secret much longer, but that’s okay. You know those ridiculously cute and eco-friendly striped paper straws that are making the rounds of blog land?

{via flickr}
Yep, those ones. Like many of you, I’m sure, I’m a little bit in love with them. However, I was discouraged by the online ordering process, though there are a few options. The first is to order from Kikkerland, the company that manufactures them. You can go here to do that. One box of 50 straws is $3, but that balloons to $12.99 with shipping, or $4.33 per box! AND you don’t get to pick the color! You’ll get either blue + white, green + white, or red + white, whichever combo Kikkerland feels like sending you.

{via Oh Happy Day}
Green Party Goods sells the straws in packs of 3 for $8.50, but again, you can’t choose the colors (you’ll get either green + white, blue + white, or pink + white). They also require you to have a minimum order of $17 to reduce greenhouse gas emissions, which will bring your total to $26.29 with shipping at a minimum, or $4.38 per box. Right.

{via 100 Layer Cake}
There are also several vendors on Etsy that sell the straws, but the deals are even worse, if you can believe it. Here you can buy 1 red + white pack for $9 with shipping, here you can buy the same for $11.25 (!!), and here you can buy a pack of just 25 green + white, pink + white, or blue + white for $8.25 (that would be $16.50 for 50 straws!!!). The only benefit with Etsy is that you can be assured of the color combination.

{via Style Me Pretty}
HOWEVER (and here’s where it gets good), I have a solution that blows the rest of these out of the water. It’s a little store that goes by the name of Rock Paper Scissors, located in Wiscasset, Maine. I drive through Wiscasset every summer on the way to my family’s summer house, and lately I’ve always tried to stop at RPS. It’s a delightful store, but perhaps the best part is that they sell these straws… for $2 a box! If you happen to be in the area, I’d suggest stopping by to pick up a few. If you aren’t, simply call the store (207-882-9930) and request the colors you’d like (selection varies). The owner will charge you the cost of shipping after she’s weighed it at the post office.
The upshot? On Thursday I ordered 3 boxes of gray + white and 4 boxes of blue + white, and my total (with shipping) was $21.50, or $3.07 a box. Score! And you have the added bonus of supporting a small business.
I’d love to hear if you try my method!
UPDATE: Reader Chelsea let us know that Rock Paper Scissors is no longer shipping paper straws, but is still selling them in-store. RPS recommends getting the straws online from Kikkerland.
13 April 2010
I’m pretty sure you’re all thinking right about now that I should rename this blog Bunting & Bunting, and I have to say I don’t really blame you. BUT I do have two more uber-cute ideas to share with you, and they just happen to involve my favorite strings of triangulated fabric.
First, a bunting invitation. Bunting may play a role in the invites I’m busy mocking up for K + C’s ceremony and reception, so these, from Cakies, have found a soft spot in my heart. Let’s just say they involve Happy Tape and that you should head over to her blog post to have a look at the finished product. Brilliant!

Next, as promised, the bunting cake, from this adorable wedding (image by Colleen Sherman). We’ve pretty much decided that we’re going to be sprucing up simply-decorated cakes bought from a bakery, and though we’ve tossed out several decor ideas, right now I’m loving these mini strings of bunting. Dressing the cake couldn’t be easier, and when it’s time to eat, the (fabric? paper?) flags come right off. And affordable, to boot!

30 March 2010
Love mini bunting almost as much as I love full-size bunting, and we’re planning to make paper strings to decorate the food stations at K + C’s wedding. Kate, bless her heart, cut out hundreds of small paper triangles when she visited last week. Now, to find some twine (a yellow and white striped version, anyone?) and string everything together…
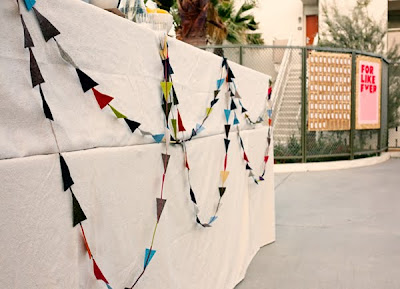
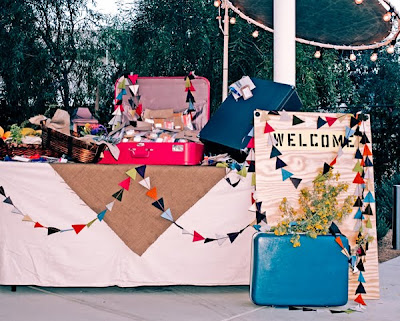
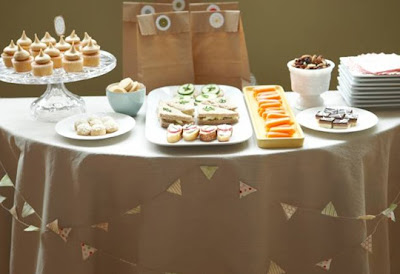
Top two photos by kzphoto via Once Wed; bottom photo by Scott Clark and styling by Jillian Event Design, via 100 Layer Cake
24 March 2010
Finally, we’re ready for the big reveal of the last few months’ labor of love! As with most DIY undertakings, we thought this would be a fairly simple process.
It wasn’t. (Surprise, surprise.)
But, after five months, about 23 proofs emailed back and forth, and a few emergency add-on info cards later, here are the save the dates for K + C’s wedding! Let me give you the tour…
The envelopes are the A6 navy version from Paper Presentation (love them!). The stamps were standard USPS fare. Our original plan was to write out the addresses in white ink, but we decided to save that for the actual invitations. Instead, I wrote each address in navy on an office-supply store white label. We stuck those labels on top of rectangles we cut from old nautical charts.

The return address stamp was from RubberStamps.net, and the service and price were great. It was a bit difficult to position the stamp since it came on a solid wood block, but other than that, no complaints.
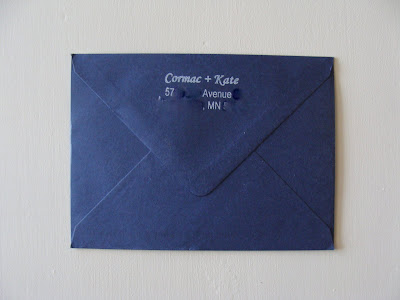
The envelopes were also lined with nautical charts. Having a father who teaches at the Coast Guard Academy is a boon when planning a sea-worthy wedding! We chose charts from the Bay Area, as C grew up nearby.

The entire suite: chart lined envelope, save the date, wedding website card, and second reception card (which was only sent to some guests).

As you may remember, our design was inspired in part by one seen here. I designed the cards in Microsoft Publisher (often comes with the standard Microsoft Office suite and is very easy to use). We printed the cards at UPrinting, and though the quality was good, I was a bit disappointed when we got them back and saw there was less white space on the top and bottom than I expected. Oh well. It was likely my fault.
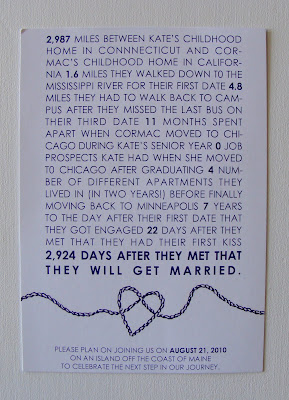
The rope heart was hand-drawn by my best friend, a multi-talented furniture designer at RISD. Thank you, Wanda! We plan to use it throughout the wedding. The cards were printed at Vista Print.
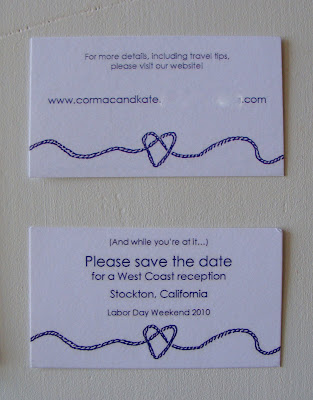

And that’s that! Here’s the cost breakdown, for those who are interested:
150 envelopes (plus s&h): $36*
White labels: $2
Return address stamp (plus s&h): $17.90 (we needed priority shipping)
Charts: $0 (Dad!)
Rope graphic: $0 (BFF!)
Printing of 100 save the date cards (plus s&h): $35.78
Printing of 250 reception cards: $13 (s&h)
Printing of 250 website cards: $4.99 (to upload custom design) + $13 (s&h)
Postage: $39.60
TOTAL: $162.27, or $1.80 per suite (We sent 90 envelopes to 184 guests)
Please let me know if you have any other questions!
*We could have saved here if we hadn’t over-estimated the quantity. But we’ll be using these in the future, so I don’t consider it a loss!


