29 March 2019
If you’ve spent any amount of time here, you know that I’m engaged in an epic quest to organize our personal photos (and have been for almost a year). Many of you have expressed curiosity at my methodology and the processes I’m putting in place, and I’m happy to oblige – once I have everything wrapped up with a bow!
In the meantime, though, I wanted to share one aspect we’ve got down pat, especially since I’m guessing it might be a pain point for some of you: Instagram photos! The photos I share on IG are some of my very favorites, so it makes sense that they’d be a priority to get off my phone and into our home.
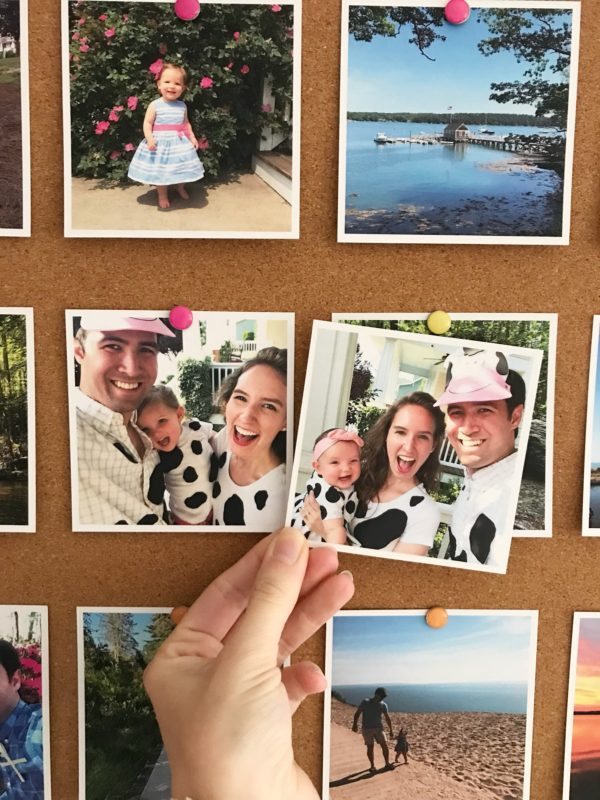
Each January, I order 48 to 72 of our favorite Instagram photos from the past year in the 4-inch size via Social Print Studio. (You can purchase them in sets of 24 for $12). They’re printed on velvety-matte paper, and I’ve found the quality to be good. I especially appreciate that you can upload from multiple accounts in the same order as long as you have the passwords, which is great because I choose favorites from John’s account and both my personal and public accounts.
(If we need to round up to reach a number divisible by 12, I’ll add a few more copies of a print I know a family member or friend would love, then pop them in the mail once they arrive!)
From there, I choose our favorite 24 photos from the past year, with a prejudice toward landscape- and adventure-focused shots, and pin them to a bulletin board in our kitchen. I love being reminded of so many beloved places, faces, and memories on the daily, and guests love looking at them, too!
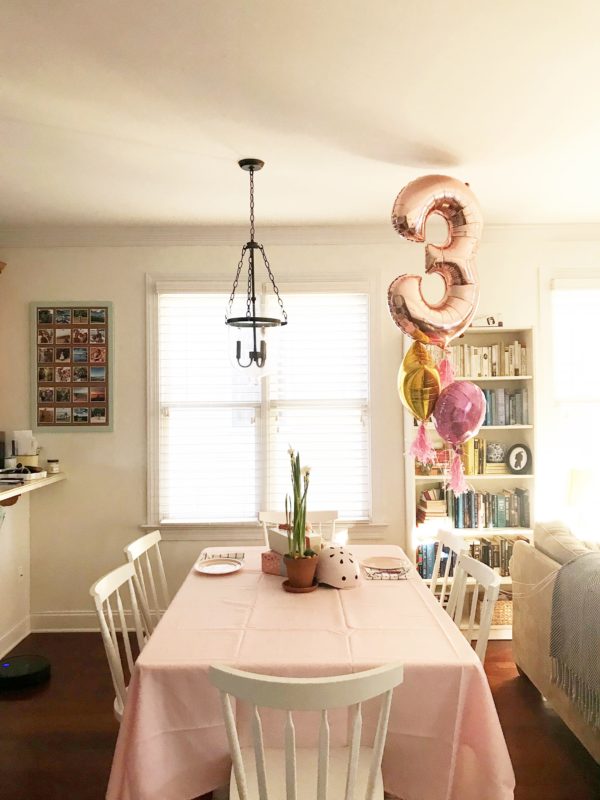
The ones from the previous year come down and, along with the remainder from the new set, go loose-leaf style into a box on our coffee table. (I add the year and any other pertinent info on the back.) The box isn’t organized in any way, which is good because the prints are literally taken out and rifled through every. single. day. June LOVES to discuss them, and they’re a great conversation starter with guests, too!
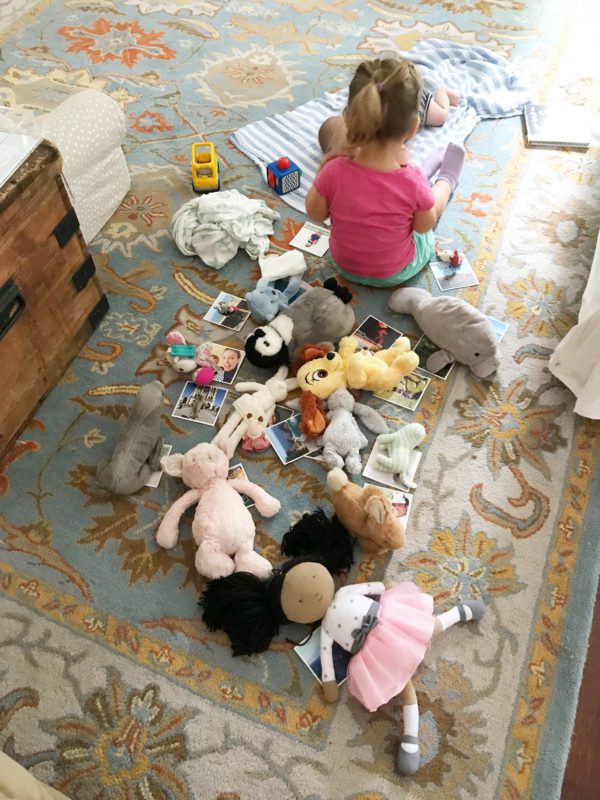
On this particular day, each stuffie was assigned a photo :)
One last thing I like about this system: it’s a natural way to make sure we’re refreshing at least some of our wall decor on at least an annual basis. It can feel like a monumental effort to get anything on our walls – the choosing! the hanging! – and once something is up, I’m inclined to just leave it. But it’s nice to spiff things up every once in a while, and this is an easy way to do it.
I’m curious: do you have a favorite way of printing your Instagram photos? I think it would be so fun to order one of SPS’s 365 calendars one day!
Affiliate links are used in this post!
18 February 2019
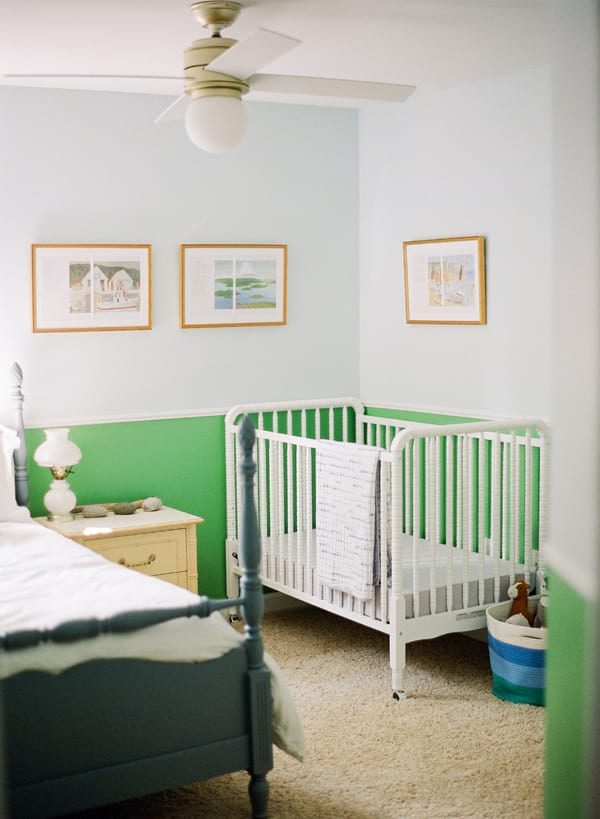
Friends, I’m so excited to share today’s post with you!! I had a clear vision for Shep’s nursery from the beginning, and it has been gratifying to see it come to fruition. Let’s take a tour!
But first, let’s look back. Here’s the before of the former “blue room,” our smallest bedroom:

Yikes! My inspiration for turning this dumping ground into a happy spot for our baby boy was one of my favorite childhood books – Time of Wonder by Robert McCloskey, a treasured New England author. We’d use the bold but nature-inspired colors and whimsical illustrations from the book to set the scene, framing three spreads to star in the space. This was my original inspiration board:
All of the credits are in this post!
And here’s how the board came to life!
Whee!! Such a good before and after :)
To free up floor space, we moved the queen bed into our guest room and set up the full in here.
We hired out the painting – prepping the walls to cover up those stripes was a feat! – and he did a beautiful job. When I first saw the finished colors, though, I was convinced we had made a mistake – they looked a little cartoonish to me. But, once we layered in finishes and especially the artwork – what was meant to tie everything together from the start – they totally transformed. Speaking of which…
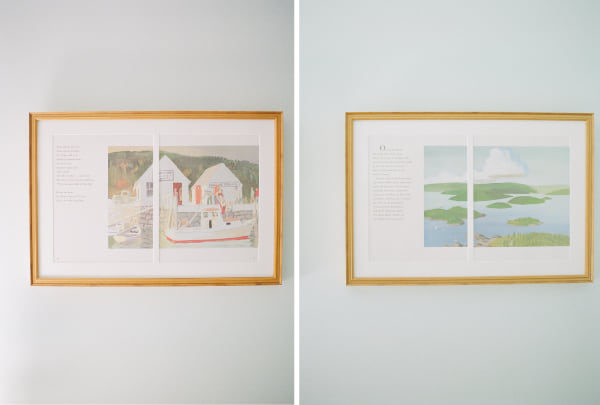
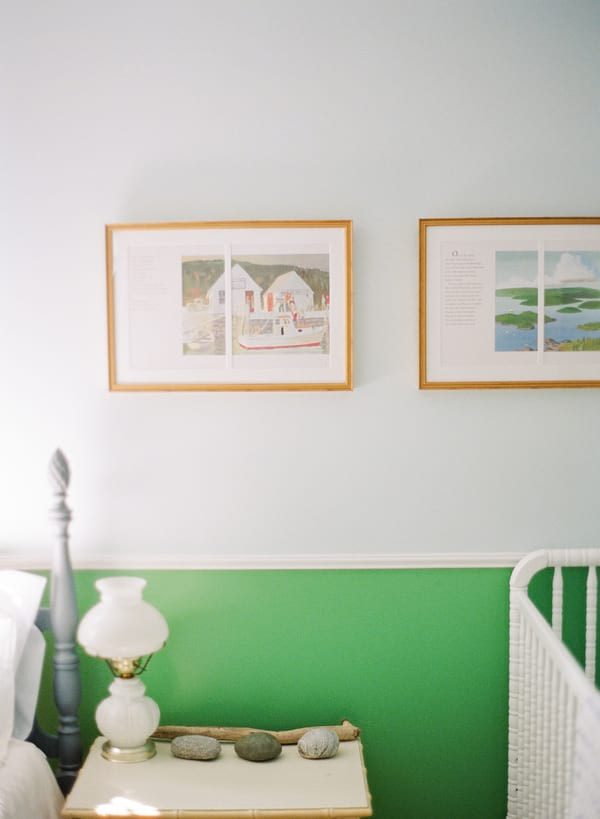
The art!! The illustrations that started it all have turned out to be the crown jewel in this room, just as I had hoped. We had Framebridge frame three spreads from the book (I bought a new copy and cut the pages out verrrrrry carefully!). The gold Richmond frames have a heritage feel even though the illustrations themselves are youthful. I couldn’t be happier with how they turned out and know we will treasure them for a long, long time!
Our only “major” DIY was switching out the light fixture and fan. John really wanted to keep a ceiling fan, so I hunted high and low before finding this one. The sleeker visual profile really makes a difference in how big the room feels, and I like that the frosted, round bulb has a bit of a nostalgic feel to it!
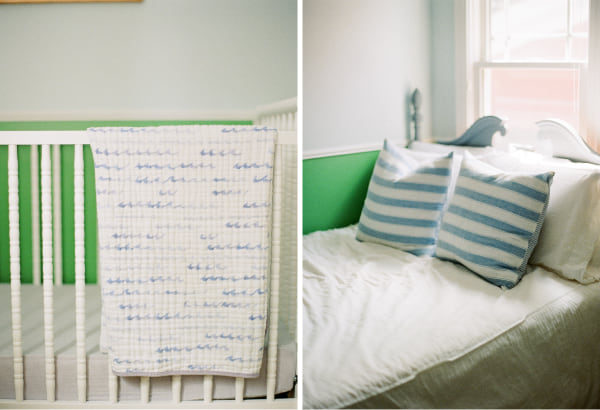
John’s parents ended up gifting us the white Jenny Lind crib, which looks sharp against the colorful walls. We have two sheets on rotation from Little Unicorn – this blue one and this wave pattern. For the big bed, I found coordinating pillow cases and throw pillows at HomeGoods (we already had the white duvet and sheets!).
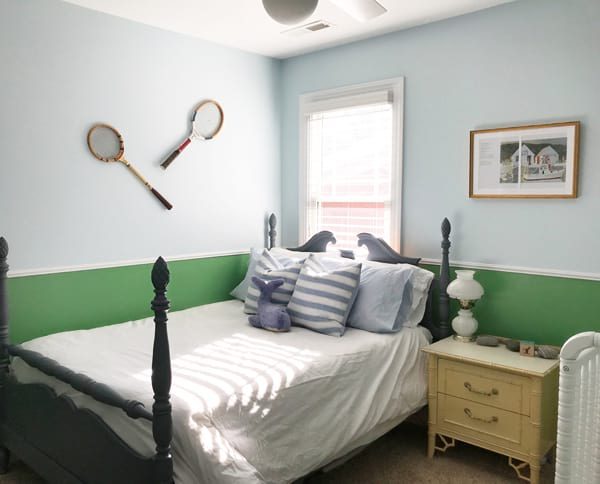
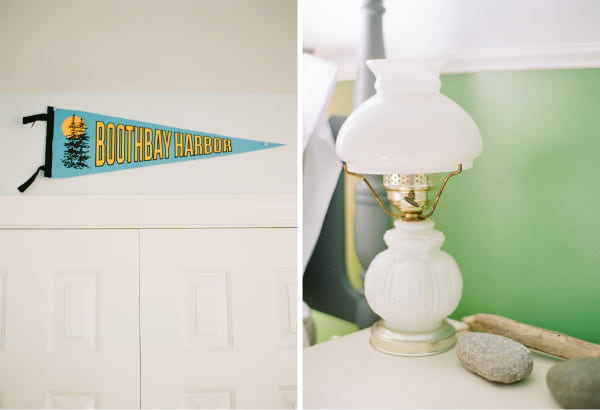
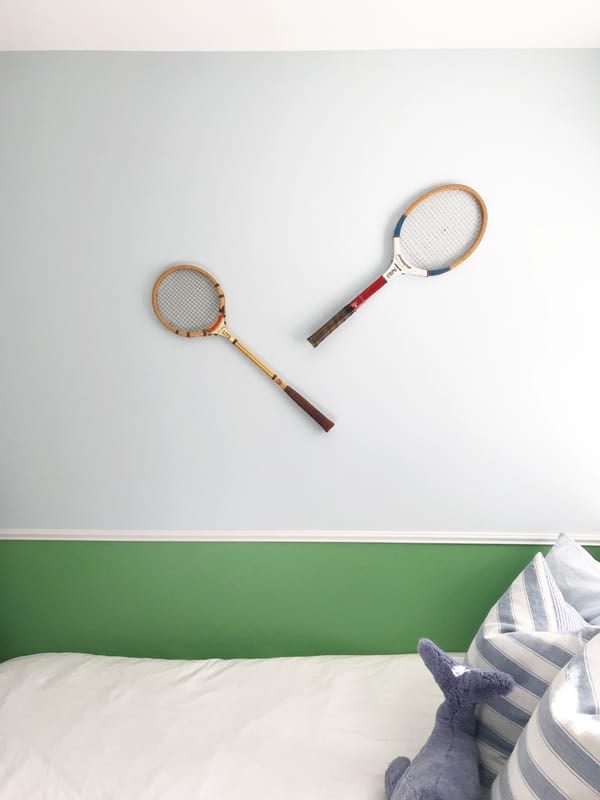
Let’s see… the little yellow bedside table was one I found at the flea market many years ago, and the lamp was from my Mom’s childhood room (!). The racquets are from my grandmother’s attic – I had saved them for years without knowing where to put them, and I’m so glad they finally have a home!! The sweet striped basket was a gift from my work ladies, the rocks and driftwood were collected on the Island, and the stuffed whale was a gift, too.
It’s a happy, cozy little room. I hope Shep loves spending time here as he gets bigger!
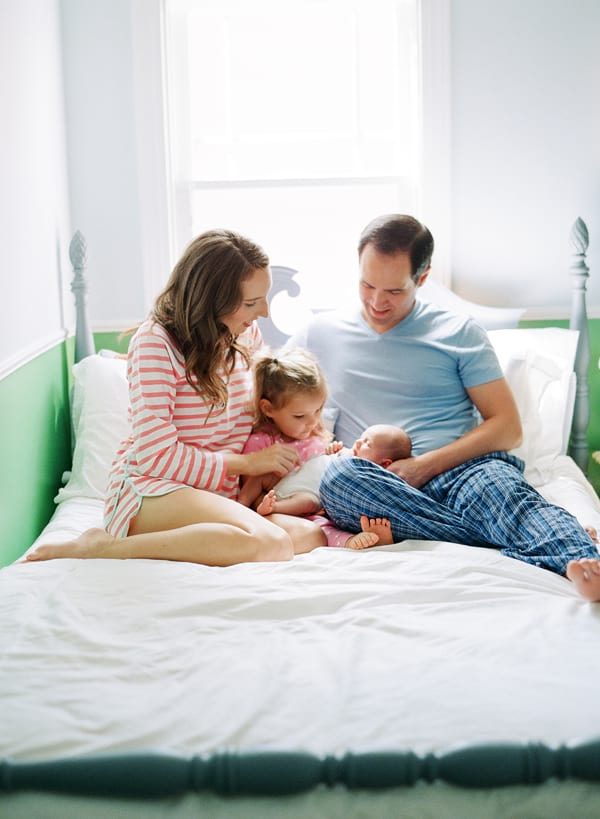
And now, if you’ll indulge me with a few more of our family photos by Graham…
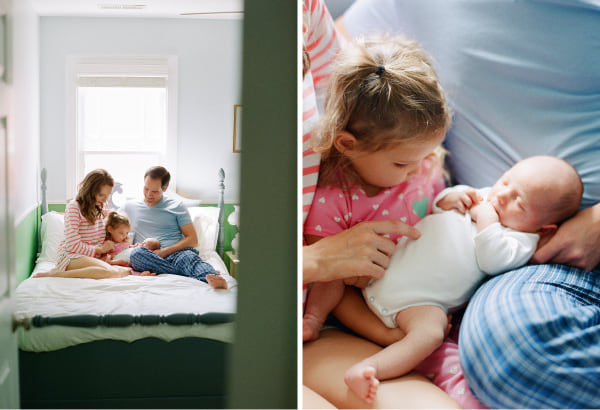


My one request of the session was that we create a new version of our favorite photo from last time. I’d say Graham did an admirable job :)


Thank you for letting me share, friends! What do you think of our sweet baby boy’s spot? If you have any questions I didn’t cover, drop a note in the comments and I’ll help you out!
Photos: Graham Terhune of Anagram Photo | Hair and makeup: Samantha Ray | My pajamas: Lake Pajamas | Wall color: Beach Foam by Behr (blue) and Aurora Borealis by Ben Moore (green) – both colormatched to Sherwin Williams | Custom framing: Framebridge | Fan: Hunter | Jenny Lind-style crib: Amazon | Crib mattress: Amazon | Bed and bedside table: Raleigh Flea Market | Lamp and racquets: vintage | Crib sheets and blanket: Little Unicorn | Striped pillows: HomeGoods | Pennant: Seawicks | Striped basket: gift
P.S. June’s buffalo check and Liberty print nursery
27 July 2018
Happy Friday, friends! We are counting down the days until baby brother’s arrival, so thank you for your patience as I’ve navigated these last few weeks!
Today, I am SO excited to share with you our new backyard!! This was definitely one of those “reveals” where it’s tempting to just wait one more month and then another month, after we’d finished this or that was blooming, but the truth is that a landscape project is ALWAYS evolving and changing – after all, it’s a project that’s literally growing! At this point, the major elements are all in place, and I’d love to have the chance to share it with you!
For those friends just joining us, this is a project that was many years in the making. As two people who grew up with expansive yards (that’s just how we do it in New England), our yard was a pretty big disappointment when we moved in. Not only was it tiny, but it just wasn’t very usable. The previous owners had done literally nothing with it – no plantings, no hardscaping, etc. Accordingly, we spent zero time back there our first few years in the house. A few before photos:
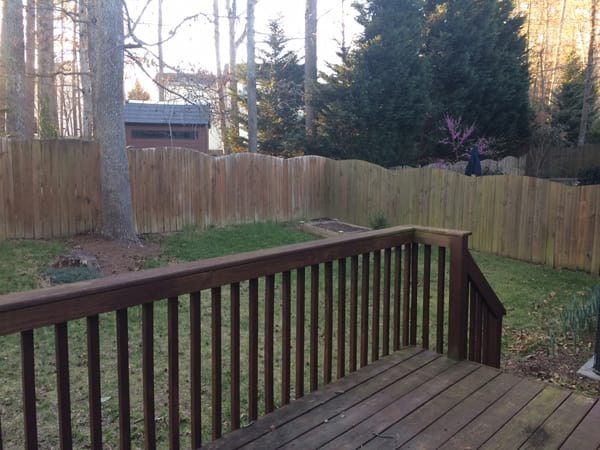
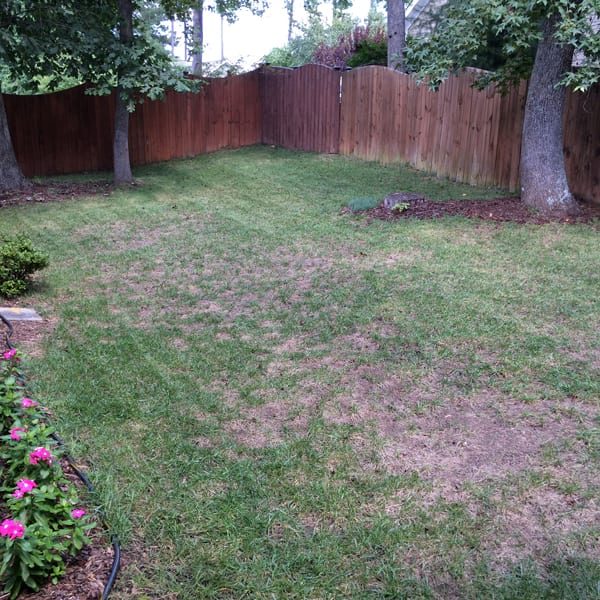
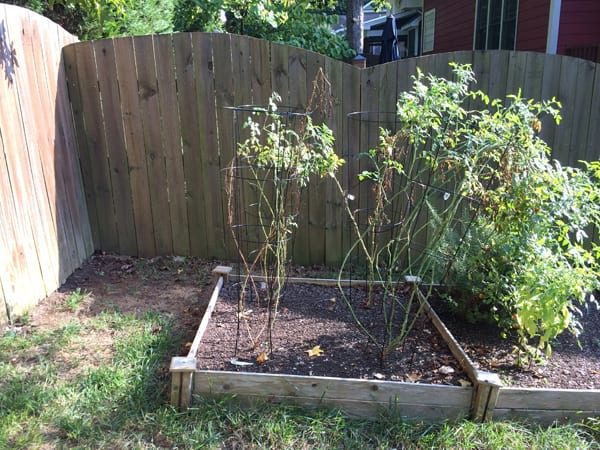
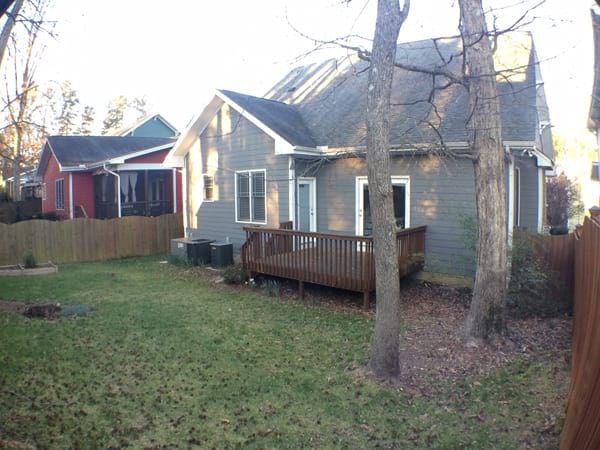
Deteriorating deck, sad grass, old stumps, barren wasteland of a lower right corner: check, check, check, check.
With an interior that only needed furnishing, we knew we’d eventually want to invest some money in improving the backyard. June’s impending arrival lit a fire under us, though it still took us until after her first birthday to break ground.
I’ll be honest – this was NOT an inexpensive project. In fact, it cost more than my first car (!!!). We used a big chunk of savings we had set aside, and we were also so grateful to be able to put some money from my grandmother towards it. Naturally, spending such a large amount of money was challenging and a bit nerve-wracking for us.
Having had a year to live with the improvements, however, I can confidently say that I am SO happy we chose to spend the money in this way. It transformed a part of our house that was a negative into a major positive, and changed our daily habits in wonderful ways. Not only does our backyard now look beautiful, but it’s already served as the backdrop to so many family and friend memories. That is the kind of consumption I’m happy to take part in.
Ready to take a peek? Here we go!!
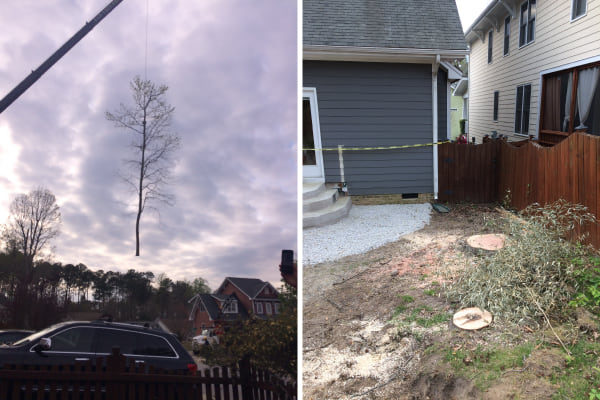
The first major changes were to remove two trees, the deck, and a concrete stair pad. The tree removal was necessary to grade the lawn and create more usable space, two of our main goals, but it was still painful for this tree lover.

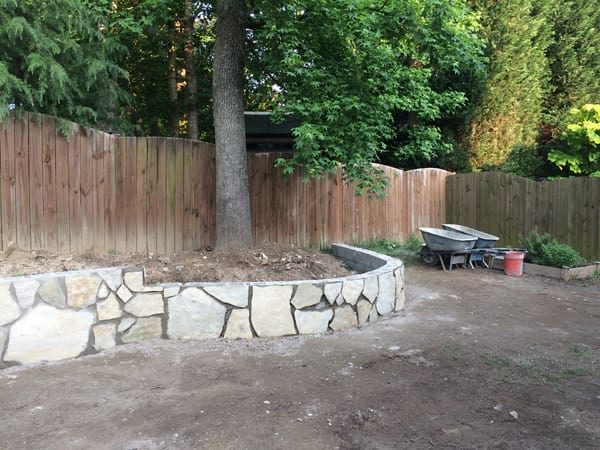
Grading the lawn came next, then building the stairs, setting the patio, and constructing the retaining wall. Our contractors also built the arbor and laid new sod.
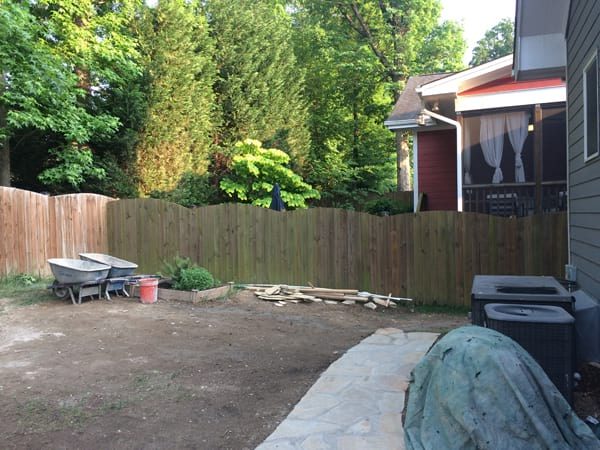
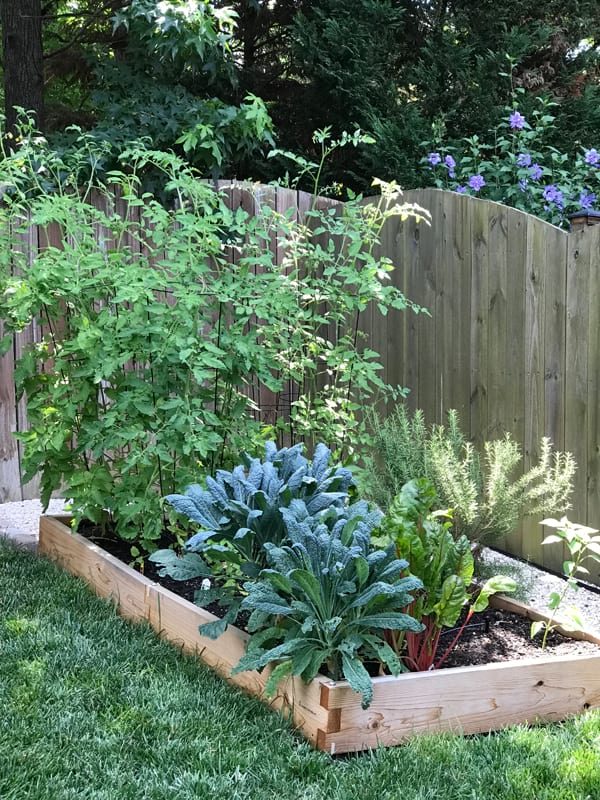
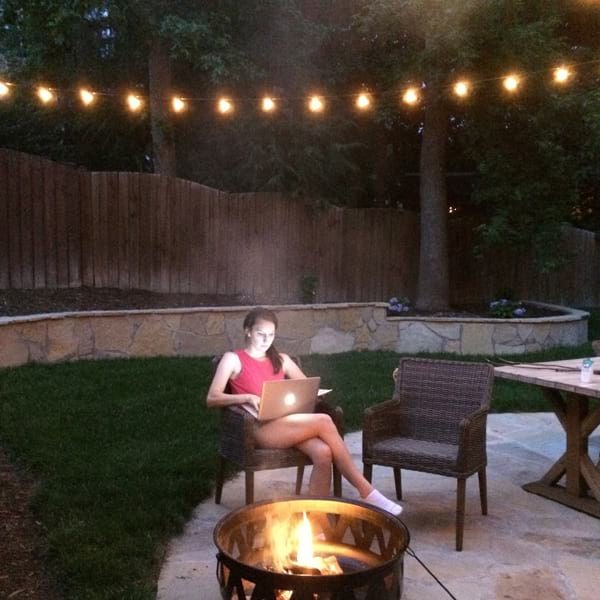
From there, it was up to us! Over the last year, we’ve added a few plantings, rebuilt our veggie bed, strung string lights, and added patio furniture and a fire pit to move closer to our vision for this space.
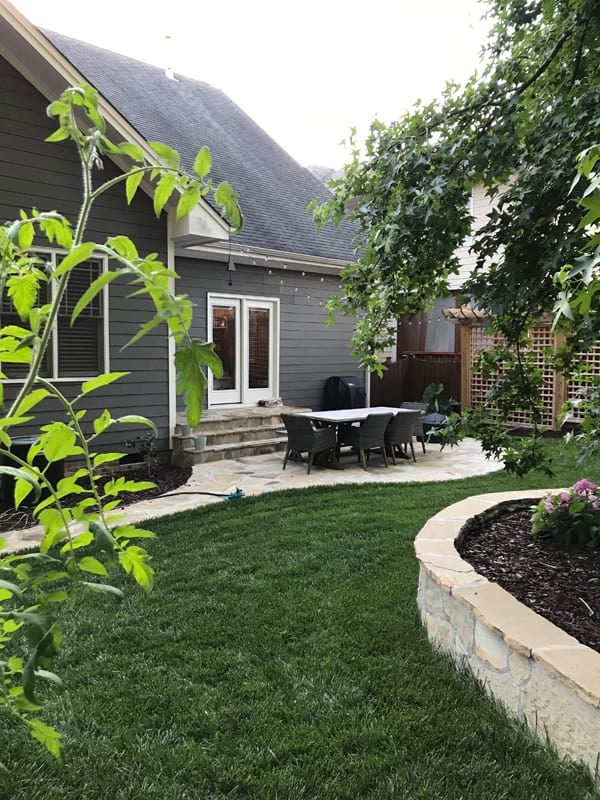
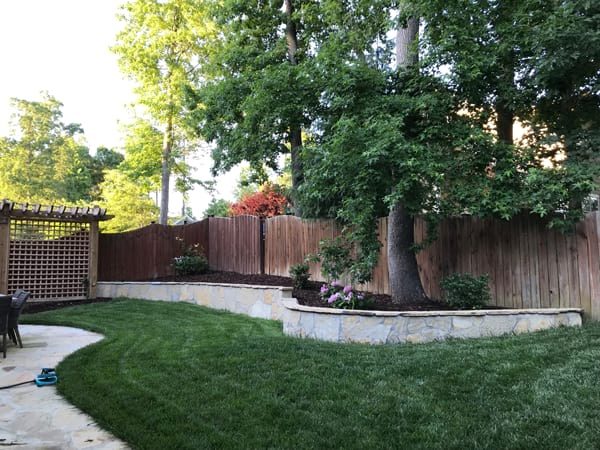
Ahh, much better!! To recap, our priorities were: more privacy; more usable, flat lawn space; L-shaped stairs leading down from the house, good for perching; a pergola; a flagstone patio with space for a dining table and fire pit; and string lights! I’m so happy to say we got all of these things and more!
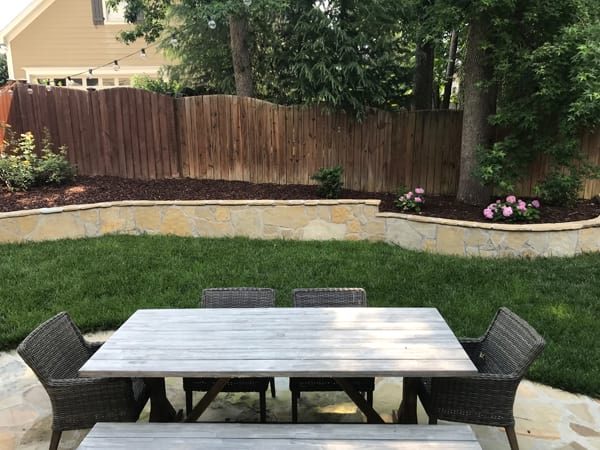
Let’s talk about the furniture for a minute. It’s all from World Market, and while I’m happy with how it looks (and with the price!), I do not expect it to last forever. The table surface is already showing wear after one year, so I expect we will likely only get 3-4 years out of it. But that’s okay – we weren’t able to invest more last summer, and we wanted to be able to use the space right away! I am prone to holding off on purchases forever, waiting for the perfect piece I’ll have for the rest of my life, and while generally I think this is a good approach, sometimes it’s more important to just choose something and get on with it!

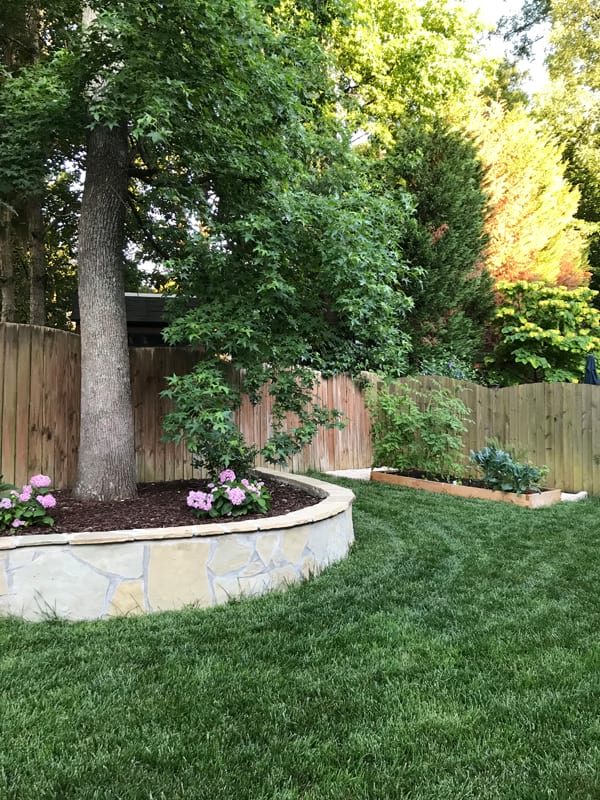
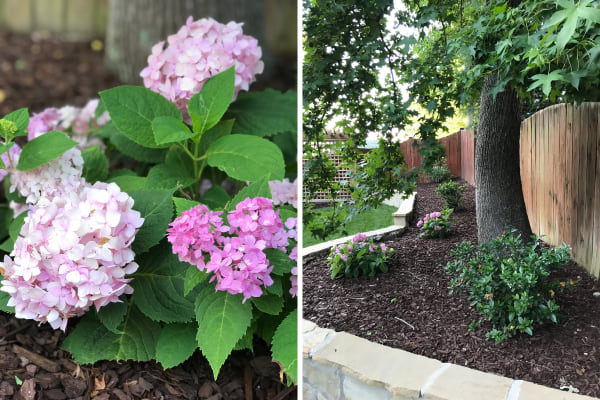
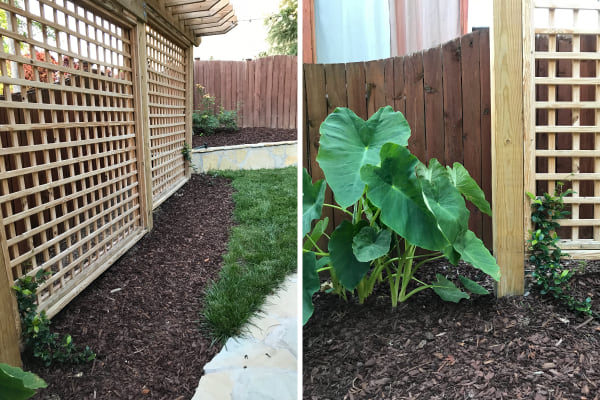
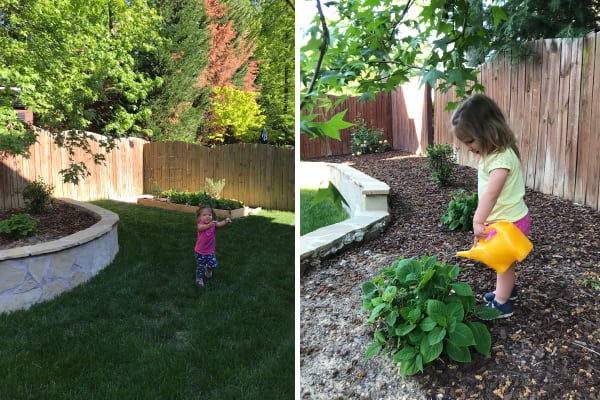
So far in the back bed we have a Golden Celebration rose in honor of our kitty Jack, two gardenias, and two hydrangeas. (The hydrangeas might need to move, as they hate getting blasted by the afternoon sun.) We also have a thriving elephant ear in the corner that somehow survived our whole backyard getting torn up (we planted it several years before this project and did not expect it to survive!). We also planted two teeny jasmine plants on either side of the pergola/privacy fence, and with the way jasmine grows, I am eagerly anticipating them exploding into a gloriously-smelling arch sometime next summer! Next year, we hope to fill in the back bed with even more plants, and eventually add more potted plants on the steps like my inspiration photos.
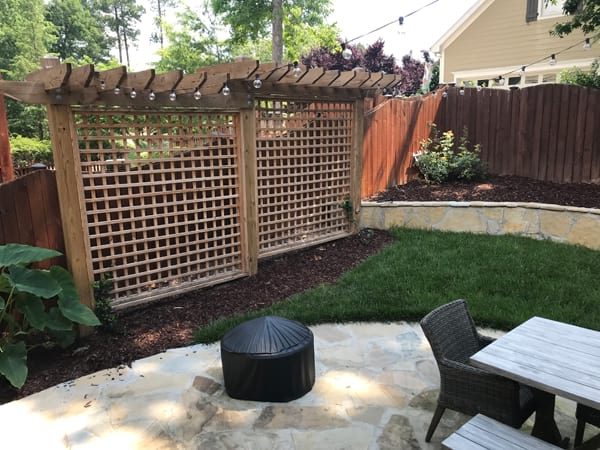
One of our main goals with this project was to increase how private our backyard felt (we were starting from basically zero, so it was only onwards and upwards from there!). I’m so happy that we accomplished that thanks to a few changes. The most significant was replacing our deck with a patio, so that we were no longer up on a platform when we were eating outside, but beneath the level of the fence. The pergola and plantings also help.
Of course, our biggest and most important goal was to create a space where we all loved spending time, especially June. Throughout the last year, we’ve seen that dream come to life, and we are so grateful!!

There you have it, friends! I hope the tour was worth the wait! :)
I’m curious to hear, if you live in a space with a yard: has the outside or inside of your house been more of a priority? We held off for five years on this work, but are so glad we took the plunge when we did!
21 June 2018
Some of you may recall that June’s nursery was not finished until several months after she was born – ha! Knowing that my life will only get more complicated after baby brother arrives and not less, I’m trying to be a little more on the ball this time around :)
My job is made easier by the fact that the space we have to work with needs to stay simple by necessity. It will be his room, yes, but it’s also going to have our second guest bed in it at least for now, so the “baby” elements will be fairly minimal – basically, a crib. Our glider and changing pad are downstairs in our master bedroom, we keep almost all toys downstairs or in our loft, and you all know how we do kiddo clothing around here!
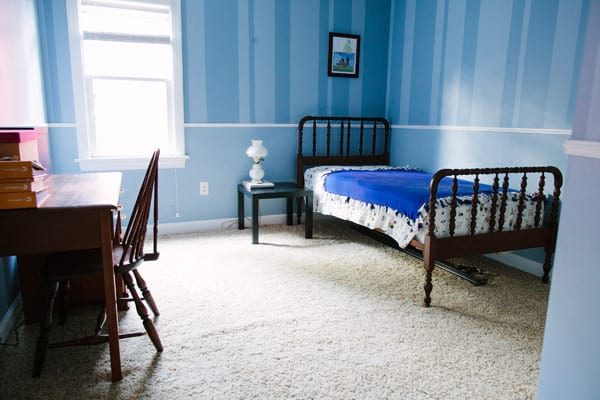
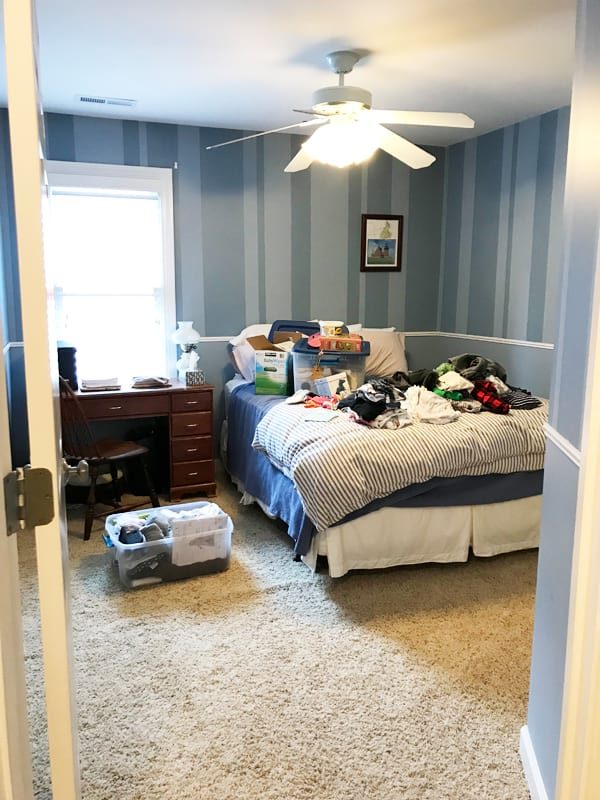
Still, we basically haven’t touched this room since we moved in (it still has the paint job from the previous owners!), and I’m looking forward to making it a lovely, cohesive space for him AND for guests after five years of living here! The above before photos show what it’s looked like over the years since we moved in – the bottom photo is most recent, taken just before we swapped the queen bed for the full and moved the desk into the loft.
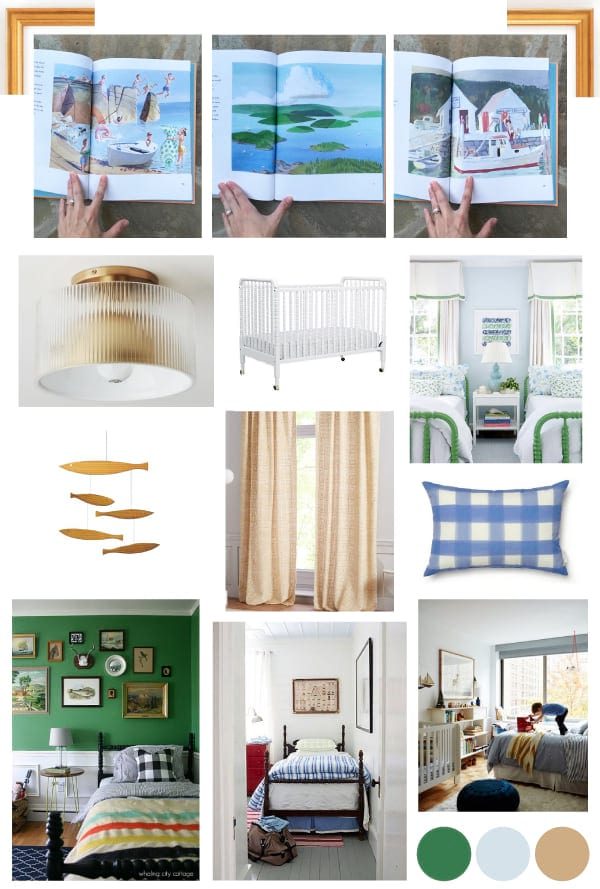
My inspiration for the color palette and style is entirely inspired by the Robert McCloskey book Time of Wonder. I’m not sure how well-known McCloskey is outside of New England — some of his more famous titles include Make Way for Ducklings and Blueberries for Sal — but he is an icon where I’m from, and “Time of Wonder” has always been one of my favorite children’s books. The writing is quite poetic, and the illustrations are gorgeous.
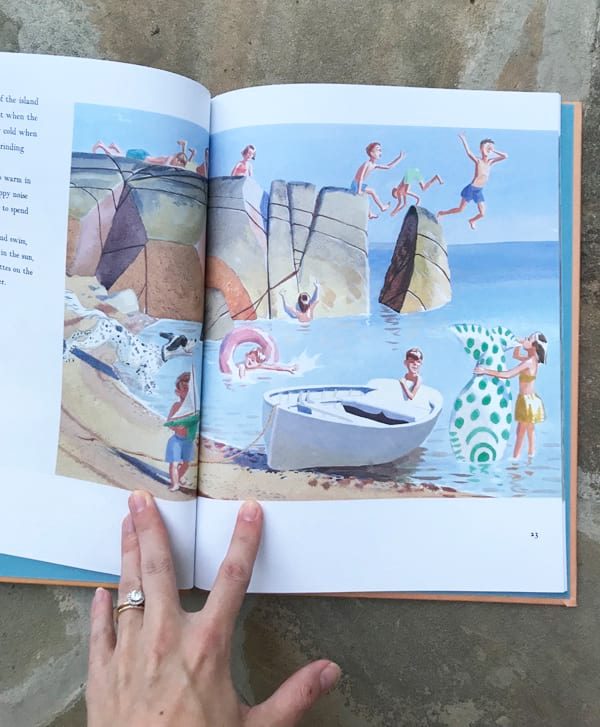
To set the tone, we’re framing three spreads from the book, then building out the color palette from there. (I bought a new copy and cut the pages out verrrrrrry carefully.) Since the pages are a custom job, we opted to go with Framebridge for a reasonably-priced option. They’re still an investment, but I imagine us having these in our home for years, hopefully, maybe even in a kiddo bathroom if brother grows out of wanting them in his own room eventualy. We went with their classic gold Richmond frame, and I’m picturing hanging them on the wall above the crib in a row.

The room had a chair rail when we moved in, and we plan to keep it, painting the top portion a very pale blue and the bottom a kelly green (!), both drawn from McCloskey’s illustrations. I am hopeful about this, but also concerned it might be too much in such a small room?? Fingers crossed it’s not :) Here are a few inspiration images that are setting me at ease:
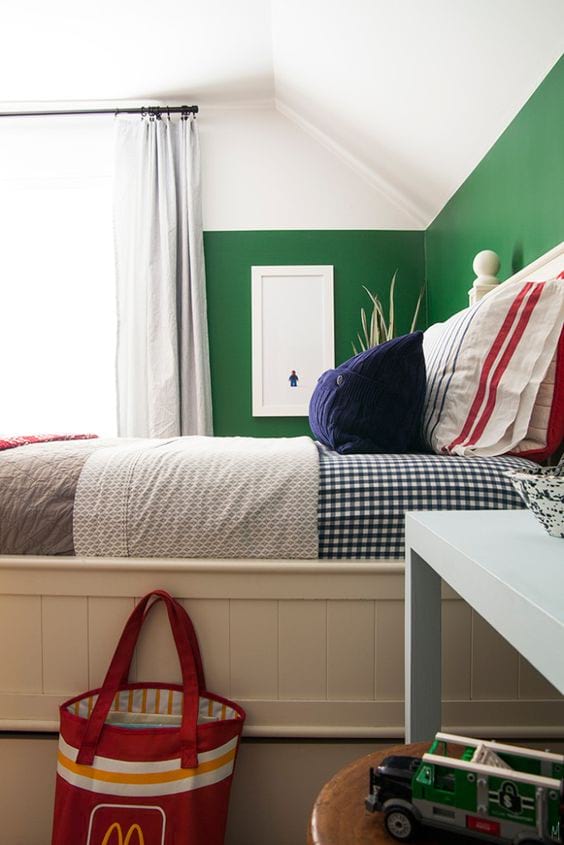
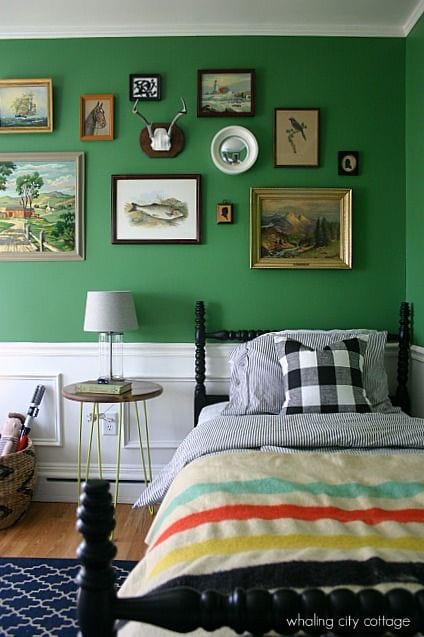
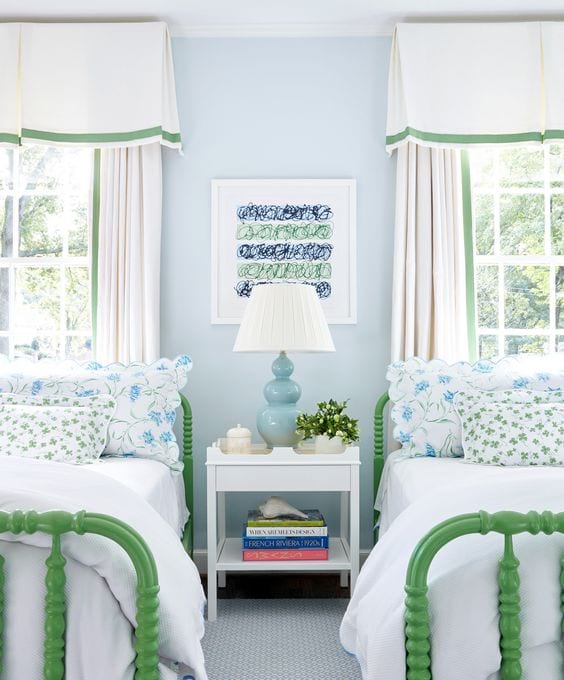
From The Makerista, Whaling City Cottage, and Sarah Bartholomew
The crib is a big question mark. We have no desire to move June out of her crib and potentially disrupt her sleep at the same time as we’ll be waking up overnight with a newborn, but I obviously don’t want to spend a ton of money on a second crib. (The good part is that June’s crib was $0 – a hand-me-down from my parents!) I’m thinking we’ll do the white Jenny Lind crib and call it a day.
That leaves soft furnishings. The spread and sheets on the full bed are white, so I’d love to add a bit of coordinating color and pattern with pillowcases, shams, and a blanket, as well as in the sheet on the crib and maybe a crib skirt? Since the bed is against the one window, I think we’ll go with a simple valance for it, hopefully in a fun pattern. We’re also planning to switch out the fan for a New England-y light fixture, since I think the fan hangs way too low for the room.

Pillow from Caitlin Wilson, curtains from West Elm, light fixture from CB2, mobile from Aha
Wish us luck that we can knock all of this out by the end of July :)
Affiliate links are used in this post!