3 February 2011
Are you ready for this? It’s been just over five months since my sister’s wedding, and I’m finally ready to share all of the delightful details with you. I hope you’re still interested! :) Since it was really a week-long affair for our two families, I’ll start at the beginning — the Friday before the Friday before the wedding, when J and I flew into Logan airport in Boston.
My parents picked us up that evening driving two very laden cars. I call Kate and Cormac’s wedding a semi-destination affair, because although none of us were local to Maine, we had a home base (our summer cottage) a short walk from the ceremony and reception locations. This was a HUGE convenience and really the only way we were able to pull off this very-DIY wedding. My parents live in Connecticut, and were able to make several trips to Maine over the course of the summer to deliver things like clay pots (a favor component), wooden cutlery packets, napkins, paper cups, punch bowls, strings of bunting, lemonade dispensers, reception centerpiece components, lawn games, etc.
Even with all of those pre-wedding week trips, however, we had quite a large load driving up to Maine that Friday. From my recollection, here’s the short list of what they had packed: their clothing and accessories for a week and a half, all of the soda and beer (the wine went in another trip!), de-constructed wooden signage, food to get the seven of us (my immediate family + John + Cormac) through the first few days on-island, tennis equipment, a croquet set, and I’m sure many things I can’t remember. On top of that, I brought a carry-on suitcase and two checked bags on our flight, stuffed with everything from cake stands to blue Ball jars to cake signage. And J brought at least one suitcase. Whew!
Since our flight arrived in the evening, we planned to spend the night at my uncle’s house in southern Maine. That way, we only had a two hour drive and no boat ride ahead of us!
The next morning (Saturday) we continued heading north. We made a quick stop in Freeport to pick up the whoopie pies for the welcome dinner from Wicked Whoopies — yum! When we arrived, our order of 100 mini classics was boxed and ready to go. The staff couldn’t have been nicer — they even opened the store a half hour early to accommodate our travel plans!
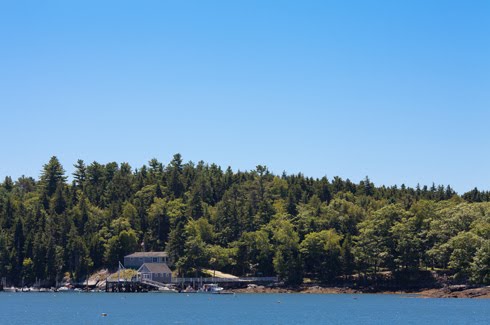
Whoopies wedged into one of the cars, we drove the last hour-long leg up to Boothbay Harbor, and finally rounded the familiar, glorious curve to the Island parking lot!
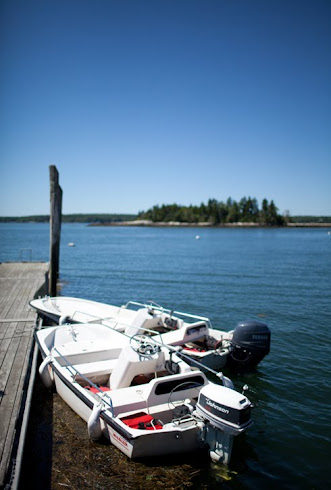
As I think I’ve mentioned before, there isn’t a bridge to the Island, and there is only one truck on the Island. This makes packing efficiently essential, as, in general, you carry or cart everything you bring on and off. There is a ferry (a refurbished lobster boat) that runs several times a day, and most Island families have their own boats.

We made sure to arrive in time for the 12:30 ferry, reminded the ferry driver we’d need an extra trip (we had alerted him a few weeks before!), and then proceeded to unload our stuff. You can see a little of that in the video here! I wish I had photos of all this, but due to a miscommunication between my co-recorder and I in clearing off the camera each night, the first few days of pictures are no more. Sniff sniff!
We got everything loaded on and over to the Island in one trip, and then began carrying everything up the ramp and loading it into the truck. Can you tell yet that this week involved a lot of lugging?
We then followed the truck up the hill to my grandmother’s cottage, where we’d be staying the week, and — you guessed it — unloaded everything off the truck.
We paused a few moments to take in the view — SO BEAUTIFUL! —

and then it was back to work. I became famous that week throughout the Island for my “wedding binder,” which was chock full of schedules and lists. That sounds a little intense (and it was!), but as counter intuitive as it seems, being ultra-organized absolutely helped us all relax. We knew what needed to be done, and we had a plan for getting it done. The rest of the time we could relax!
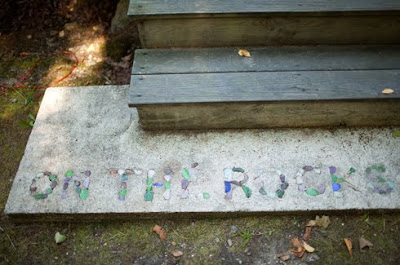
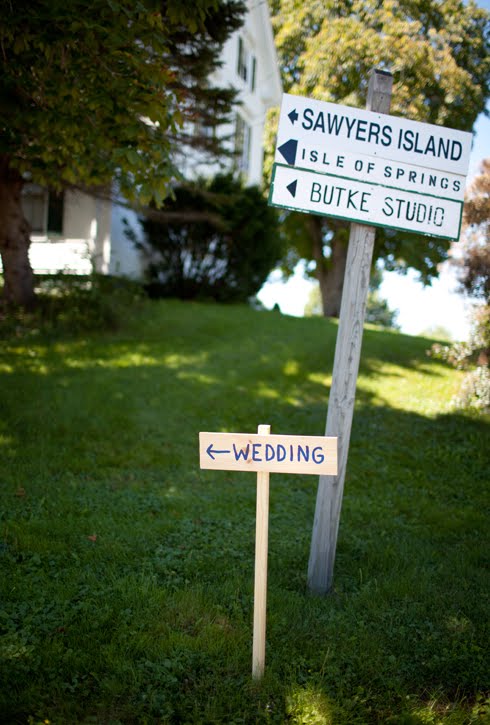
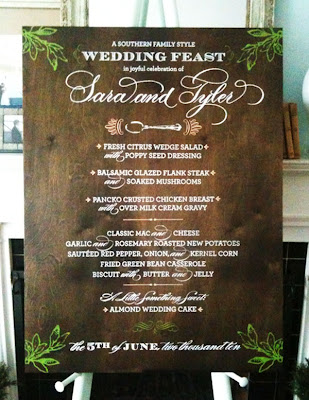
Anyway, the wedding binder told us that we had two tasks for the day: moving all of the beverages from my parents bedroom to a designated spot under the house, and constructing the wedding signage. I’m happy to say we accomplished both! A sneak peek:
To be continued…
All photos by the fabulous Jenna Cole
2 February 2011
Lovely reader Rachel emailed me late last week asking for some assistance gathering inspiration for the escort card display at her wedding next June. First, though, here’s a picture of Rachel (she’s the one on the left):

Isn’t she so cute? She was one of the reader models at a Southern Weddings photo shoot last spring (photo by Jose Villa). Anyway, on to her question:
“I wanted to ask your input/advice on table seating displays. We are having about 150 guests to our wedding, and the reception will be hosted at the Surf Club in Wrightsville Beach around 7-ish at night. We’re having a sit down dinner with assigned seats. On the tables themselves will be tented cards with each guest’s name done in calligraphy. But what we don’t quite have a vision for is how to initially tell guests where and what tables they are sitting at for the dinner. I’ve seen things like framed pretty poster-sized paper with guests’ names done in calligraphy under each table number. Do you have any other ideas? We have some space to work with, so we could set something up on a table or something. One word of caution: My mom and I are NOT GOOD at DIY stuff (I tried making earrings once and broke out in sweat and tears in frustration. Oh, and my clumsy fingers kept twisting the wires INTO MY SKIN and I bled on the table… in front of a third grader’s birthday craft party. Nightmares.)”
No more nightmares, Miss Rachel! I’ve rounded up a few ideas here — I hope they help!
First, we have an army of mini cards + envelopes mounted on a fabric-wrapped board. Both of these ideas are from Martha (the instructions for the second look are here). If you’re the DIY type, these are pretty easy to whip up — I recommend buying mini envelopes and cards (even bracketed ones!) from here. SO much cheaper and so many more colors than ANY other option out there.
Once you’ve got the cards in hand, just write out guests’ names on the envelope, and stamp their table number on the card. This is a great job for a calligrapher if you’ve got the budget (see a few of my recommendations in the left sidebar, or shoot me an email at peachandpearl at ymail dot com for a more casual look!). Even the DIY-disinclined can probably handle tacking the envelopes to the board! Bonus: it’s easy to make a quick switcheroo if guests tell you they won’t be showing last minute!


If you like the sans-envelope look, consider pinning mini letterpress cards to the boards. I love these designs from Bella Figura, since everything about them is customizable. The best part? They’ll print the names for you!


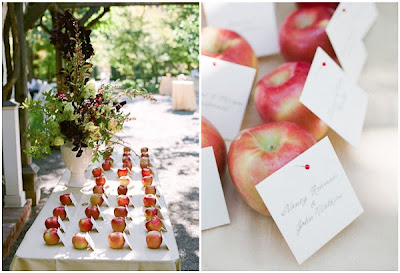
For a more interesting table display than fabric-wrapped boards, I love the idea of pinning escort cards to apples, as seen in this shot from a Cooper Carras wedding. Stick with white or cream cards for this one, so as not to compete with the gorgeous apple skins. You could also switch out the apples for lemons or limes or oranges.
I also love the idea of tying simple tags to vintage keys. Even a DIY-phobe can handle a shoelace knot, right?! This photo by A Bryan Photo with Calder Clark Designs via Southern Weddings.

A few more options for the DIY-inclined, and then we’ll move on :) For these next two, coordinate something on the table (napkins, runners, chargers, decor, etc.) with a detail on the escort card. Instructions for the second idea here.


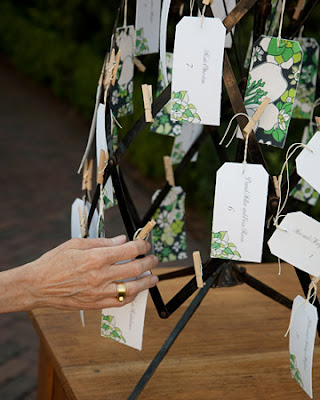
Love this idea from Martha Stewart Weddings — just clothespin fabric or patterned paper-backed gift tags to a form, and write guests’ names and tables on the reverse.
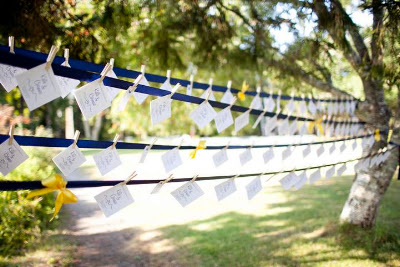
You can pin similar tags to ribbon strung between two trees, like we did with the ceremony programs at Kate’s wedding (photo by Jenna Cole).
This next idea couldn’t be more perfect for a casual wedding — set out the bottle display at the front of the cocktail hour or reception area, and guests can grab one on the way to their seat, lessening the crush at the bar at the beginning of the festivities! DIY by Mika78 on 100 Layer Cake here.

Finally, we move on to options that are meant to be hired out. Might I suggest my flag escort cards? :) Here they are at a rehearsal dinner planned by Calder Clark and photographed by Gayle Brooker. Purchase here!


Calder stuck them in limes, but you could try petit-fours or truffles just as easily, as in this photo by Lisa Lefkowitz.

Lastly, the idea that first popped into my mind when I read Rachel’s query: a custom wooden sign by Chocolate Butterbean. Joni makes the most amazing creations, and can fashion pretty much anything your heart desires, including an escort card display with each guest listed by table. See more examples of her beautiful work here!
I hope this helps, Rachel! Congratulations on your wedding!! Readers, chime in: did you try anything creative for your escort card display?
31 January 2011
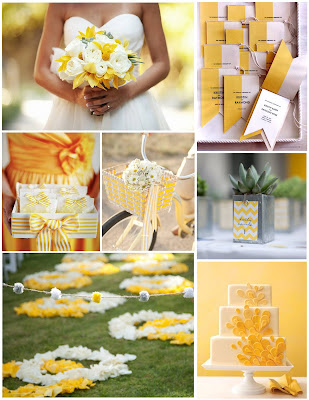
(Click to enlarge!)
How about a gorgeous, sunny yellow board after the gorgeously sunny weekend we just had? It was 69 degrees here yesterday! I love how this board is filled with graphic touches (the teardrop cake, the striped bows, the chevron-printed centerpiece boxes) but still seems sweet. And isn’t that bouquet BEAUTIFUL?
The Details
First row, left to right: bouquet by Blue Lotus, photographed by Poser, via Southern Weddings; programs by Bird and Banner from Martha Stewart Weddings
Second row: favor boxes, bike photo by Allyson Magda (designed by Jill LaFleur) via Style Me Pretty, centerpiece photo by Erin Hearts Court (designed by La Partie Events) via Style Me Pretty
Third row: ceremony photo by Erin Hearts Court via Style Me Pretty, cake from Martha Stewart Weddings
27 January 2011
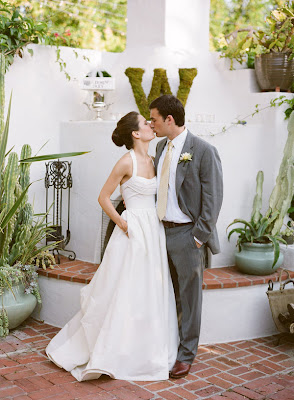

Just two lovely, casual bride and groom portraits for you on this fine Thursday! The top one is by Michael and Anna Costa, and the bottom is by Aaron Delesie. Love how it looks like they just happened to pause for a moment and steal a kiss. And the pockets are perfect :)