25 March 2011
Am I the last one to find out that H&M has a home department?! I stumbled upon it yesterday, and was instantly intrigued by their collection of extremely inexpensive pillow covers. Behold:
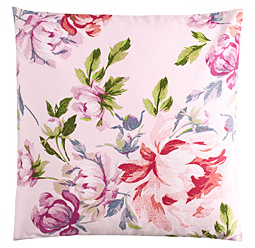

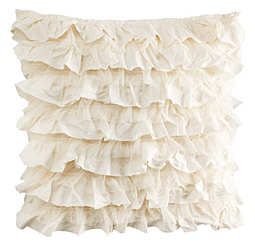

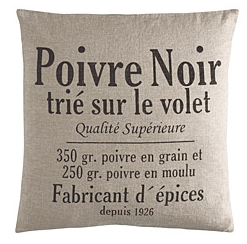
Pillows can be so expensive, and though the H&M collection isn’t huge, it could be perfect if its options happen to coincide with your decor. These are all between $7 and $15! I know I’m eyeing that floral number, even though I have no idea where I’d put it…
See them all here!
2 March 2011

Came across this nifty little piece of art in my searches the other day. I’ve been looking for something to go over my bed, and this might be just the thing! The only downside? It’s priced at $300 at Marmalade, which is a bit out of my budget (expensive or not, they have a few other neat options, too!).
Happily, I think this might be a doable DIY — I’d just need a thick, smooth piece of wood (this one is 36 inches by 36 inches), some cream paint, some black paint, and a stencil set. I’ll let you know if I make an attempt!
16 February 2011
Even though we had a thriving porch garden last year, I feel super lame for never posting about it! Whether documented or not, it was a goal from my first 101 that was a rousing success, which has us eager to get our green thumbs dirty again this year. And promise, I’ll share the adventure with y’all this time! Let’s start with our seedlings, which we planted a few days ago. Here they are, perched on the ledge in our shower!

Too cute! We chose the shower ledge for a few reasons: that particular window gets tons of light, it’s easy to keep them moist, and the cats would have a heck of a time getting up there to attack them (a very important consideration).
Interested in starting a small-scale vegetable garden of your own? I’m happy to pass on a few tips, though we’re certainly not experts. Before we began last year I learned a lot from reading this article (and this one and this one), and then, of course, I learned even more from trial and error. That being said, here are a few things to take into consideration.
1. Take stock of the space you have available. We have our balcony — if you need a refresher, see here! It’s long and skinny, but there’s plenty of room for a row of pots. There isn’t, however, room for Brandywine tomatoes or cucumbers. We tried both last year, and were disappointed because they never really produced anything of note. This year, we’re trying peppers — poblanos, bells, and jalapenos — which we learned from our work in our community garden grow well in compact spaces.
2. Evaluate your sun situation. And be realistic about it. Last year, we convinced ourselves we had more sun than we actually did. Since sun is so important for veggie production, you’ll inevitably be disappointed if you overestimate the amount of sun your space gets (we sure were!). Red iceberg lettuce, cilantro, and basil all did fantastically with the amount of sun they got, so we’ll be planting all of those again.

3. Buy seeds and supplies. We bought some of our seeds from Seed Savers Exchange, which specializes in rare and heirloom varieties. They worked out great! We also bought a few packets from Lowes. The remaining supplies? All from Lowes: several plastic pots, the seedling pots and starter soil, two bags of organic potting soil, a box of fertilizer, and a watering can. We spent about $90 the first year on supplies, but only $45 this year. I estimate that next year, we’ll spend about $20 (the pots accounted for the bulk of the expense both years, and you only have to buy those once!). If you are a savvy shopper and scout around for bargains, I’m sure you could buy your initial supplies for less than we did.
4. Start your seedlings inside and early for the largest crop. Do a Google search for average last frost in your area, which should give you a pretty good idea of when you should start.
5. Make it fun! We’re planting dahlias simply because I wanted pretty blooms with my vegetables.

So here we are: week one. Empty pots outside, seedlings inside.

I’ll update you on our progress next month, but in the meantime, tell me: do you grow herbs or vegetables? Are you working with an apartment balcony or porch, or do you have a much larger space? Any tips to share?
26 January 2011
Have you all seen Joanna’s apartment tour?
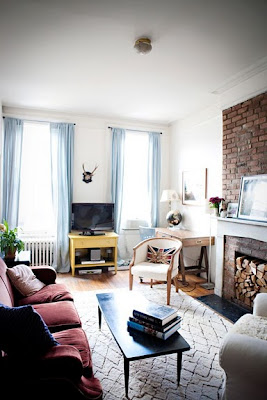

Gorgeous! I love so much about it, from the natural brick and wood-stacked fireplace to the built-in bookshelves and abundance of framed images. But what I love most is the gorgeous muted gray blues that pop up throughout the space. Not surprising, then, that Joanna is providing the main inspiration for painting my new office chair. We started out with pretty much the same thing:

Jenny from Little Green Notebook, the design genius behind this space, spray painted the chair with what she thinks was Krylon’s “Medium Gray.” This was the result:


Gorgeous! Unfortunately, Krylon doesn’t list a “Medium Gray” color on their website, and the chair at least appears to be more blue than gray (to me, anyway!). The closest option seems to be “Mountain View:”

There’s also “Stonewashed Denim”

…and “Classic Gray.”

Do those look too dark to you, though? The only other possibility is “Peekaboo Blue,” but that seems too bright:
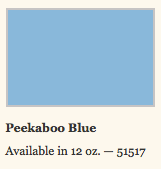
Which brings me to my two questions for you today:
1) Should I paint the chair or leave it as is?
2) If I should paint it, which color would you recommend? One of these blue grays, a different blue gray, or something more neutral, like white? Seleta suggested a few gray blues in this post, which I’m also pondering…
Let me know what you think!
All apartment photos by Karen Mordechai. Want more details? Check out Joanna’s blog post here and Jenny’s blog posts here and here on the redesign. Both give tons of tips and inside sources for the details seen in the photos!


