13 July 2010
Thank you for your patience as I gather my bearings after a week away! In the meantime, I thought I’d share a peek at one of the projects my Dad and I tackled for Kate’s wedding while I was home. We purchased 1 x 5″ x 10′ boards from Home Depot, he cut them into sections, and I hand painted the letters. Between needing to direct guests to the island, and then to the ceremony and reception sites once they’re there, we ended up with more than 25 signs!


My favorite?

Easy. Because, you know, love… actually is… all around.
25 June 2010
Since it’s Kate’s birthday today (happy birthday, sister!), I thought it was as good a time as any to share her wedding invitation with y’all. These were definitely a labor of love, but since we didn’t print them ourselves, not a particularly agonizing process. In fact, I would say we were as pleased with the end result as we were the process. Without further ado…
We chose the A7 envelopes in matte lemon drop from Paper Presentation. I hand-wrote the addresses with a simple black pen, and Kate chose the wedding cake stamps.
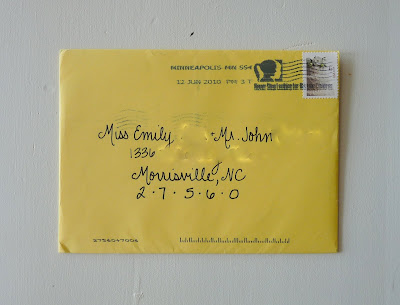
As you probably have gathered by now, bunting is something of a theme for this wedding, and we decided to carry that through to the paper goods, as well. The envelope liners were conceptualized by me, actualized by the fabulous Chelsey from Fourth & Folded, printed and cut by me, and installed by Kate. Teamwork, I tell you!

The stack guests saw when they opened the flap. From front to back, we have reception card, second reception card, reply postcard, information card, and wedding invitation, all tied off with yellow and white baker’s twine from Divine Twine.

Instead of including a reply card, we included a reply postcard from the wedding location, and asked guests to write a note letting us know which events they’d be able to attend. I’m jealous Kate will be receiving 100 pretty postcards in the mail over the next two months!


The whole suite:

We went with simple wording for the invitation, and opted to recognize C’s parents, as well.

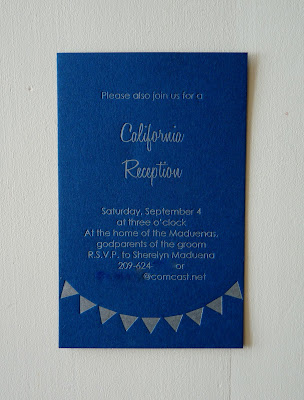
“And afterward for lunch and lawn games,” says the reception card.

K and C will be having a second reception in C’s home state since a significant number of his family and family friends won’t be able to travel across the country for the August events.
The information card was double-sided. The first side detailed the weekend’s events, starting, as you can see, with a wiffle ball game and wharf jumping. Whee!

The reverse included some of the details found on K + C’s wedding website, including travel and packing information.

One more look at the whole shebang…

…and it’s on to the nitty-gritty.
Cost Breakdown:
–$423 for 100 letterpress invitations, 100 letterpress reception cards, 25 letterpress California reception cards, and 100 double-sided, flat-printed information cards from Clinton Press
–$50 (approximately) for paper for all suite pieces from Paper Depot. If there was one thing we (I) could have changed, it would have been to order thicker paper.
–$37.05 for 125 matte lemon drop A7 envelopes from Paper Presentation
–$50 for 100 postcards from the wedding location
–$7.50 for baker’s twine from Divine Twine. (The spool is $15, but we used half for this project and half for another.)
–$15 (approximately) for the black markers and ink pad for addressing
–$0 for envelope liners. I printed them on my home computer and Chelsey kindly gifted her services. We love you, Chelsey!!
–$25.76 for reply postcard postage
–$56.12 for invitation postage
TOTAL: $664.43
We mailed 92 invitations, which comes out to a cost of $7.22 per invite. Yes, we easily could have bought something cheaper, but they wouldn’t have been as perfect for this wedding. We actually had budgeted (somewhat arbitrarily) $668 for invitations, so I’d say we did pretty well!
What do you think? Would you be excited about K + C’s wedding if you got this in the mail?!
9 April 2010
I love fresh flowers with the best of them, but live blooms aren’t always in the budget. Which should explain why when I cracked open my copy of Martha’s April issue, I didn’t even finish the book before busting out the supplies to try my hand at her paper dogwood flowers. I also love the original version of this Good Thing, a paper cherry blossom display that first appeared in April 2006.
I must say, I’m pretty happy with how my version turned out! Here’s Martha’s:

And here’s mine:

What do you think?
I pretty much followed Martha’s directions (which you can find here), with just a few tweaks: I didn’t see the need to buy a “starburst” stamp, so I used the eraser of a fresh pencil for all of the stamps instead of just for the middles. I also subbed in a thick green marker in place of a stamp pad. If I were to do this project over again, I think I would make the blooms a bit smaller than the 5 inches she suggests — or at least have some larger and some smaller flowers.

{via Martha}
All in all, though, a very easy and satisfying project! I would highly recommend.
2 April 2010
I may live in the sunny South now, where temperatures are expected to hit 88 this week (!), but I still vividly remember the cold and wind of March in New England. Inspired by one of my favorite bloggers, I sent a box of sunshine to five of my favorite Northern buds a few weeks back to help brighten their last few weeks of spring.
I spray painted simple kraft boxes bright yellow, then lined them with bright orange tissue paper.

Then I collected the brightest candy I could find, tucked in a few extras…

…and topped the box with a favorite Mark Twain quote.


All of the boxes have been received, so I thought I’d share here. How was March in your neck of the woods?


