19 September 2009

Remember when I fell in love with this upholstered headboard? {If you don’t, click here.} Well, I’m still in love, which is why I was instantly enamored with the recent DIY Grace posted on Design*Sponge.

She’s posted the full DIY, and it seems easy enough. Too easy in fact – it’s all I can do to stop myself from running to Home Depot to pick up some plywood and a staple gun tonight. Since I can’t exactly hang a flush mount in an apartment, alas, this project will have to wait.
11 September 2009

My cousin Molly is settling into her freshman year of college. I can clearly remember two things about my freshman year:
1) How rough my transition was.
2) How much I loved getting mail.
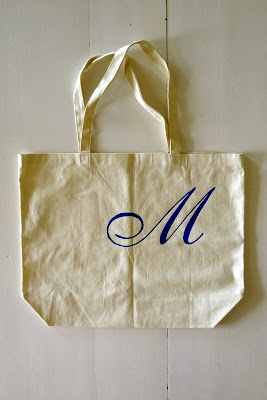
Thankfully, Miss Molly’s transition seems to be going much more smoothly than mine did. I still, however, thought she would enjoy some mail, so inspired by Brooke of inchmark, I settled on sending her a custom tote bag.

If you’d like to make your own, here’s what you’ll need:
— a tote bag (mine was canvas from Joann’s)
— freezer paper
— a pencil
— an x-acto knife (scissors could work)
— a self-healing cutting mat
— fabric paint + a brush (mine was foam)
— a letter to trace

1. Print out one letter in the typeface and size of your choice. Trace the letter onto the paper side of your freezer paper and cut it out carefully with an x-acto knife. Remember that you’re making a stencil, not cutting out the letter.

2. Iron the freezer paper onto your bag, wax side down. Make sure to press down firmly, especially if your letter has narrow areas (you don’t want the ink to bleed underneath).

3. Tuck an extra sheet of freezer paper inside your bag in case any paint bleeds through. Paint and then let dry overnight.

4. The next morning (you won’t be able to wait any later than that!), peel off the freezer paper. Admire your handiwork. Then iron again to heat set your letter.

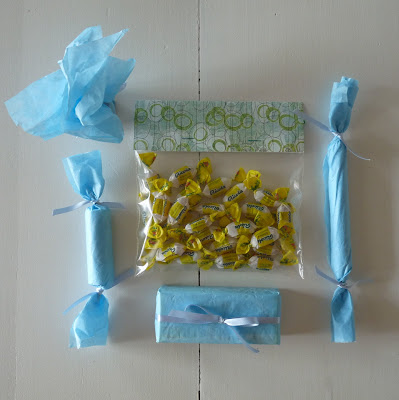
5. Fill with your most indispensable college goodies. J helped me pick, and we decided on Vosges chocolate, ricola cough drops, a Tide to go pen, travel Advil, lip balm, and custom mixed CDs.
Lots of love to you, Molly!
4 September 2009

I love garlands. Y’all know that. Before, though, I never really had a proper space to hang one. But once we moved into our new apartment, complete with porch, a garland moved to the top of my project list.

This is a simple project, but quite repetitive and a bit lengthy. Here’s what you’ll need:
— fabric
— scissors
— a pencil or pen
— a ruler
— twine or string
— an iron
— iron-on adhesive

1. Gather your fabric scraps and begin cutting them into equal size rectangles (mine were 2.5 by 6 inches).

2. Once you have cut enough, grab your string. Measure out a good 2-3 feet extra before you start adding fabric (it will come in handy later for hanging).

3. Turn your first piece of fabric over, so that the front of the fabric is facing down. Cut a length of adhesive just shorter than the width of the fabric and lay it about 1-2 inches below the top of the fabric.

4. Place your string on the top of the fabric at the top of the rectangle.
5. Fold the fabric over the adhesive and the string. Press with an iron for 10 seconds.
6. Move along the string adding rectangles until you’ve reached your desired length. Remember to evenly space the flags along the string.
Hang and host a party!

Thanks to Brittni for the inspiration and instructions!
28 August 2009

{via Style Sisters}
First, love this pantry. Second, love the chalkboard paint. I bought some a while ago (like… a year ago. Last September. Do you think it’s still okay?) but haven’t found the perfect spot for it yet. This is such a great DIY project, though, because it requires minimal time + minimal skills but makes quite the impact once completed, don’t you think?
AND Martha has instructions on how to color your paint.
Have a great weekend, friends! After my adventures last weekend, I’m hoping to lay low. I do, however, have this lovely lady’s bridal shower to attend! What are you all up to?


